Guide to Burn ISO to USB on Mac in Three Ways
How do I easily burn a bootable ISO to a USB drive on OSX? As a Mac user, you may sometimes need to burn ISO to USB mac - whether it's to create a bootable installer for the latest macOS or to transfer an image file to external media.
But fear not my fellow Mac ISO burners - there are easy ways to get those ISOs burned to USB drives, even on our closed-off Mac ecosystem.
In this comprehensive guide, we'll walk through three simple methods for mac ISO burner usb on your Mac so you can easily create live media and system installers and transfer image files through Mac burn ISO usb processes.
Even if you've never burned an ISO to USB before, we've got you covered. After reading this guide, you can easily burn ISO to USB on Mac.
Way 1. How to Burn ISO to USB on Mac with Terminal
The command line interface on Mac, known as Terminal, can directly burn ISO Mac files onto connected USB drives with byte-to-byte accuracy. Here are the major benefits and downsides of using Terminal commands to burn ISOs:
Steps to Burn ISO to USB on Mac
1.Connect the target USB drive and launch Disk Utility

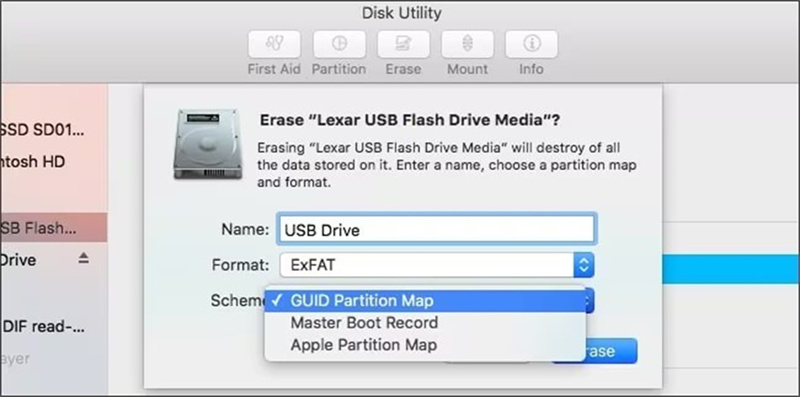
2.Format the USB as "MS-DOS (FAT)" to make it bootable

3.Open Terminal and identify the USB mount point (typically /dev/disk2)
4.Unmount the USB using “sudo dd if=/path/to/win-ISO-file of=/dev/disk2 bs=1m” command
5.Execute burn command “sudo dd if=/ISO-file.ISO of=/dev/disk2 bs=1m”
Pros
- Allows flawless, direct disk clones for reliable transfers
- Leverages built-in tools already included on modern macOS
- No cost as it uses native UNIX tools
Cons
- Requires knowledge of non-intuitive command syntax
- Higher likelihood of transfer errors compared to dedicated apps
- Formatting the USB erases all existing data
Way 2. How to Burn ISO to USB on Mac with UUByte IOS editor
UUByte ISO Editor, ISO burner for Mac, is a dedicated third-party application for working with ISO files on Mac. It provides an intuitive graphical interface to burn, edit, extract, and create ISO images. A key benefit is the ability to easily make bootable USB drives from ISO files.
UUByte Editor is an excellent dedicated utility for managing ISO images on Mac. It streamlines Macos ISO to usb into a simple 3-step process through its purpose-built toolset. The graphical workflow sets it apart from command-line methods
Features
- User-friendly UI for burning, editing, and extracting ISOs
- Build bootable USB drives from ISO files
- Supports latest macOS and Windows ISOs
- Additional tools to edit ISO content
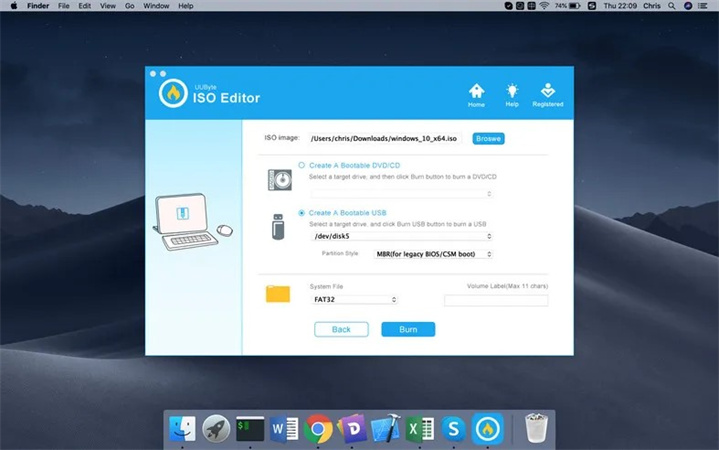
Steps to Burn an ISO to USB on Mac with UUByte ISO Editor
1. Download and Install UUByte ISO Editor
First, download and install the UUByte ISO Editor app on your Mac. Launch the program when complete and select the "Burn" module.
2. Insert USB and Import Target ISO
Plug in the target USB drive and select the ISO file you wish to burn from your Mac's storage. Adjust any advanced settings if needed.
3. Click Burn to Write ISO to Connected USB
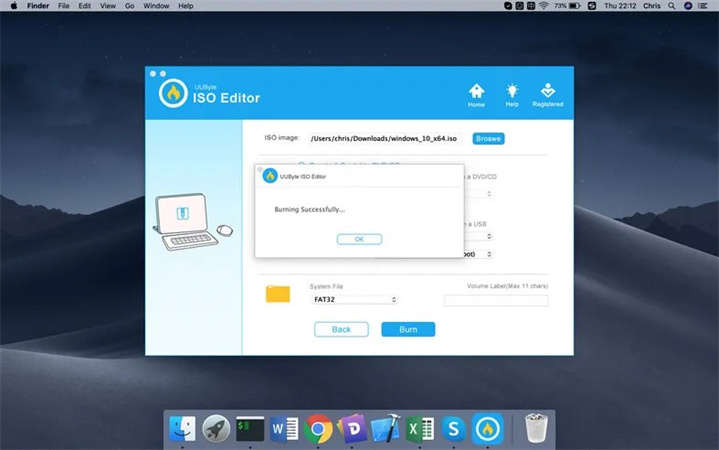
Finally, click the Burn button to initiate copying the ISO to the connected flash drive. Wait for the process to fully complete.
Pros
- Intuitive app tailored for ISO files
- Fast writing speed for rapid USB creation
- Supports bootable media for Windows and macOS
- Modern interface with on-screen guidance
Cons
- Limited legacy OS X support
- Unable to write Linux ISO images
Way 3. How to Burn ISO to USB in Mac with Echter
Etcher, ISO burner mac, is a free, open-source utility for burning ISO files to USB drives and SD cards. It is available for Windows, macOS, and Linux.
Burn ISO on Mac using the Following Steps
- 1.Download and install Etcher on your Mac
- 2.Insert a USB drive into your Mac
- 3.Open Etcher and click "Select Image" to locate your ISO file
- 4.Select your USB drive as the target drive
5.Click "Flash" to begin the burning process

Wait for the process to finish. Your bootable USB will be ready.
Pros
- Simple and easy-to-use interface
- Fast burning speeds
- Free and open-source
- Cross-platform support
Cons
- Limited ISO support
- Requires powerful hardware for best performance
- No UEFI boot support
Bonus tips: Burn Videos to DVD on Mac HitPaw Univd (HitPaw Video Converter)
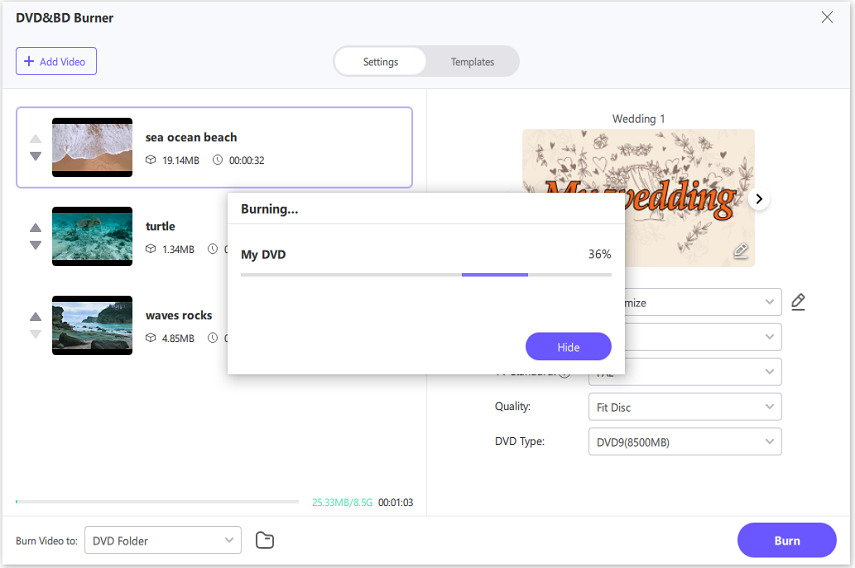
HitPaw Univd for Mac is a versatile video conversion and editing software that allows you to burn video files to DVDs. Its array of conversion and editing tools helps create customized DVDs. The DVD menu designer gives you control over the final presentation. It offers an efficient solution for burning videos to DVD on Windows and Mac.
Powerful DVD Burner Features in HitPaw Univd
- Supports over 1000 video formats, so users can burn any digital to DVD and blu-ray DVDs
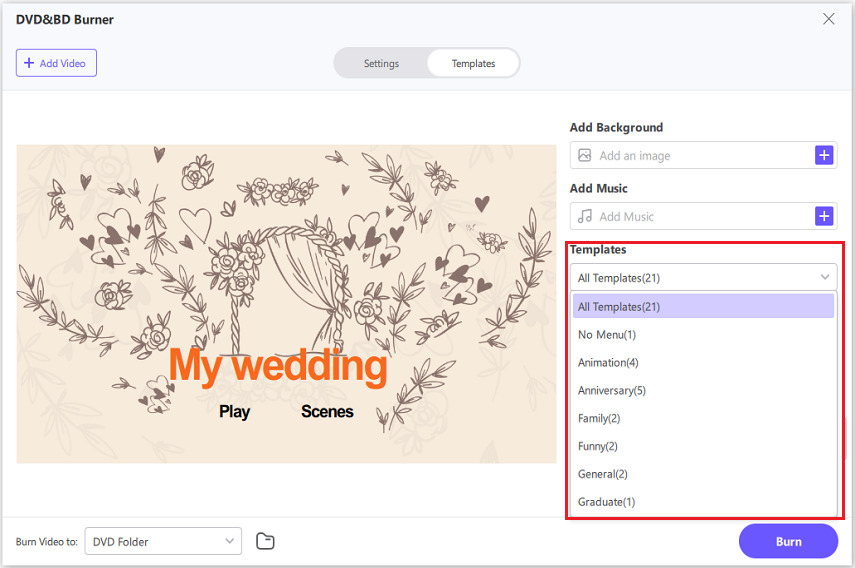
- Multiple built-in DVD templates for DVD burning
- Customize DVD background, music and menus
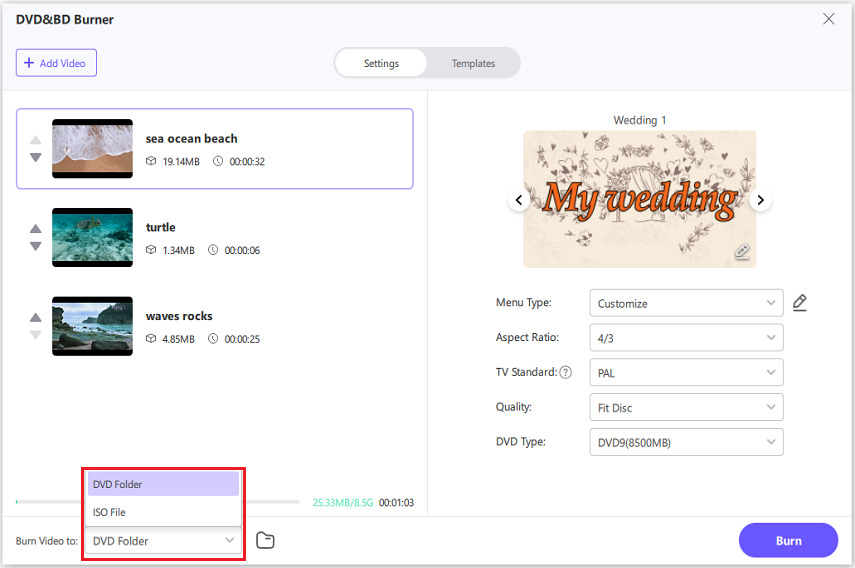
- Burn videos to DVD disc, DVD folder, and ISO file
- Rea-time preview before burning
- 30+ other media tools including popular AI tools
Here is How to Burn videos to DVD on Mac:
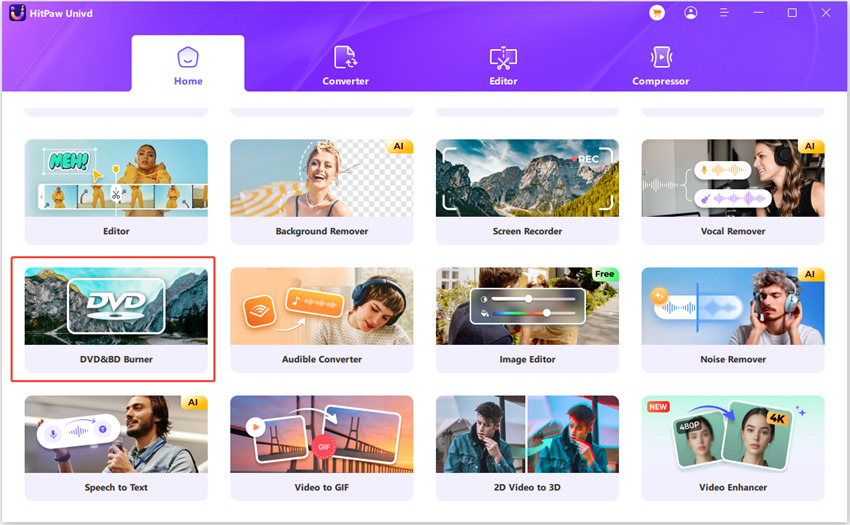
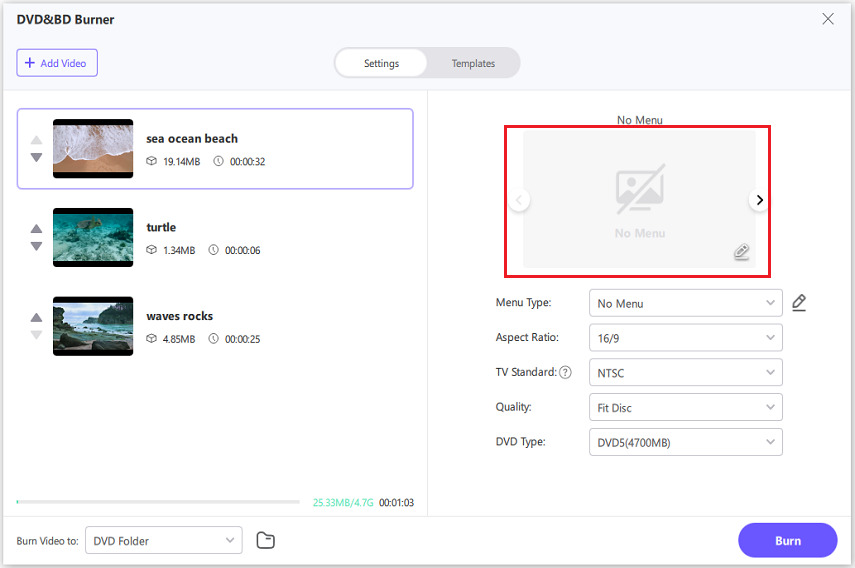
Step 1:Launch the program and go to the DVD burner module

Step 2:Add video files you want to burn to the DVD

Step 3:Configure DVD settings like quality, aspect ratio, encoding, etc.

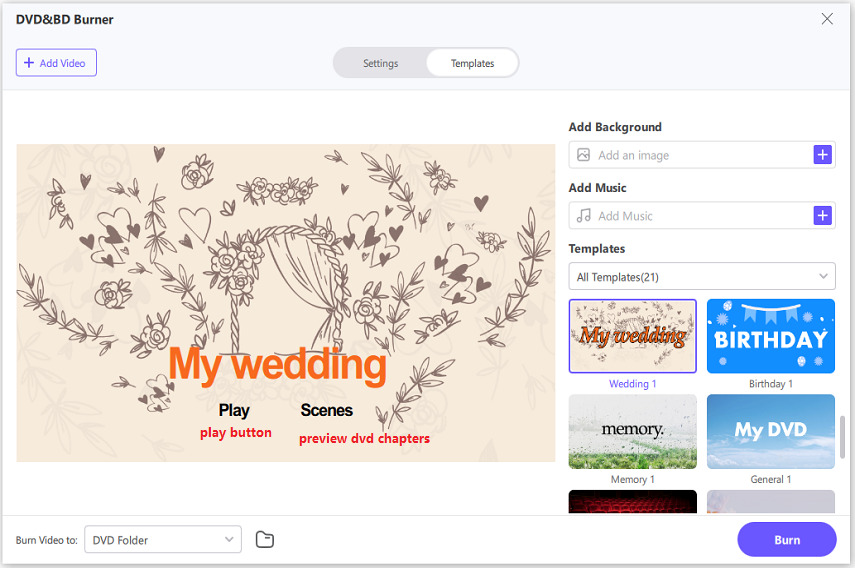
Step 4:Customize the DVD menu template and theme.

Step 5:Preview the final DVD with menus.

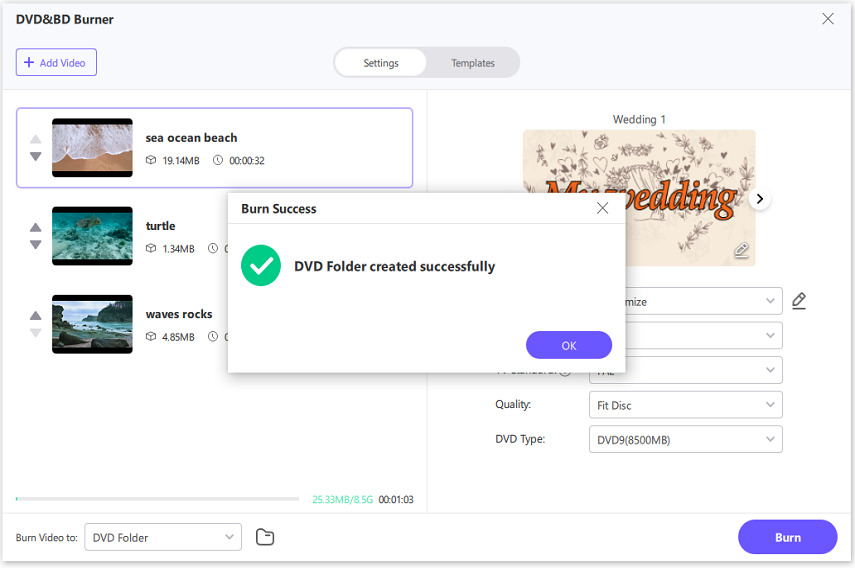
Step 6:Select burn to DVD disc, ISO image, or folder output

Step 7:Start the burning process.

Step 8:Save and access the output DVD

Also, if you are struggling with how to convert DVD to USB, this guide will help you: Copy DVD to USB Flash Drive
Other Tips: Macos ISO to a USB May Possibly Lead to the USB Being Formatted
Burning an ISO to a USB drive can lead to the drive being formatted or, at the very least, its data being erased. Here are the key points:
- Formatting Process: Most tools used to burn an ISO (such as Rufus, BalenaEtcher, etc.) will format the USB drive first to ensure that the ISO file is written correctly and the drive becomes bootable. This means that any existing data on the USB drive will be deleted.
- Data Loss: Since the process usually involves formatting, all data on the USB drive will be erased. Therefore, it’s important to back up any important files from the USB drive before you start.
- Different Burning Methods: Some tools or specific settings might offer an option to avoid formatting, but this is not common. Most tools will default to formatting the drive during the burning process.
In summary, burning an ISO to a USB drive typically results in the loss of data, so be sure to back up any important files beforehand.
FAQs about How to Burn IOS to USB Mac
1. How do I burn an ISO image to a USB Mac?
To burn an ISO image to a USB drive on a Mac, you can use Apple's built-in Disk Utility application or a third-party app like Etcher. With Disk Utility, insert your USB drive, select the ISO file, and click "Burn" for Mac burn ISO. Etcher provides a simple interface - select the ISO, choose your USB drive, and click "Flash" to burn the image.
2. How to burn windows 10 ISO to USB on mac?
To create a bootable Windows 10 USB on a Mac, first to create a bootable Windows 10 USB installation drive on a Mac, you will need the following:
- Download Windows 10 ISO file from Microsoft's site
- Insert a USB flash drive (8GB+) into your Mac
- Use Disk Utility to format the USB drive to FAT32/exFAT
- Open balenaEtcher and select the ISO file
- Choose the formatted USB drive as the target
- Click "Flash" to burn the ISO onto the USB drive
- Insert the bootable USB into your Windows PC
- Configure the BIOS to boot from USB
- Install Windows 10 from your USB flash drive
Conclusion
This article introduced three ways to burn ISO file to USB on Mac. When it comes to burning videos to DVD on Mac, HitPaw Univd for Mac hits all the right notes. Its user-friendly interface, coupled with powerful conversion tools, makes the process a breeze.
In just a few clicks, you can download online videos, convert audio tracks, customize menus, and burn everything to a polished DVD. The ability to tweak encoding settings and preview menus gives you full control over the final product.






 HitPaw Edimakor
 HitPaw VikPea (Video Enhancer)

Share this article:
Select the product rating:
Joshua Hill
Editor-in-Chief
I have been working as a freelancer for more than five years. It always impresses me when I find new things and the latest knowledge. I think life is boundless but I know no bounds.
View all ArticlesLeave a Comment
Create your review for HitPaw articles