How to Import FLV Files to Windows Movie Maker Successfully?
FLV, short for Flash Video, is a file consisting of FLV file extension, often written as movie.flv, imovie.flv, etc. This file uses Adobe Flash Player or Adobe Air to pass on audio or video over the internet. Flash Video is the high-caliber format used by almost all implanted videos on the internet, including videos created on YouTube, Hulu, and many other websites. Streaming services and software developers have now preferred HTML5 and other formats over Flash ever since Adobe officially cut ties with Flash.
In this article, we will explore the use of FLV movie editors, how they are edited and imported, and the best software you can use.

Part 1. Import FLV to Windows Movie Maker with HitPaw Univd (HitPaw Video Converter)
Compatibility issues often arise when FLV videos are downloaded and stored on personal computers since many media players do not support the FLV format. Converting FLV files to more universally compatible formats like WMV becomes necessary to address this.
It can be a bit difficult to import FLV files into Windows Movie Maker due to compatibility issues. HitPaw Univd simplifies this process, offering convenience and ease. With its user-friendly interface and efficient tools, HitPaw enables users to effortlessly convert FLV files to WMV, ensuring smooth integration into Windows Movie Maker for editing and production purposes.
Why HitPaw Univd To Import FLV To Windows Movie Maker
- AI program amalgamating multiple features into a single interface
- Allows convenient video conversion formats with various quality and format selection options
- Multiple video editing capabilities are provided, which include cutting, cropping, merging, audio editing, and making montages
- 100% immersive editing or downloading of videos without annoying ads
- Available for both computers and mobile phone platforms in both Android and iOS systems.
Steps on How to Import FLV Files to Windows Movie Maker
Step 1. Download and install the HitPaw Univd on your PC.
Step 2. Click the “Add Files” button to add files to the HitPaw Univd. Browse the system to look for files you want to import. Select them and click “Open’ to add them to the conversion queue.

Step 3. Navigate to the output format section to choose a compatible format with Windows Movie Maker, such as MP4. You can optionally adjust and customize output settings, such as bitrate, resolution, frame rate, etc, from the “Settings” button.
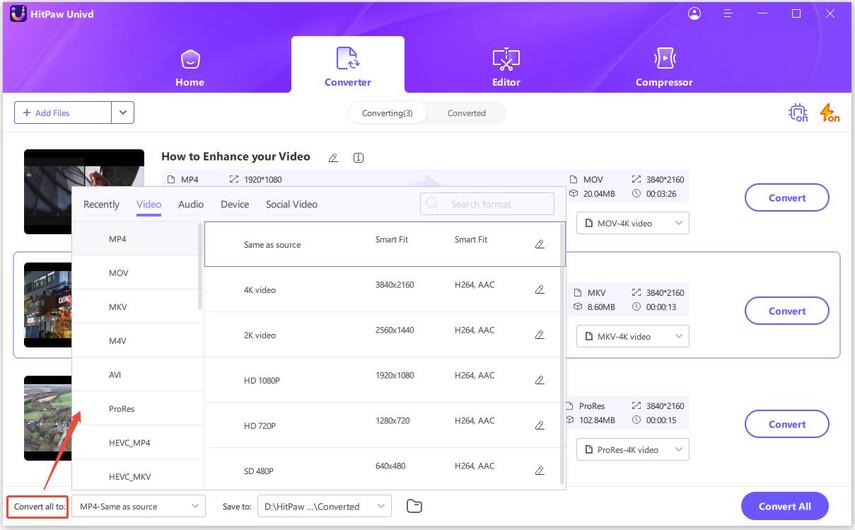
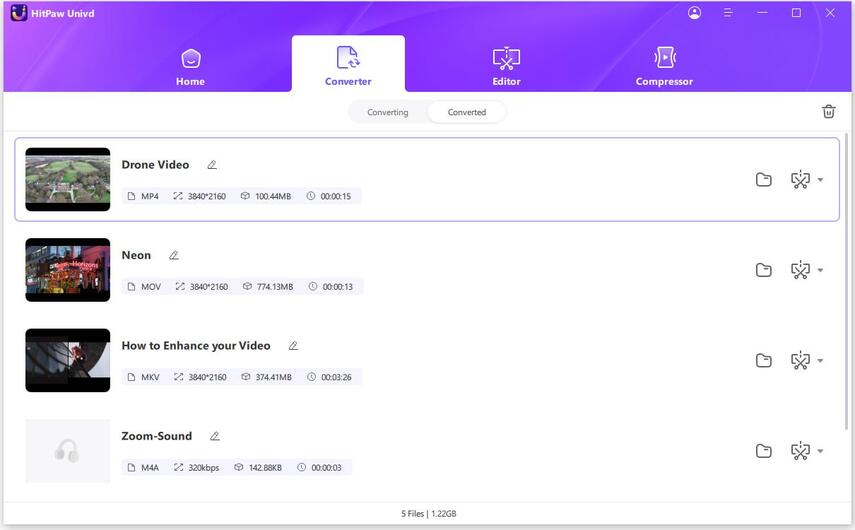
Step 4. After confirming your settings, click the “Convert” button to start the conversion process. It will notify you once the conversion is complete; these converted files can be found in the output folder specified during the conversion process.
Part 2. Install Codec Pack to Import FLV to Windows Movie Maker
A codec pack is short for a “compression-decompression” or “coder-decoder.” It is a collection of audio and video codecs that enables software applications to encode and decode various audio and video file formats. A codec pack includes different codecs of famous file formats such as FLV, MPEG, AVI, and more.
Some codecs also include supplementary tools to enhance capabilities, such as splitters, filters, adjusting video settings, improving playback quality, etc. Therefore, in addition to converting FLV format, users can also make Windows Movie Maker support FLV video by installing smaller codec packages.
To install a Codec Pack To Import FLV To Windows Movie Maker, follow these steps:
Step 1. Select a well-thought-out Codec Pack that supports FLV files and visit its official website. Look for the download section and select the desired version of your Codec pack for your Windows operating system.
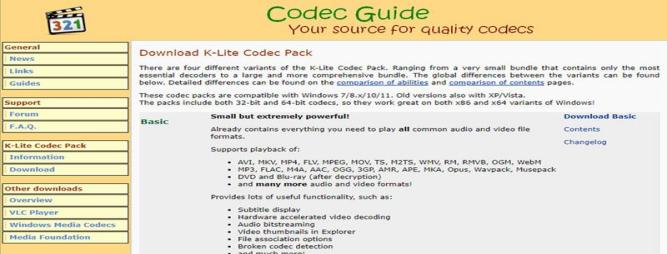
Step 2. After downloading the Codec Pack installer, click on the downloaded file. An installation wizard will appear to guide you through the installation process.
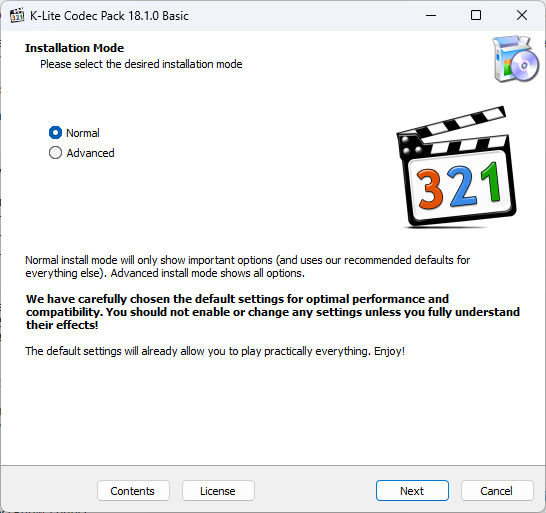
Step 3. Choose the components you wish to install and proceed by clicking on the “Next” button.
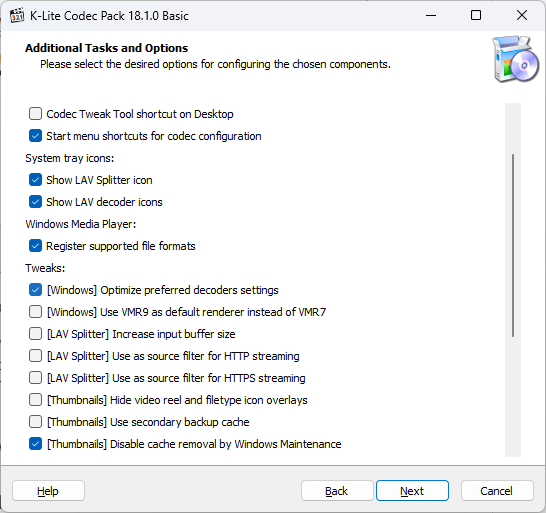
Step 4. After installation, open the Windows Movie Maker where you want to import FLV files. Use the “Add photos or videos” option and drag and drop the required files for that purpose.
Step 5. The codec pack has been installed if the files are successfully imported and no errors appear.
Part 3. FAQs Of FLV Windows Maker
Q1. What formats are supported by Windows Movie Maker?
A1. Windows Movie Maker supports video files consisting of asf, avi, mpe, mpg, mpe2, wm, wmv, .m1v, .mp2v, and .mpeg.
Q2. Why was Windows Movie Maker discontinued?
A2. As of November 1, 2023, Microsoft made the decision to discontinue Movie Maker after over 19 years of service. Despite being a free platform with various editing functions and tools, Movie Maker did not achieve the expected level of popularity.
Q3. How do I edit a FLV file?
A3. Editing FLV files can be a bit tricky, because FLV is primarily a video streaming format. Traditional video editing software may not be able to handle it optimally. However, there are some specialized tools that can handle FLV files, and HitPaw Univd is one such tool.
The Bottom Line
In conclusion, importing FLV files to Windows Movie Maker is an easy process. It can be done in various ways, as discussed in the article. In order to import FLV files inside Windows Movie Maker as quickly and safely as possible, HitPaw Univd must be the first choice, which has endless benefits and innovative ideas.
Both converting FLV files and installing a codec pack offer solutions to the FLV compatibility issue with Windows Movie Maker. Hopefully, you can now import your files into Windows Movie Maker for editing.


 HitPaw Edimakor
 HitPaw VikPea (Video Enhancer)


Share this article:
Select the product rating:
Joshua Hill
Editor-in-Chief
I have been working as a freelancer for more than five years. It always impresses me when I find new things and the latest knowledge. I think life is boundless but I know no bounds.
View all ArticlesLeave a Comment
Create your review for HitPaw articles