Unleashing the Power of WebM with Alpha Channel in After Effects
In video editing, harnessing the full potential of cutting-edge technologies can elevate the quality and creativity of your projects. One such innovation is the utilisation of WebM with Alpha Channel in After Effects, a powerful combination that opens up a realm of possibilities for creating dynamic and immersive visuals.
Additionally, tools like the HitPaw Univd (HitPaw Video Converter) provide seamless integration and efficiency, empowering users to effortlessly leverage the capabilities of after effects webm with Alpha Channel in their editing workflow. Let's explore how this integration unlocks new levels of creativity and versatility in video editing.
Part 1. What is After Effects WebM with Alpha?

Alpha webm after effects refers to utilising the WebM format, which supports alpha channels, within adobe after effects webm. Alpha channels allow for transparent information within video files, enabling elements within the video to be composited seamlessly over other content.
This feature is invaluable for creating visually stunning effects, such as overlays, lower thirds, and motion graphics, where transparency and layering are essential for achieving professional-quality results.
With Alpha after effects webm export is a powerful tool for video editors and motion graphics artists to enhance their projects' visual impact and complexity.
Explaining the process of creating a WebM file with an alpha channel in After Effects:
Creating an after effects to webm file with an alpha channel involves several steps:
1. Composition Setup: Create a new composition in after effects export to webm and set your project's desired dimensions and frame rate.
2. Import Assets: Import the assets you wish to include in your composition, such as video clips, images, and graphics.
3. Create Alpha Channel: To create an alpha channel, ensure that your assets have transparent backgrounds or utilise tools within After Effects, such as masking or keying, to remove unwanted areas.
4. Render Settings: Access the render settings by navigating to Composition > Add to Render Queue. Choose WebM as the output format and select the option to include an alpha channel.
5. Adjust Settings: Customize the render settings, including bitrate, resolution, and audio settings.
6. Render Output: Click on the Render button to initiate the rendering process of after effects webm import generates a WebM file with an alpha channel, preserving transparency information for the specified assets.
Benefits of using After Effects for creating WebM with alpha:
Utilising After Effects for creating WebM files with alpha channels offers several benefits:
1. Seamless Integration: After Effects seamlessly integrates with other Adobe Creative Cloud applications, allowing for efficient workflows and easy collaboration between different stages of the editing process.
2. Advanced Effects: After Effects provides various advanced effects and tools for creating complex motion graphics, visual effects, and compositing, enabling users to achieve professional-quality results.
3. Precise Control: With After Effects, users have precise control over every aspect of their compositions, including timing, animation, and layering, ensuring the desired outcome for their projects.
4. Flexibility: After Effects supports various file formats and codecs, including WebM with alpha, allowing users to choose the most suitable format while maintaining transparency information.
Part 2. Step-by-Step Guide: Exporting After Effects Projects to WebM with Alpha
A. Preparing the After Effects project for WebM export:
1. Ensure all assets in your After Effects project have transparent backgrounds or utilise alpha channels for transparency.
2. Ensure your composition is set up correctly and includes all necessary elements for your project.
3. Organise your composition layers and pre-compose any complex elements to simplify the export process.
B. Adjusting the composition settings for WebM with alpha:
1. Open the composition settings by selecting Composition > Composition Settings.
2. Set your composition's dimensions and frame rate according to your project requirements.
3. Ensure the background colour is transparent by selecting RGB + Alpha for the Color settings.
C. Exporting the After Effects project to WebM format with alpha channel:
1. Add your composition to the render queue by selecting Composition > Add to Render Queue.
2. In the Render Queue panel, click on the Output Module settings to configure the export settings.
3. Choose WebM from the Format dropdown menu and select the desired output location.
4. Click the Format Options button to ensure the Video Codec is set to VP9. Check the Render at Maximum Depth option for better quality.
5. Enable the Include Alpha Channel option to preserve transparency information.
6. Adjust other settings such as bitrate, resolution, and audio as needed.
7. Click OK to apply the changes and return to the Render Queue panel.
8. Click the Render button to export your After Effects project to WebM format with an alpha channel.
D. Testing the WebM file with alpha in different media players and browsers:
1. Once the export process is complete, locate the exported WebM file on your computer.
2. Open the WebM file in various media players to ensure transparency is preserved correctly.
3. Test the WebM file in different web browsers to verify compatibility and ensure transparency displays correctly.
4. Check for any artefacts or issues with the alpha channel and adjust the export settings if necessary.
5. Repeat testing to ensure the WebM file has alpha functions as intended across different platforms and playback environments.
Part 3. The Best Video Converter for After Effects WebM with Alpha
HitPaw Univd stands out as the premier choice for format conversion, offering a comprehensive suite of features designed to streamline the video editing and conversion process.
This versatile software empowers users to convert between various photo and video formats effortlessly while providing additional tools for downloading, editing, and enhancing multimedia content.
Highlighted by its diverse and powerful functions, HitPaw Univd is a one-stop video conversion, editing, and enhancement solution, making it an indispensable tool for novice and experienced users.
Features
- Format Conversion: HitPaw Univd enables users to easily convert video and photo formats, ensuring compatibility across different devices and platforms.
- Video Downloading: With support for over 10,000 websites, HitPaw Univd allows users to download videos from popular streaming platforms such as YouTube, Vimeo, and Facebook.
- Music Downloading: Users can also download music from famous platforms like Spotify, SoundCloud, and Apple Music, expanding their multimedia library.
- Video Editing: HitPaw Univd includes a robust set of editing tools, allowing users to trim, crop, rotate, and add effects to their videos before conversion.
- Additional Tools: In addition to format conversion and video editing, HitPaw Univd offers various popular tools such as image compression, screen recording, and 2D to 3D conversion, providing users with a comprehensive solution for all their video processing needs.
Steps
1. Launch The HitPaw Univd after downloading it from the official website.
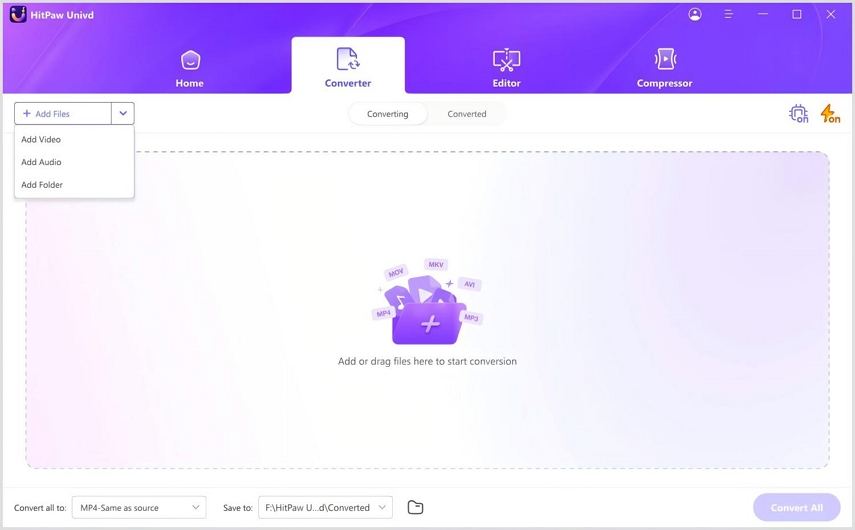
2. To import your files, select Add Video. Alternatively, drag the video(s) straight into the application.
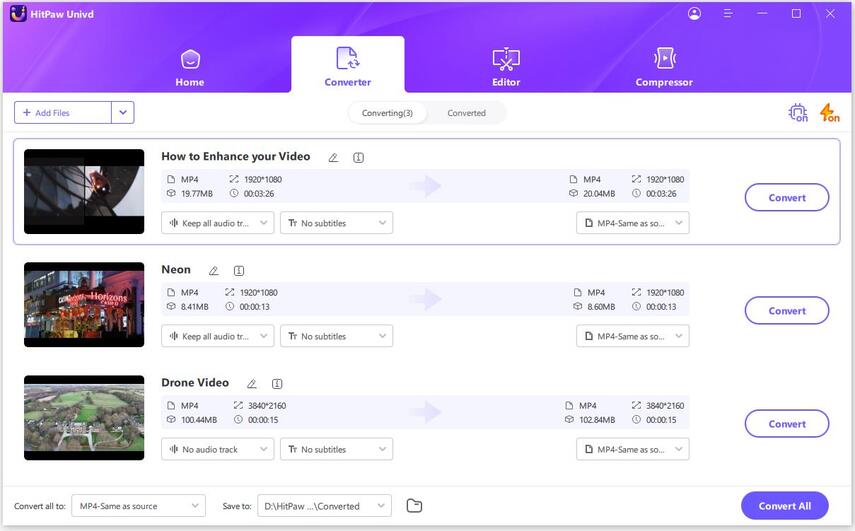
The application imports the video files in a queue.
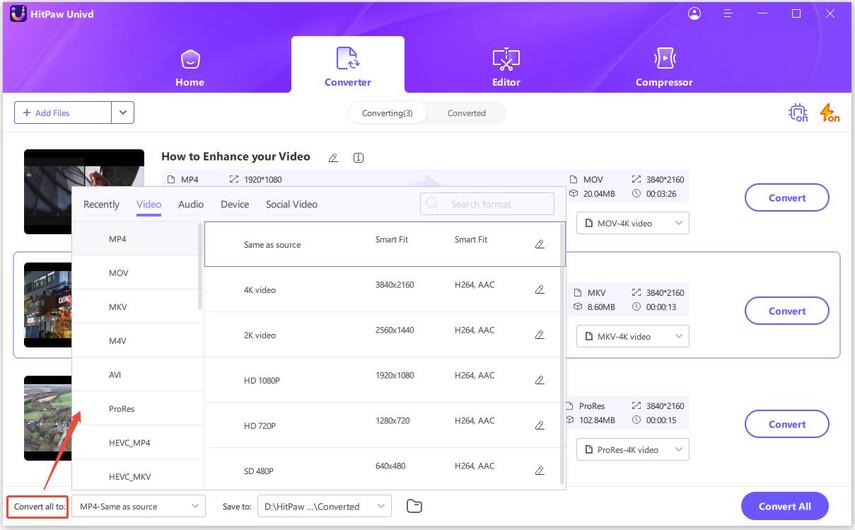
3. By selecting the inverted triangle icon in the lower right corner of each file, you may choose the output format for that particular file. In the lower-left corner, click "Convert all to" to select a standard output format for all imported files.
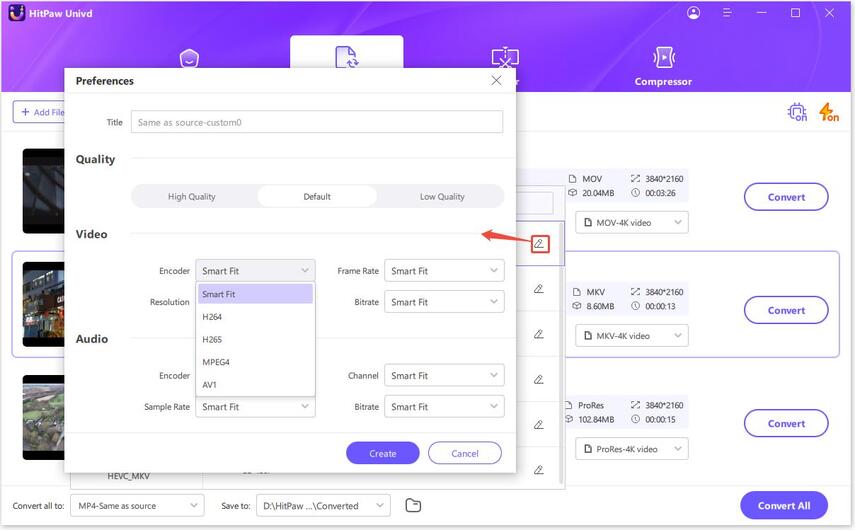
You can alter the output format's settings with this software. Click the edit icon to access the format preferences box and select this file's video and audio codecs, quality, and format.
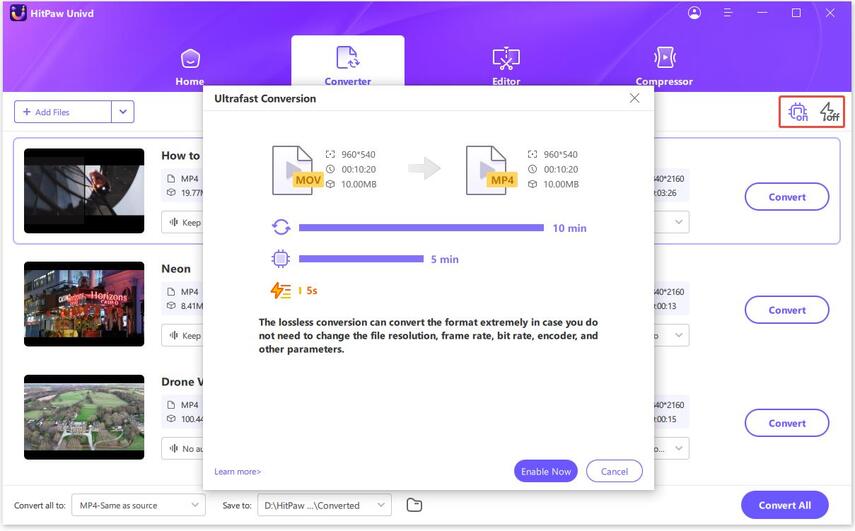
4. select the Hardware Acceleration Detection and Lossless Conversion tab in the upper-right corner.
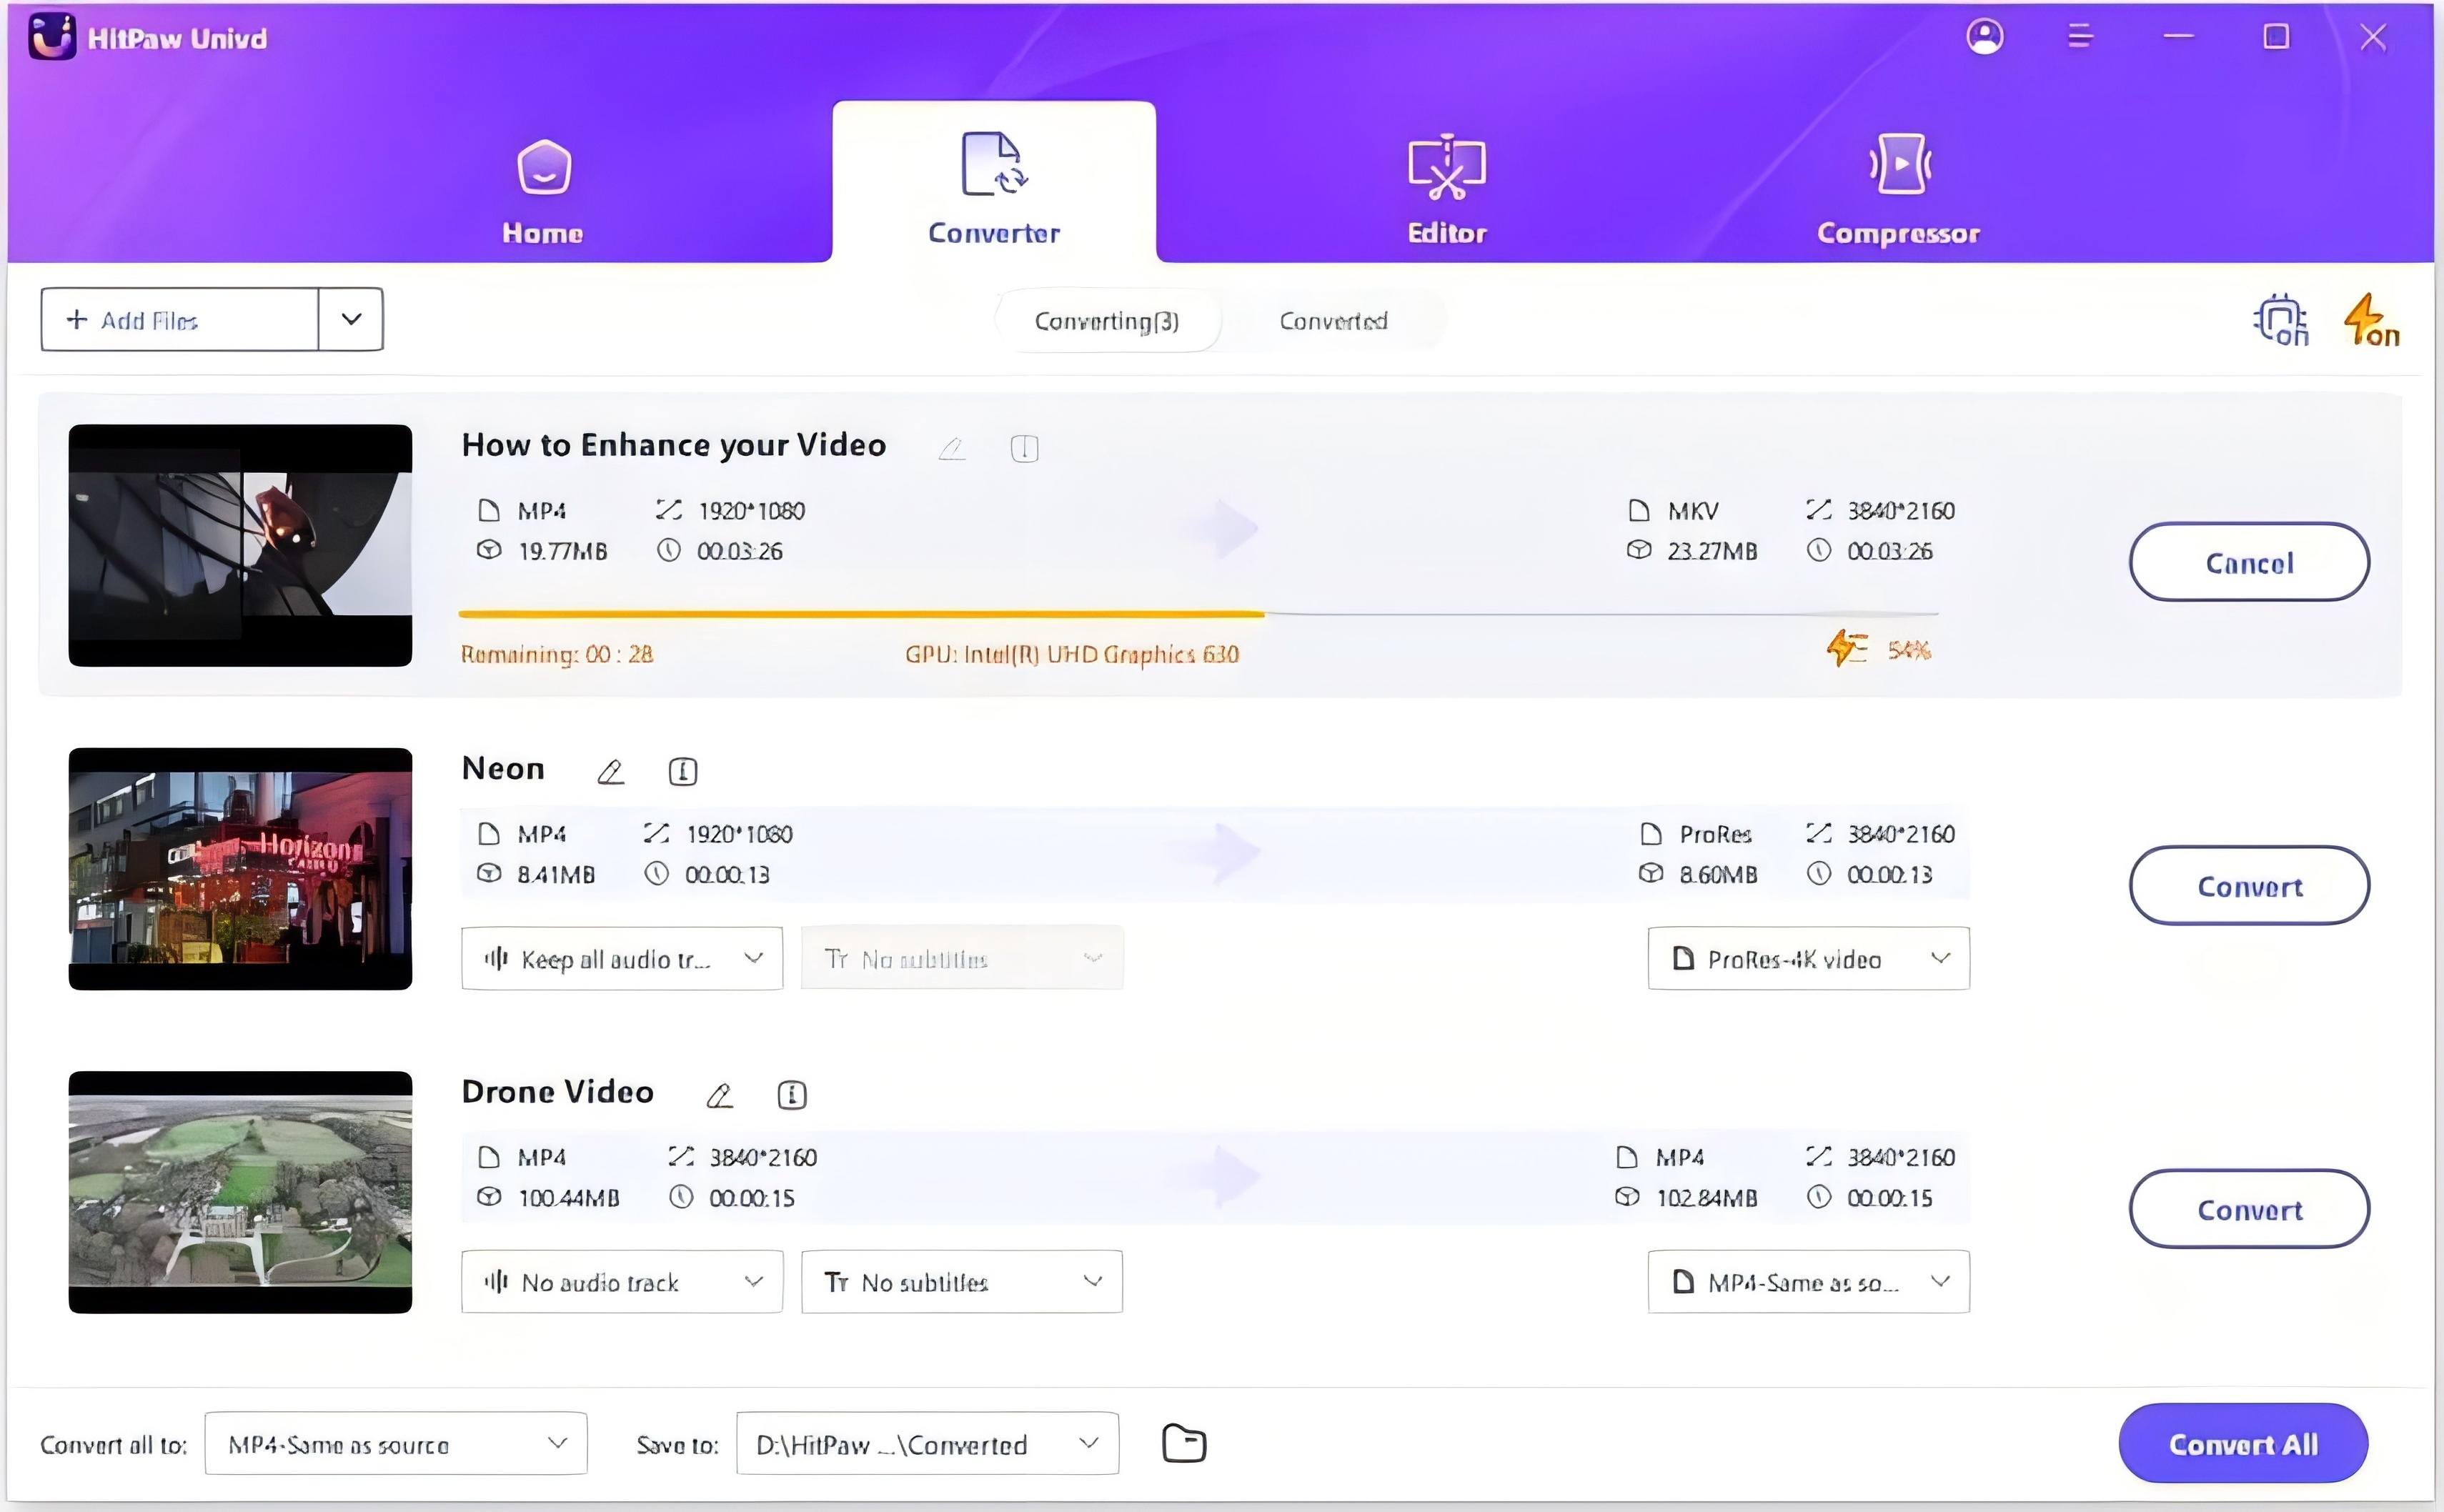
5. To convert the movie to the format of your choice, pick a target folder in the interface, then click Convert (or Convert All if you have numerous files).
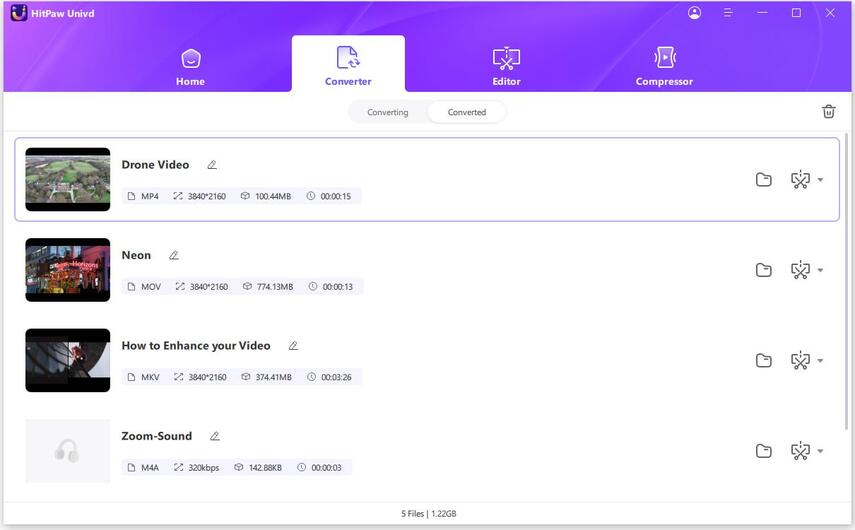
6. Once the conversion process is finished, select the Converted tab at the top to view the converted files. You may edit your movie by clicking Add to the List or Open Folder to view the completed files if necessary.
Part 4. FAQs of After Effects WebM with Alpha
Q1. How do I export a .mov with a transparent background in After Effects?
A1. To export a .mov with a transparent background in After Effects using HitPaw Univd, ensure that the alpha channel is preserved during export and select the desired settings for transparency in the output options.
Q2. Which video format supports alpha?
A2. The WebM format supports alpha channels, allowing for transparency within video files.
Q3. Does WebM support transparency?
A3. Yes, WebM supports transparency through its alpha channel, allowing for the inclusion of transparent elements within video files.
Bottom Line
In conclusion, harnessing the power of after effects webm with alpha opens up creative possibilities for video editing and motion graphics. With tools like the HitPaw Univd, users can easily convert, edit, and enhance multimedia content.
Don't miss out on the opportunity to elevate your video editing experience—try out HitPaw Univd today and unlock the full potential of your projects. Experience the convenience and versatility of HitPaw Univd and take your video editing skills to new heights.


 HitPaw Edimakor
 HitPaw VikPea (Video Enhancer)


Share this article:
Select the product rating:
Joshua Hill
Editor-in-Chief
I have been working as a freelancer for more than five years. It always impresses me when I find new things and the latest knowledge. I think life is boundless but I know no bounds.
View all ArticlesLeave a Comment
Create your review for HitPaw articles