How to Use Cassette MP3 Converter to Get Old Music
Cassette MP3 converter offers a convenient solution for digitizing old music stored on cassette tapes, allowing users to preserve and enjoy their favorite tracks in a modern digital format. Converting cassette tapes to MP3 format is a vital process for preserving old audio recordings, ensuring that cherished music collections and memories remain accessible in the digital age.
In the following passages, we'll explore the significance of cassette to mp3 converter, discuss the equipment and software needed for the conversion process, and provide step-by-step instructions on effectively converting cassette tapes to MP3 files.
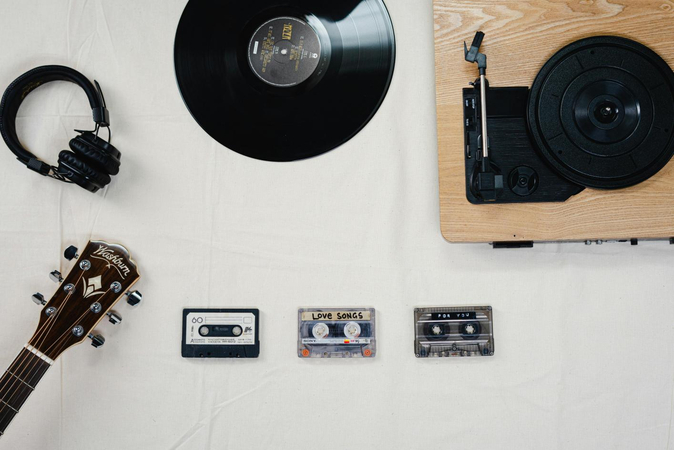
Part 1: Preparation for Best Cassette to MP3 Converter
In preparation for Best Cassette to MP3 Converter, you'll need the following materials:-
Cassette Player: You'll require a cassette player with a functioning playback mechanism. You can find cassette players in various places, including thrift stores, online marketplaces like eBay or Amazon, or even borrow one from friends or family members. Make sure the player is in good condition and has a working cassette deck.
-
Computer: A computer is essential for capturing and storing the audio from the cassette tapes. Any desktop or laptop computer with a USB port and sufficient storage space will suffice.
-
Audio Capture Software: You'll need software to record the audio from the cassette player and save it as MP3 files on your computer. There are several options available, both free and paid. Audacity is a popular and free audio recording software that works well for this purpose. Alternatively, some cassette MP3 converters come with their own proprietary software for capturing and digitizing audio.
- 1.Analog Connection: Most cassette players will have analog audio output ports, typically labeled as "Line Out" or "Audio Out." These ports usually use RCA connectors (red and white) or a 3.5mm headphone jack. You'll need a compatible cable to connect the cassette player's audio output to your computer's input.
- 2.USB Cassette Player: If you have a USB cassette player, simply connect it directly to your computer using a USB cable. These players are designed to digitize cassette tapes directly onto your computer without the need for additional cables or connections.
- 3.Software Configuration: Open the audio capture software once your cassette player is connected to your computer. Configure the software to recognize the input source from the cassette player. This usually involves selecting the appropriate audio input device in the software's settings.
Part 2: How to Convert Cassette to MP3 Using Audacity
One of the most popular and accessible tools for this task is Audacity, a free, open-source audio editing software. In this guide, we'll walk you through the process of cassette mp3 converter using Audacity.
Recording audio from a cassette tape using Audacity involves several steps. Here's a how to convert cassette to mp3 using Audacity:- 1.Set up your equipment: Connect your cassette player to your computer using an appropriate cable. Most likely, you'll need a cable with a 3.5mm jack on one end (to connect to your computer's line-in or microphone port) and the appropriate connector for your cassette player's headphone or line-out jack.
- 2.Open Audacity: Launch the Audacity software on your computer.
- 3.Configure Audacity settings:
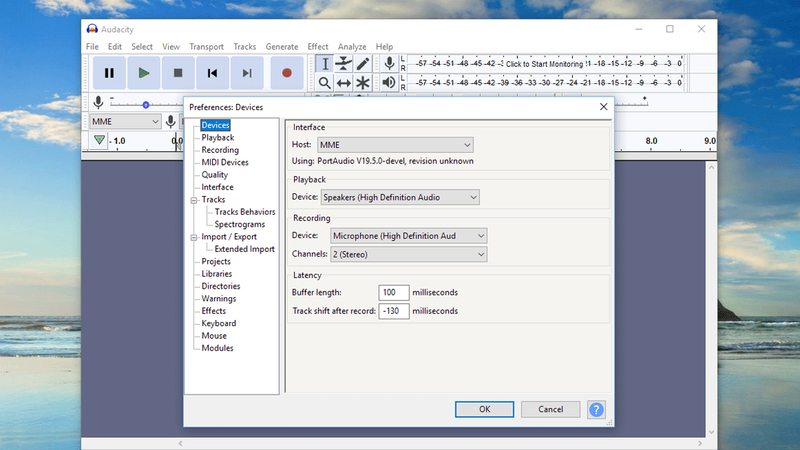
- Go to the "Edit" menu and select "Preferences."
- In the "Devices" section, choose the appropriate recording device from the dropdown menu. This should be the input source where you've connected your cassette player.
- Set the recording channels to "Mono" or "Stereo," depending on your preference and the capabilities of your cassette player.
- Click "OK" to save your settings.

- 4.Prepare the cassette tape: Insert the cassette tape into your cassette player and cue it to the beginning of the audio you want to record.
- 5.Set recording levels: Before recording, it's essential to set appropriate recording levels to ensure good sound quality without clipping
(distortion). In Audacity, you can do this by adjusting the input volume level:
- Start playback on your cassette player.
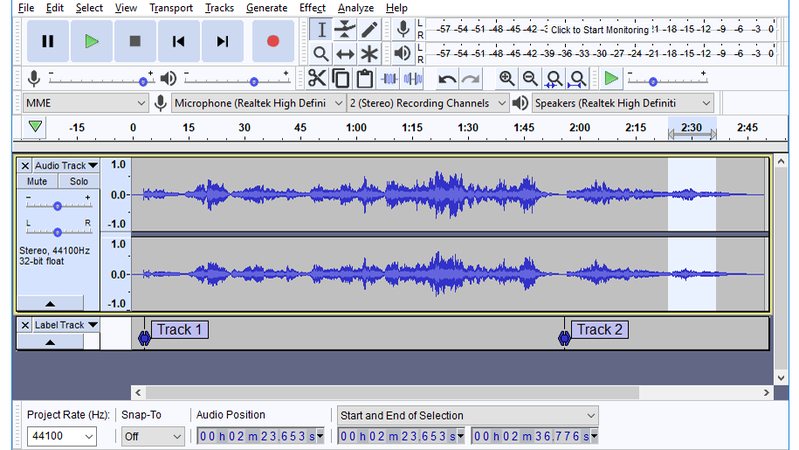
- In Audacity, you'll see a level meter moving in response to the audio input. Adjust the input volume on your computer or cassette player until the level meters reach around -6dB to -3dB, avoiding clipping (the red bars).
- 6.Start recording: Once your levels are set, you're ready to start recording:
- Click the red "Record" button in Audacity to begin recording.
- Start playback on your cassette player.
- 7.Monitor the recording: Keep an eye on the recording as it progresses. Ensure that the audio is being captured properly and that there are no unexpected issues like clipping or excessive noise.
- 8.Stop recording: When the desired audio has been captured, click the "Stop" button in Audacity to stop the recording.
- 9.Save your recording: IAfter stopping the recording, Audacity will prompt you to save the project. Save it to a location of your choice on your computer.
- 10.Export the audio: If you want to use the recorded audio outside of Audacity, you'll need to export it to a compatible audio format (such
as MP3 or WAV):
- Go to the "File" menu and select "Export."
- Choose the desired audio format and settings, then click "Save" to export the audio.

That's it! You've successfully done with the best cassette to mp3 converters.
Part 3: How to Convert Any Formats to MP3 Using HitPaw Univd (HitPaw Video Converter)
HitPaw Univd is a versatile software platform designed to facilitate seamless video conversion processes. It offers a comprehensive set of features tailored to meet the needs of both casual users and professionals alike. Whether you need to convert video files for playback on different devices, compress large files for easier sharing, or edit videos to enhance their quality, HitPaw Univd provides a user-friendly solution.
Key features of HitPaw Univd include:
- Wide Range of Supported Formats
- High-Quality Conversion
- Fast Conversion Speed
- Batch Conversion
- Customizable Settings
- Editing Tools
- User-Friendly Interface
Here is how to convert cassette to mp3.
- Step 1: Import Audio File
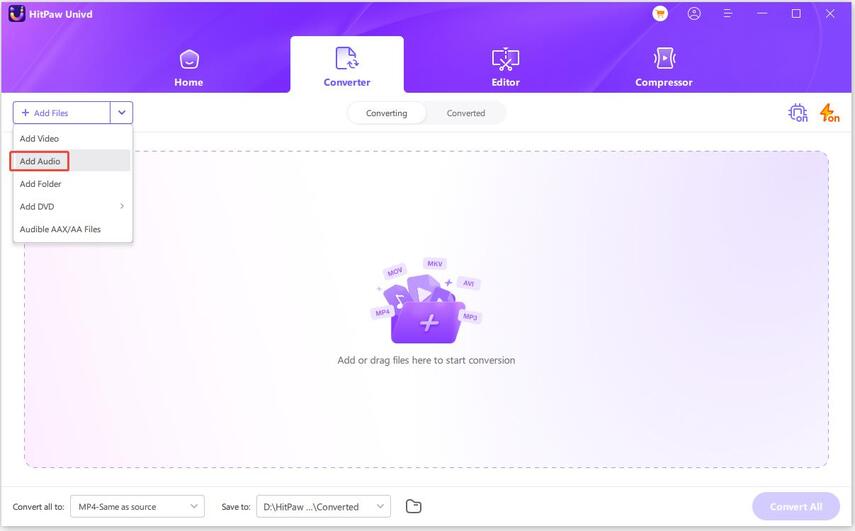
Open the software and select Add Audio in the upper left corner of the main interface. Or you can drag and drop the audio file onto the conversion board. If you'd like to extract audio from a video, please choose Add Video or drag and drop the video file to the program.

- Step 2: Select the Audio Format
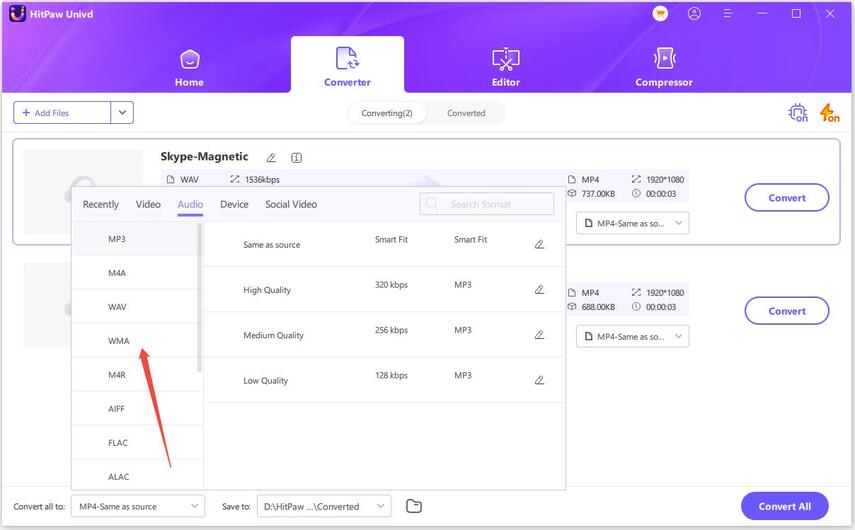
You can select an output format for each file by clicking the inverted triangle on the lower right side of each file. Click Convert all to in the lower left corner to select a unified output format for all imported files.
In the output format lists, switch to the Audio tab here and then opt for any needed format. Then, choose the output quality.

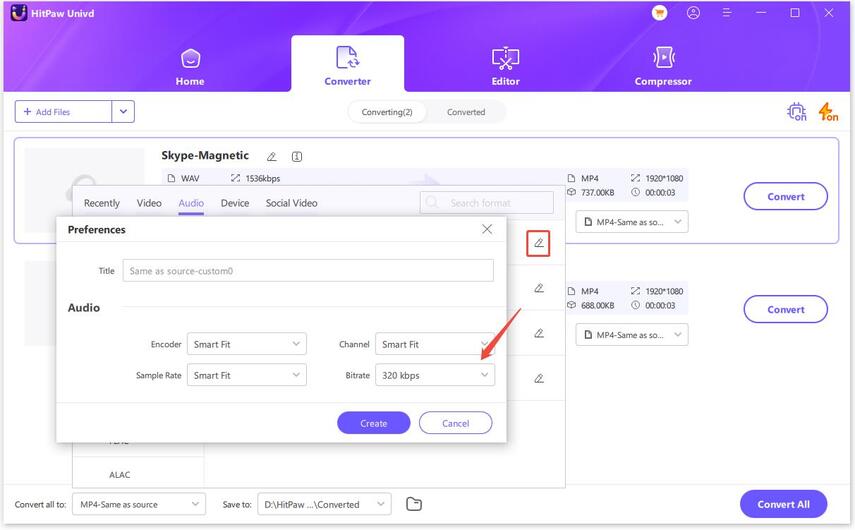
When you choose an output format, you can click the edit icon to edit the format parameters including encoder, sample rate, bit rate, etc.

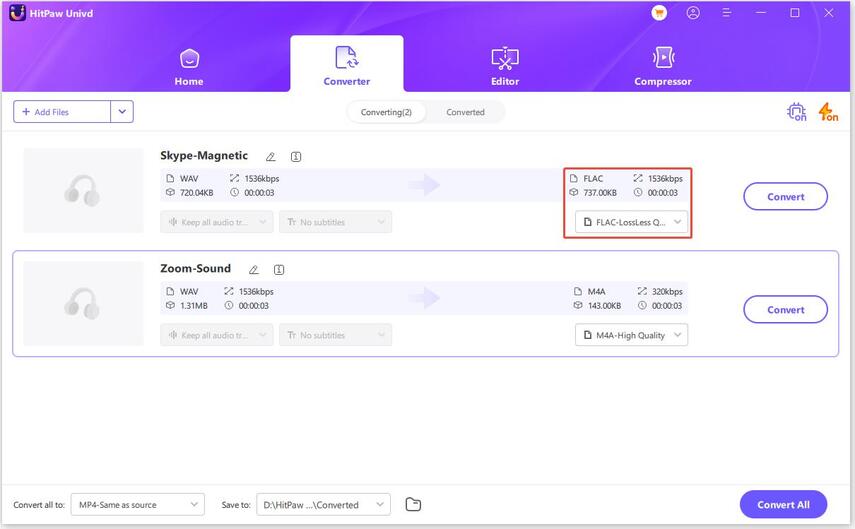
After choosing the output format, you can check the file format and size info on the main interface.

- Step 3: Convert Audio
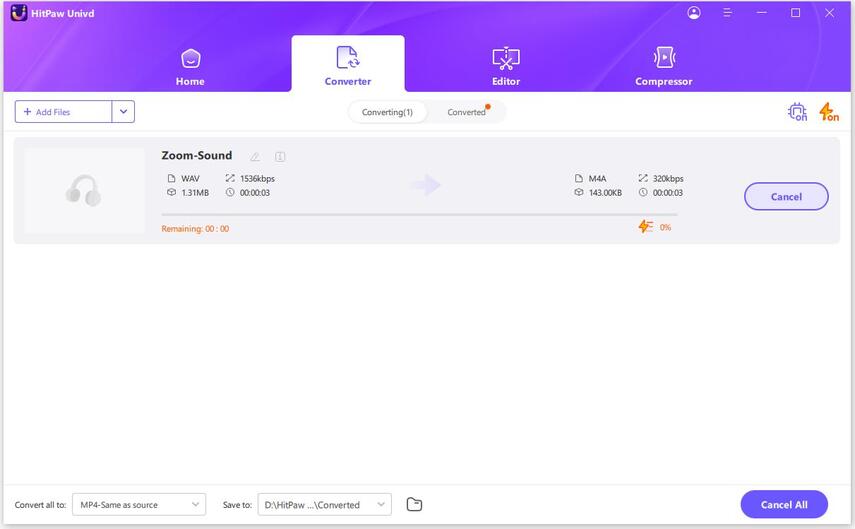
When you are satisfied with your selection, click Convert or Convert All files on Windows with lossless quality.

- Step 4: Access to the Converted Files
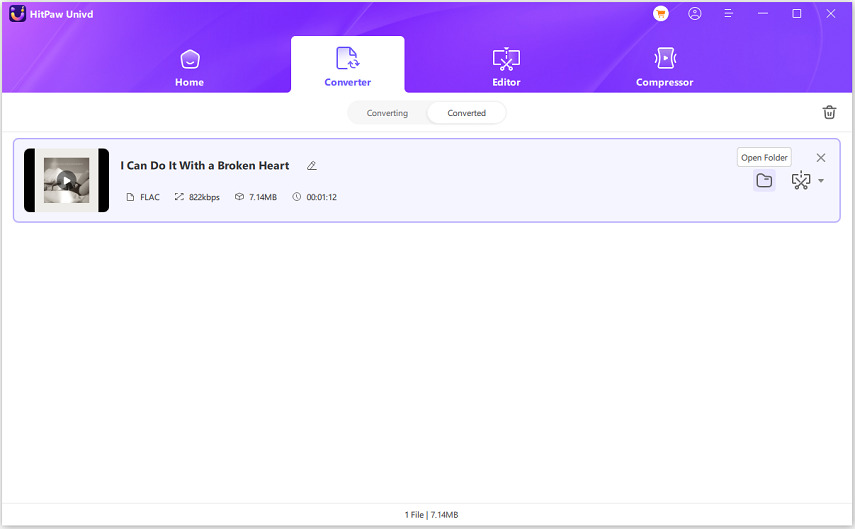
Head to the Converted tab from the top, and you will see the converted files. Click Open Folder to check the finished files, or click Add to edit list to edit your audio if you need.

By following these steps you can convert cassette tape to mp3.
Watch the following video to learn more details:
Conclusion
In conclusion, converting cassette tapes to MP3 format is vital for preserving precious audio recordings. By digitizing these tapes, we protect memories from degradation and ensure their accessibility for years to come. These recordings capture irreplaceable moments, from family conversations to musical performances, serving as windows into the past. It's essential to take action now, whether through DIY methods or professional services, to safeguard our cultural and personal history.
HitPaw Univd is the best cassette to mp3 converter. Let's embrace the journey of digitization, ensuring that our stories endure beyond the limitations of analog technology. Start today and preserve your audio heritage for future generations.




 HitPaw Edimakor
 HitPaw VikPea (Video Enhancer)



Share this article:
Select the product rating:
Joshua Hill
Editor-in-Chief
I have been working as a freelancer for more than five years. It always impresses me when I find new things and the latest knowledge. I think life is boundless but I know no bounds.
View all ArticlesLeave a Comment
Create your review for HitPaw articles