Catalog
HitPaw Univd (HitPaw Video Converter) supports to batch create GIFs from videos. This step-by-step guide demonstrates how to convert videos to GIFs with HitPaw Univd on PC and Mac.
Step 1: Launch HitPaw Univd and Switch to Toolbox
After installing HitPaw Univd, launch it on computer and switch to the Toolbox tab on the top menus. Choose Video to GIF feature there.Then choose the target video to import to the program.

Step 2: Set GIF Output Parameters
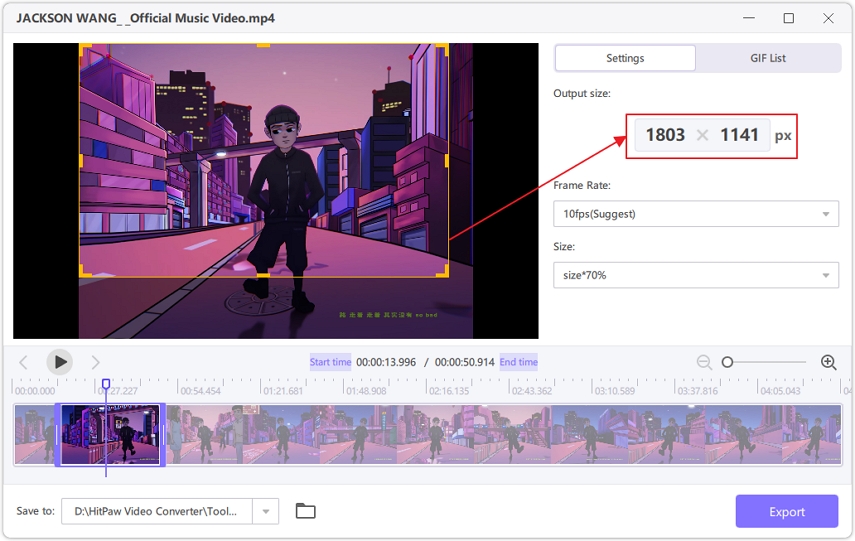
In the “Settings” tab, you can set the output resolution, frame rate, and size for the output GIF file(s).
In the preview window, you can drag and drop the matrix diagram directly to adjust the aspect ratio of the output file. You can see the scale in the "Output Size" on the right.
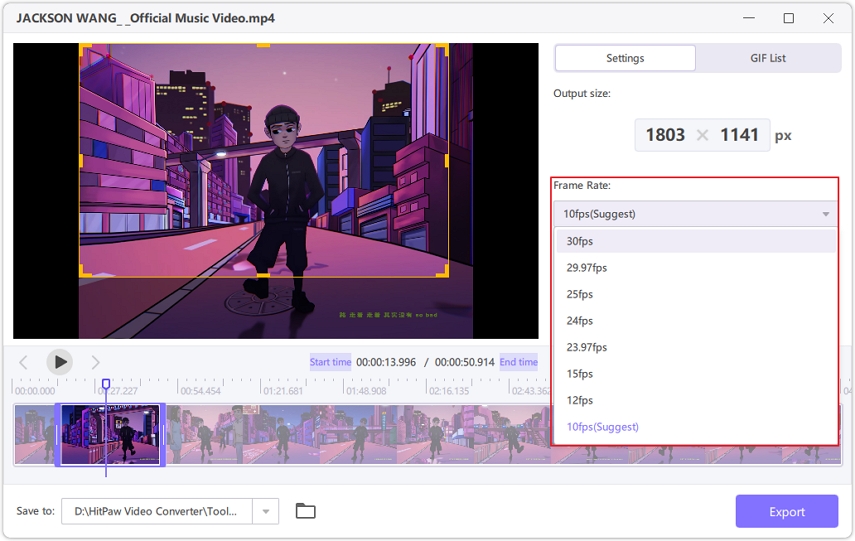
In the “Frame Rate”, you can choose the desired value. The default is 10fps.
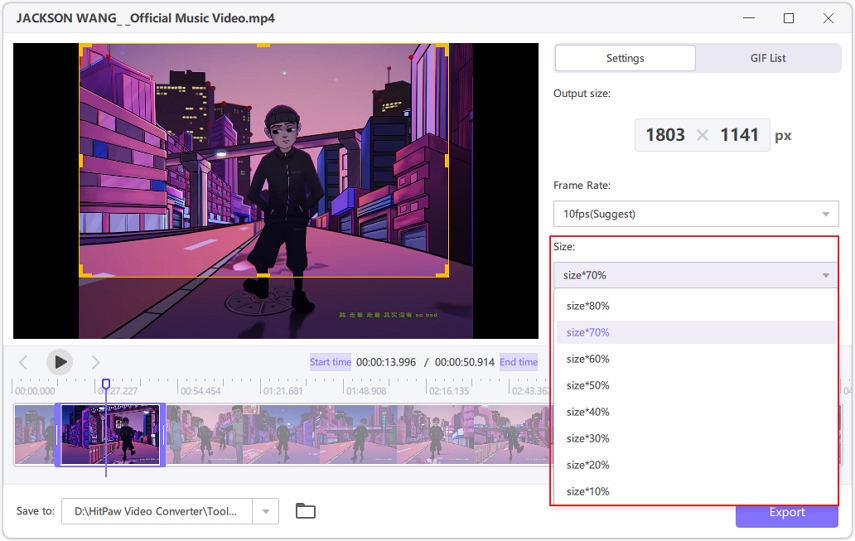
In the “Size” drop-down values, users can set up the size value.
Step 3: Create GIF from Videos
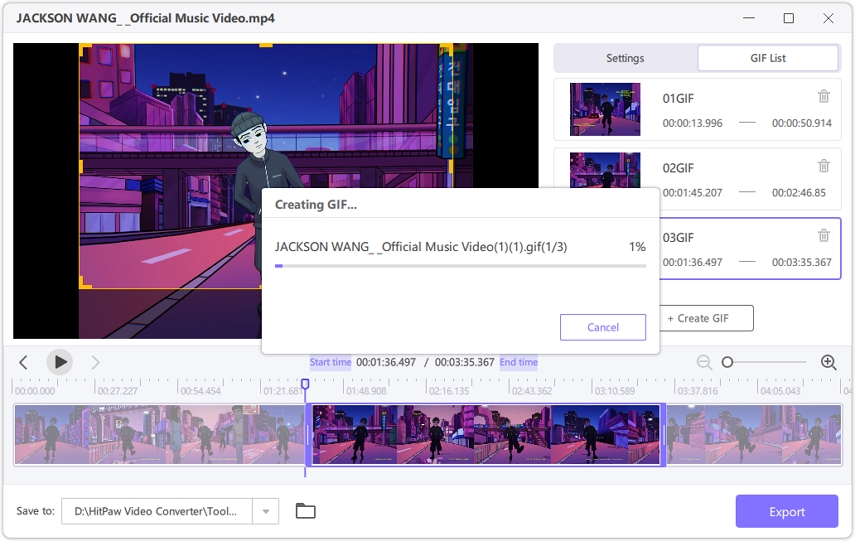
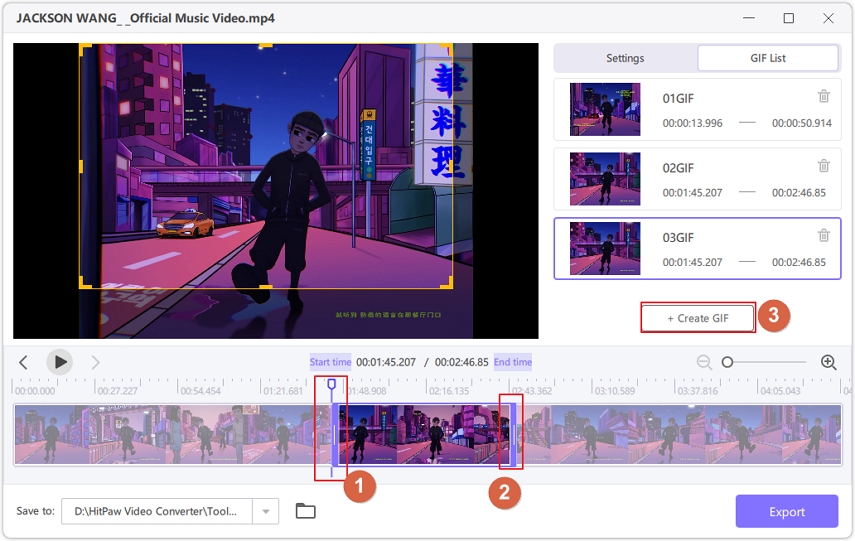
There are two drag bars on the timeline, drag the left one to adjust the start time of the GIF, drag the right one to adjust the end time of the GIF. You can click the play button to preview the segment. After confirming that there are no problems, you can click the “Create GIF” button to generate a GIF file of the clip you just set.
HitPaw Univd supports batch create GIFs. You can select a new segment you want and click “Create GIF” to create a new GIF.
Step 4: Export GIFs
Once you’ve created all GIFs you want from the video, you can click the Export button in the lower right corner to export the GIFs.
