Full Guide to Davinci Resolve Merge Clips
A camcorder is a portable electronic device that combines a video camera and a video recorder. It allows users to capture high-quality videos on the go. When editing these videos, you might need to merge multiple clips into one cohesive file. Here's a comprehensive guide on how to merge clips in DaVinci Resolve.
Part 1. How to Merge Clips in Davinci Resolve?
DaVinci Resolve is a powerful video editing software widely used by professionals and enthusiasts alike. One of its essential features is the ability to merge multiple clips into a single video seamlessly. This process is beneficial for creating a continuous sequence, enhancing the storytelling aspect of your video projects. Follow these detailed steps to merge clips in DaVinci Resolve:
Step-by-Step Guide to Merging Clips in DaVinci Resolve
Step 1: Import Your Clips
- Open DaVinci Resolve and create a new project.
- Go to the "Media" tab at the bottom of the interface.
- Click on the "Import Media" button or drag and drop your video clips into the Media Pool.
Step 2: Add Clips to the Timeline
- Switch to the "Edit" tab.
- Drag and drop the clips from the Media Pool to the timeline in the desired order.
Step 3: Align and Trim Clips
- Arrange the clips on the timeline, ensuring they are placed sequentially.
- Use the trimming tools to adjust the start and end points of each clip for a smooth transition.
Step 4: Merge Clips
- Select all the clips on the timeline by clicking and dragging to highlight them, or by pressing `Ctrl` (or `Cmd` on Mac) and clicking each clip.
- Right-click on the selected clips and choose "New Compound Clip" from the context menu.
- Name the compound clip and click "Create."
Step 5: Export the Merged Clip
- Go to the "Deliver" tab at the bottom.
- Choose the desired export settings, including format and resolution.
- Click on "Add to Render Queue" and then "Start Render" to export the merged clip.
By following these steps, you can easily merge clips in DaVinci Resolve, creating a seamless video that enhances your project's flow and storytelling. Whether you're combining clips for a short film, a vlog, or any other video project, DaVinci Resolve provides a comprehensive set of tools to achieve professional results.
Part 2. The Best Alternative to Davinci Resolve to Merge Clips
For users looking for the best alternative to Davinci Resolve, HitPaw Univd (HitPaw Video Converter) stands as a reliable choice. HitPaw Univd allows its users to convert, as well as edit videos, or merge videos into one without any compromise in the quality, providing a hassle-free conversion experience.
Why Choose HitPaw Univd
- HitPaw Univd maintains the original quality of the file and provides excellent quality outputs.
- HitPaw Univd provides reliable customer service and regular updates, so that users get a seamless conversion experience.
- HitPaw Univd provides fast conversions without compromising on quality, making it an ideal choice.
- HitPaw Univd supports a wide range of output formats, increasing its versatility.
- HitPaw Univd consists of a user-friendly interface, making navigation easy for users of all skill levels.
Steps to to Merge Clips
Step 1 —Navigate to the official website of HitPaw Univd and download it. Install HitPaw Univd on your computer and then open it.
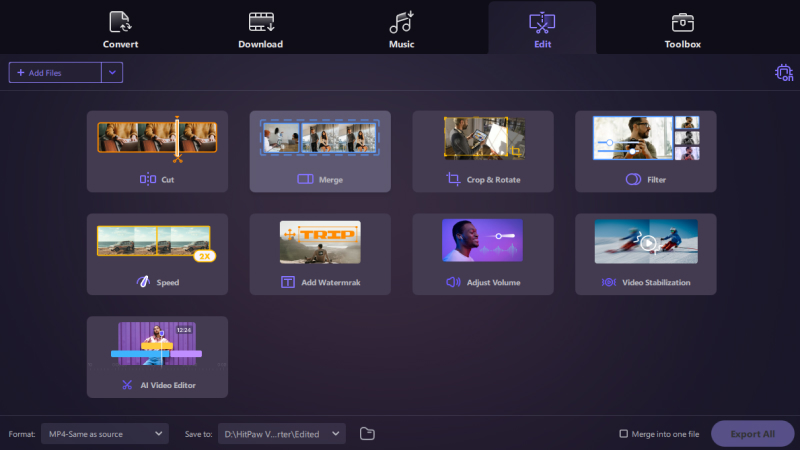
Step 2 —Click on the "Edit" button and choose "Merge" to import the videos you want to combine with.

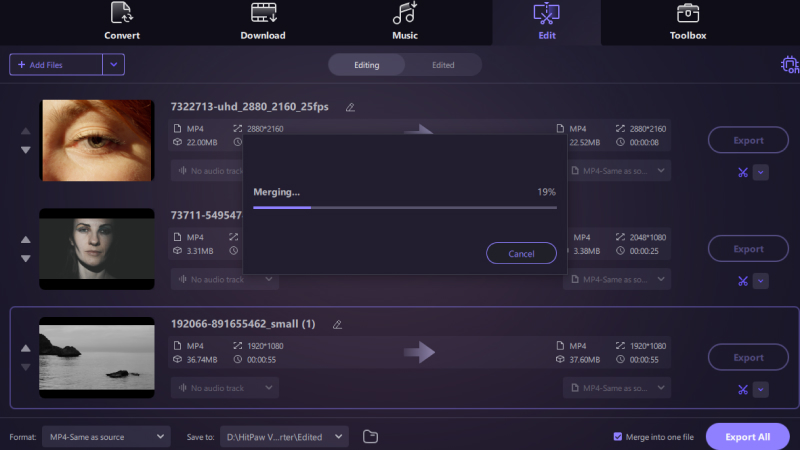
Step 3 —After importing the videos, click "Convert All" to export the merged one.

Step 4 —Finally find "Edited" to check your merged projects which are saved on your somputer.

Watch the following video to learn more details:
Part 3. Pro-Tips. Why Is Davinci Resolve So Popular?
DaVinci Resolve has become a go-to video editing software for both professionals and enthusiasts. Its popularity stems from its comprehensive set of features, user-friendly interface, and powerful capabilities that cater to a wide range of video production needs. Here are three main reasons why DaVinci Resolve stands out in the world of video editing.
1. Advanced Color Grading
One of the most renowned features of DaVinci Resolve is its advanced color grading capabilities. The software offers a wide array of tools for color correction and grading, allowing editors to enhance the visual appeal of their videos. Users can adjust hue, saturation, and luminance with precision, apply secondary color corrections, and use powerful color wheels and curves. The ability to achieve cinematic looks and intricate color adjustments makes DaVinci Resolve a favorite among colorists and filmmakers.
2. Comprehensive Editing Tools
DaVinci Resolve provides a robust set of editing tools that cater to all stages of post-production. From basic cutting and trimming to complex effects and transitions, the software offers everything needed for high-quality video editing. It supports multi-cam editing, keyframe animation, and a variety of effects that enhance the creative possibilities. Additionally, the intuitive interface and customizable workspace make it accessible to both beginners and advanced users, streamlining the editing process.
3. Integrated Post-Production Workflow
DaVinci Resolve stands out for its integrated post-production workflow, combining editing, color grading, visual effects, and audio post-production in a single application. This seamless integration eliminates the need to switch between different software, saving time and ensuring consistency across all stages of production. The Fusion module offers powerful visual effects and motion graphics, while Fairlight provides professional-grade audio editing tools. This all-in-one approach makes DaVinci Resolve a versatile and efficient choice for video production.
Part 4. FAQs of DaVinci Resolve Merge Clips
Q1. How to sync two clips in DaVinci Resolve?
- Import Clips: Bring your clips into the Media Pool.
- Select Clips: Highlight the clips you want to sync.
- Auto Sync Audio: Right-click on the selected clips, go to Auto Sync Audio, and choose Based on Waveform or Based on Timecode.
- Check Sync: Move the synced clips to the timeline and verify the synchronization.
Q2. How to overlay clips in DaVinci Resolve?
- Import Clips: Load your clips into the Media Pool.
- Add Clips to Timeline: Drag the first clip to the timeline track (e.g., Video Track 1).
- Add Overlay Clip: Drag the second clip to a higher timeline track (e.g., Video Track 2).
- Adjust Opacity and Position: Select the overlay clip and adjust the opacity and position.
Conclusion
Merging clips in DaVinci Resolve is a straightforward process that enhances your video projects' flow and storytelling. With its advanced features and user-friendly interface, DaVinci Resolve remains a top choice for video editors.
For an all-in-one solution to convert and edit your videos, consider using HitPaw Univd. It offers powerful tools and seamless performance to meet all your video editing needs.


 HitPaw Edimakor
 HitPaw VikPea (Video Enhancer)


Share this article:
Select the product rating:
Joshua Hill
Editor-in-Chief
I have been working as a freelancer for more than five years. It always impresses me when I find new things and the latest knowledge. I think life is boundless but I know no bounds.
View all ArticlesLeave a Comment
Create your review for HitPaw articles