Easy Guide on How To Remove Background Noise From Audio Recording
Podcasts gained increasing popularity in the recent years. And hence, a number of content creators shifted their attention in creating podcast. One of the major things to be careful about while creating podcasts is the background noise. And hence, people always tend to know different methods of knowing how to remove background noise from audio recording. If you are one of the users looking for different ways to remove noise from recording, then this is the right place.
Part 1. Best Background Noise Remover to Clean Audio Recording
An ideal background noise remover makes things much simpler for users to remove background noise from audio recording. One such tool is HitPaw Univd (HitPaw Video Converter). This tool efficiently get rids of background noise and allows users to get the best output in just one click. The tool easily separates vocals that contains noise so that users can delete it from the original audio.
- Automatically remove wind noise, humming or crowd noise
- Remove background noise from music, song, soundtrack, recording
- Make your audio sound flawless and crystal-clear
- Remove noise from audio with just one mouse click
Follow the below steps to know how to take background noise out of a recording using this tool.
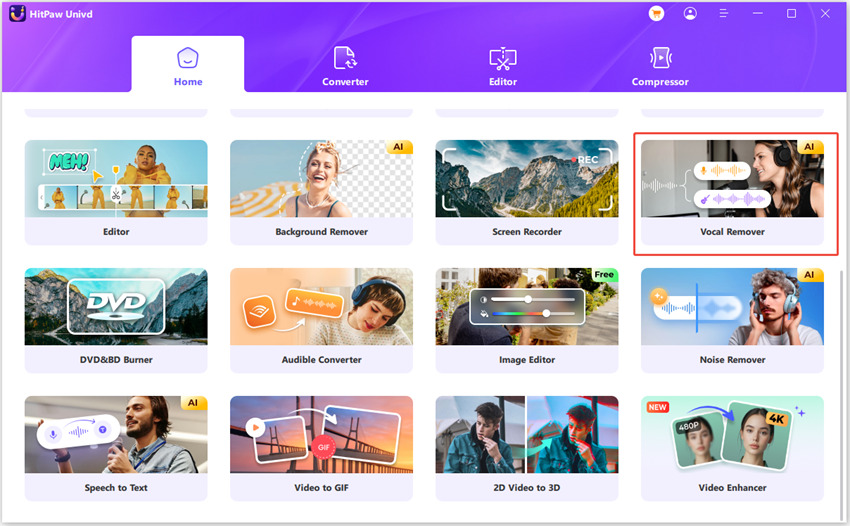
Step 1: Download, install, and launch HitPaw on your device. Navigate to Toolbox >> Vocal Remover option.

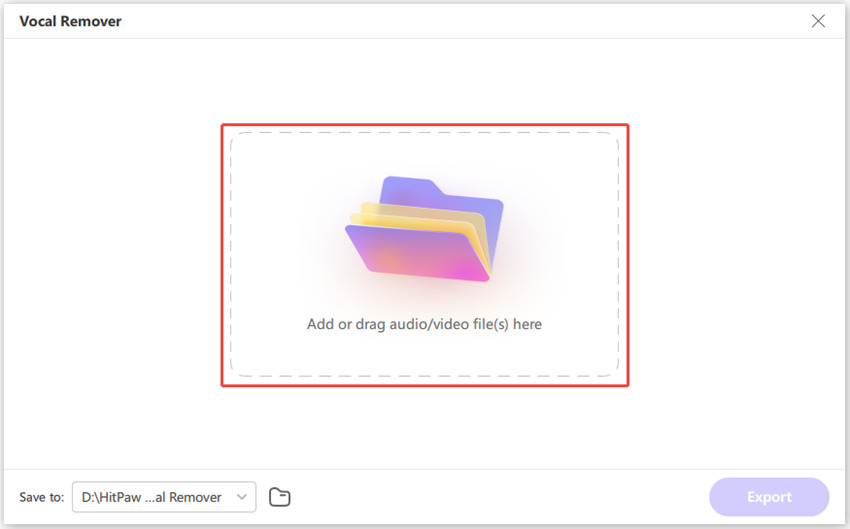
Step 2: Now, add your audio or video by dragging the files into Vocal Remover.

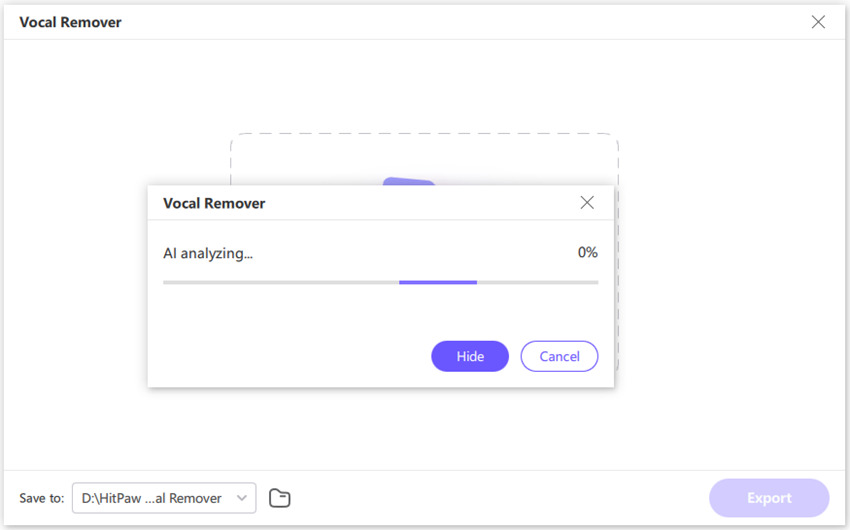
Step 3: Next, the AI will start analyzing the file automatically.

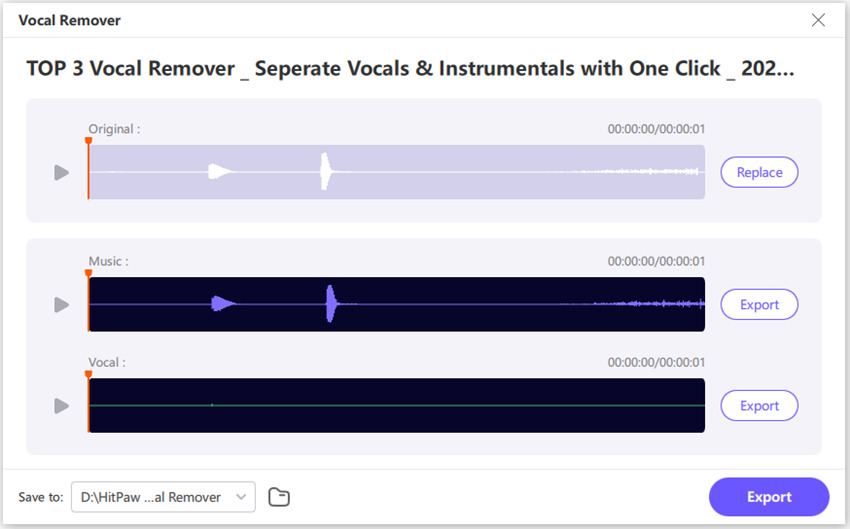
Step 4: Once the analysis is done by the tool, users will be shown two audio tracks—vocal track and instrumental track. Users can export either once them, or both of them.

Part 2. How to Take Background Noise Out of a Recording in Audacity
Audacity is another tool that can be used for removing background noise from audio recording. The tool is simple to use and is sufficient to get rid of background noise. Although the tool does not offer enhanced features as that of HitPaw. Follow the below steps to know how to get remove noise when recording using this tool.
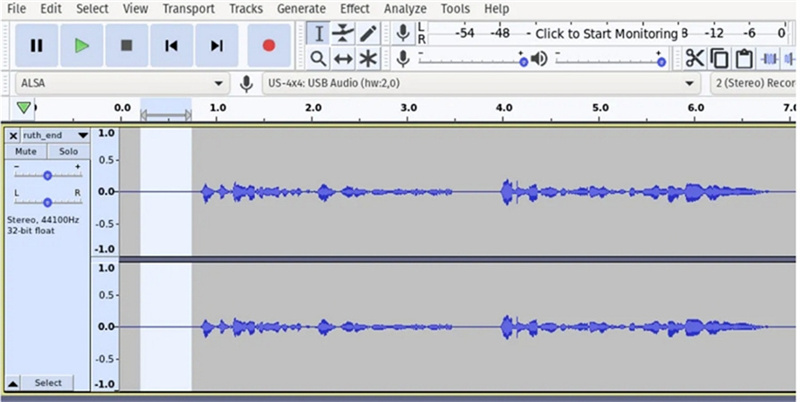
1. Launch Audacity and create a new file. Next, go to File >> Import and choose the audio file that you wish to remove voice recorder noise cancelling from.

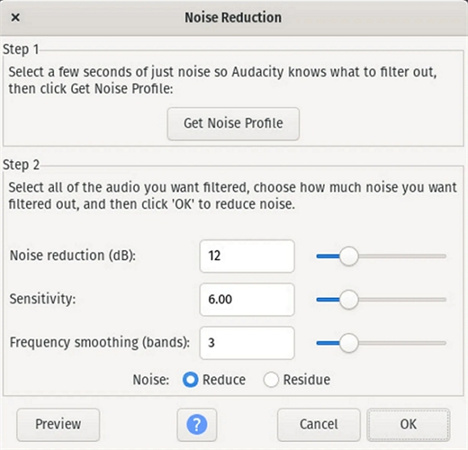
2. Choose the silent section of the audio so it is just noise. Navigate to the effects menu and go to the noise removal section. This will open a pop up with Get noise profile option.

- 3. Select and highlight all the audio you wish to remove noise from. Next, go to the effects menu and choose noise removal option in the menu.
- 3. Lastly, click OK to know how to get rid of humming noise when recording. To save the audio, click File >> Export and choose the file type. Users can export the file to MP3 or WAV format.
Part 3. How to Remove Background Noise from Voice Recording On iPhone
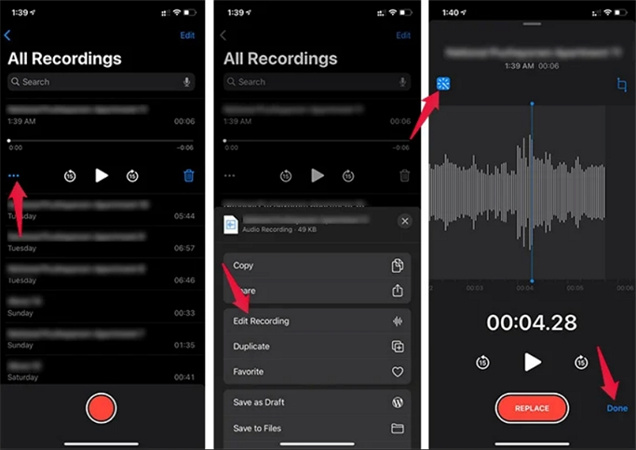
Apple users have one more option to know how to screen record without background noise. With the launch of iOS 14 and iPad OS 14, users get the Enhanced Recording feature in the Voice Memos app, which acts as a voice recorder with noise cancellation feature. This basically removes the background noise and echo from the audio files. Follow the below steps to know how to use this app.
- 1 .Open the Voice Memos app on your iPhone.
- 2 .Choose the voice recording from which you wish to know how to get rid of keyboard noise when recording.
3 .Next, click the three-dot menu on the left side of your screen and go to Edit Recording option and click the magic wand icon.

- 4 .The Voice Memo app processes the audio to reduce background noise. Play the recording to preview the edits and click Done to save the end clip.
- 5 .To save clip as a new separate file, users can create a duplicate before applying the Enhancing Recording option.
Tips: How to Record Audio without Background Noise
Follow the below useful tips to know how to record audio without background noise.
1. Reduce Subject-to-Microphone Distance, Increase Microphone to Noise Distance
Reducing the distance between you and your microphone has a great affect on the audio output. This reduces the noise background greatly and enhances the audio output quality.
2. Eliminate Background Noise Sources
While recording, make sure that you select to record audio is a sound and quite environment for quality output. To enhance your recording quality, find a small and quiet room away from:
- Traffic
- HVAC units
- White noise
- External hard drives
- Air conditioners
Users can also enhance their room tone by selecting a space with natural sound absorbers such as rugs, curtains, couches, and carpets.
3. Use Directional Microphones
As the name suggests, directional microphones are those microphones that collects the voice from a specific direction. Regular mics are polar microphones that collect noise from different directions, thereby capturing noise as well. Hence, it is essential to use directional microphones so that only your voice is captured.
Conclusion
In short, we just had a look at different ways of removing background noise from audio recording. The best way is to use HitPaw Univd that efficiently get rids of background noise and allows users to get the best output in just one click.



 HitPaw Edimakor
 HitPaw VikPea (Video Enhancer)


Share this article:
Select the product rating:
Joshua Hill
Editor-in-Chief
I have been working as a freelancer for more than five years. It always impresses me when I find new things and the latest knowledge. I think life is boundless but I know no bounds.
View all ArticlesLeave a Comment
Create your review for HitPaw articles