Step by Step Guide: How to Get Rid of Background Noise in GarageBand
GarageBand, Apple's gift to Mac, iPad, and iPhone users, offers a powerful yet free digital audio workstation (DAW). It's a handy tool for refining your recordings, but there's a common challenge we've all faced - background noise.
There's nothing worse than capturing a moment of musical or vocal brilliance only to discover unwanted noise muddling your masterpiece. That's where GarageBand comes to the rescue.
In this guide, we'll unveil a simple yet effective setting within GarageBand to bid farewell to those pesky background noises and ensure your final product shines with pristine audio quality.

Part 1. What Does Noise Reduction Do in Audio?
In the world of audio, quality is a shining gem, and when it comes to podcasts, it's no different. This part delves into the magic of noise reduction and why it's essential. Background noise can be a sneaky intruder, disrupting the pristine clarity of your podcast. It's like static on a TV screen – annoying and distracting.
So, what's the remedy? Noise reduction! It's the hero who steps in to save the day. By eliminating those unwanted background sounds, your podcast instantly dons a professional cape. Your audience gets to savor a listening experience that's crystal clear, smooth, and immersive.
Why does this matter? Well, a happy audience is the golden ticket. When your listeners enjoy a distraction-free podcast, they're more likely to stick around. They might even binge-listen to your other episodes, share with friends, and leave those heartwarming comments and reviews that every podcaster dreams of. So, noise reduction isn't just about sound; it's about building a happy and loyal podcast community.
Part 2. How to Reduce Noise and Hiss from Your Podcast in GarageBand
In GarageBand, two approaches can be used to reduce and remove hiss, each resulting in a cleaner audio file.
1. GarageBand Noise Gate
If you've ever used or heard of a Noise Gate but need help with how to use it, this section is here to help you understand the basics, specifically in the context of GarageBand. A Noise Gate is a valuable tool for audio enthusiasts. It sets a threshold for a track's volume, meaning any audio below that threshold is automatically reduced.
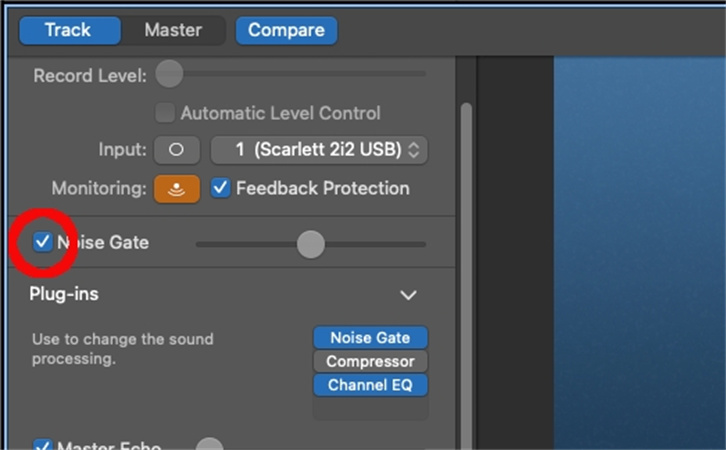
To set up a Noise Gate in GarageBand- Select the Track: Begin by choosing the track where you want to reduce noise.
- Open Smart Controls: Press 'B' on your keyboard to access the Smart Controls.
On the left of the window, you will see the Noise Gate option. Check the box to enable the noise gate.

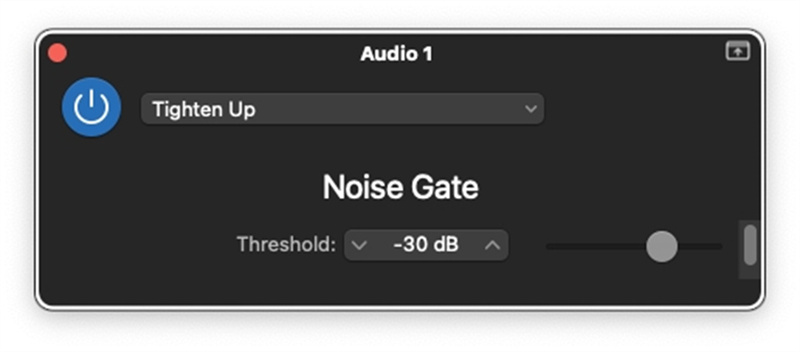
- Click on Plug ins and select Noise Gate from the drop-down menus. This will bring up a series of preset options.
Choose a Preset: Scroll through the noise gate presets and opt for the "Tighten Up" category. You will see that this sets the noise gate threshold level to -30 dB. All sounds under this volume will be eliminated.

With these simple steps, you can enhance your audio tracks in GarageBand by using the Noise Gate feature. It's a handy tool for achieving cleaner and more professional sound quality in your music or recordings.
2. How to Use Noise Gate In GarageBand Noise Reduction
In this section, we'll walk you through the steps to manually reduce background noise in GarageBand, ensuring that your audio sounds clean and professional.
- 1.Start by opening your project in GarageBand and selecting the audio track you want to edit.
- 2.Locate the Noise Gate dial and activate it. Adjust the level by turning the dial to set the threshold for noise reduction. Be cautious not to put it too high, as this may affect your audio quality.
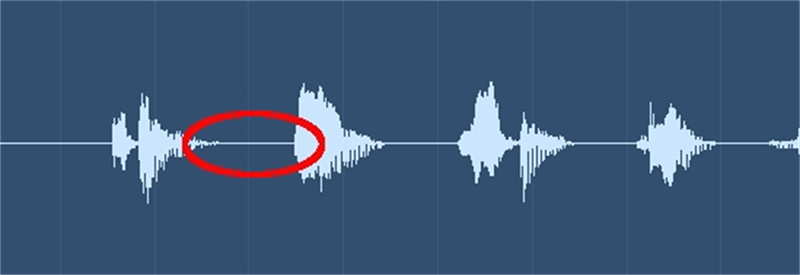
3.To have a closer look at your audio, use the zoom feature on your trackpad. This will allow you to see even the tiniest waveforms, making it easier to identify unwanted background noises.

- 4.Carefully isolate the sections of the audio that you wish to remove. You can do this by selecting the segment and using the "Command + T" key combination to cut it out. This is particularly useful for eliminating breaths or other unwanted sounds between speech or singing.
- 5.After removing unwanted audio, apply the Noise Gate to the remaining sections. Be mindful not to overuse it, as setting the threshold too high may inadvertently cut out parts of your voice.
- 6.Watch out for words with the letter "s" as they can sound choppy when using the Noise Gate. Adjust the settings to maintain the natural flow of your voice.
- 7.Use the Noise Gate dial to make additional adjustments to background noise without compromising the overall audio quality. Finding the right balance is key.
By following these steps, you can effectively reduce background noise in your Garageband audio projects. Whether you're a podcaster, musician, or content creator, mastering the Noise Gate feature can significantly enhance the quality of your recordings. So, say goodbye to unwanted noise and hello to cleaner, professional audio!
Part 3. Manually Remove Background Noise from Video and Audio
While GarageBand noise gates offer a practical solution to remove hiss from recordings; but sometimes it can be a bit of a blunt instrument. In such cases, a manual approach is necessary, and that's where HitPaw Univd (HitPaw Video Converter) comes to the rescue.
This software employs advanced AI technology to effectively eliminate unwanted background noise from both video and audio recordings, ensuring a clear and crisp final result.
Some of the Outstanding Features in HitPaw Univd
- Equipped with an AI Noise Remover feature that makes the process of noise reduction incredibly simple and intelligence.
- Remove background noise from any audio and videos.
- One-click operation, 100% accuracy.
- Available on both Windows and Mac systems.
- 20+ other features integrated including audio converter, music downloader from Spotify, Deezer, Apple Music, and Tidal, and so forth.
The Steps to Remove Noise in HitPaw Univd
Here's a step-by-step guide on how to use this feature:
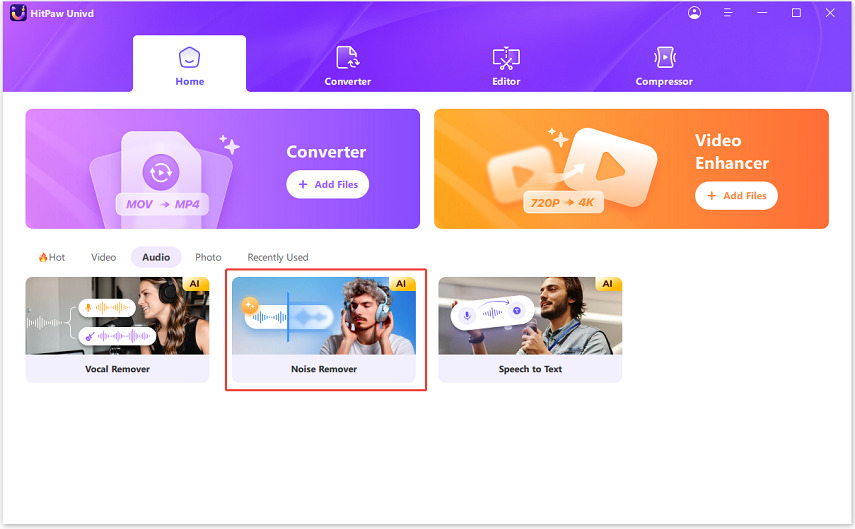
Step 1: Download the AI Noise Remover Feature
Begin by installing and launching the HitPaw Univd on your computer. Once the program is up and running, navigate to the Toolbox section, where you can easily download the Noise Remover feature.
Step 2: Add an Audio or Video File
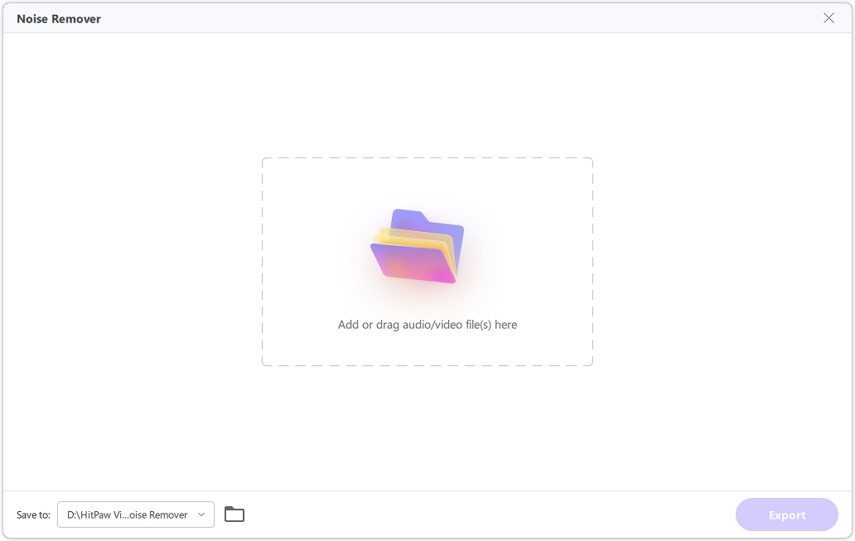
After successfully downloading the AI Noise Remover feature, you'll be directed to the main screen. Here, you can add your audio or video file by either clicking the 'Add' button or simply dragging and dropping the file into the program.
Step 3: Removing Background Noise
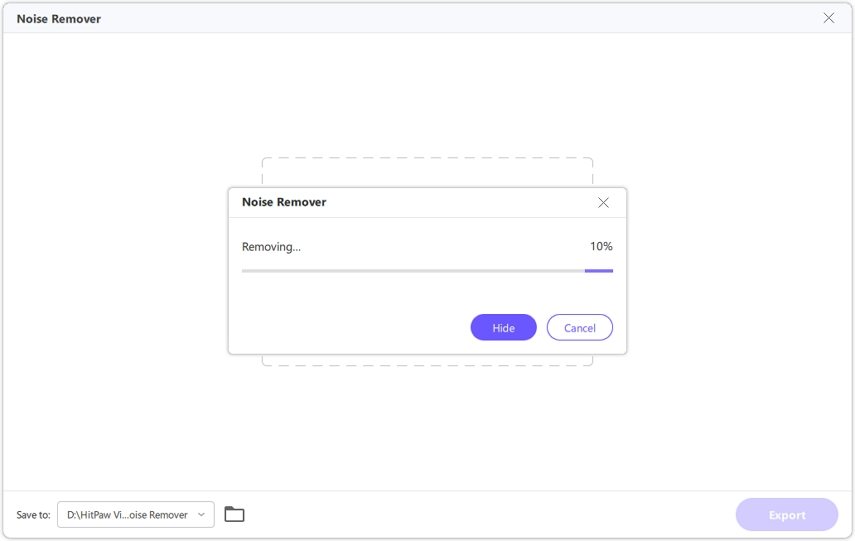
Once your file is loaded, HitPaw's AI Noise Remover feature will automatically kick into action. This advanced AI algorithm will swiftly identify and eliminate any unwanted background noise from your audio or video recording.
Step 4: Preview and Export
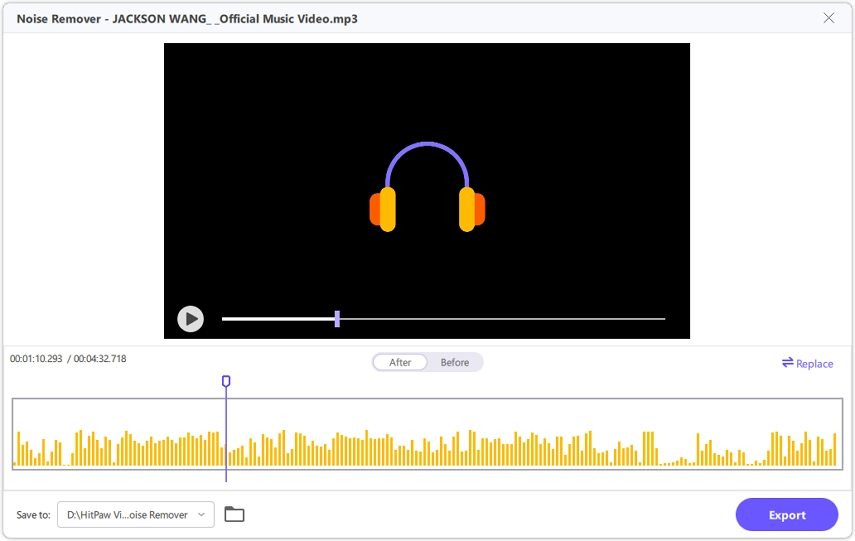
After the AI Noise Remover has done its job, you can take a moment to preview and compare the recording before and after noise removal. This step allows you to ensure that the background noise has been effectively eliminated, leaving your audio or video crystal clear. If you are satisfied with the results, click the 'Export' button to save your file, now free from the distractions of background noise.
In case you want to work on another file, simply click the 'Replace' button to repeat the process. HitPaw Univd's AI Noise Remover feature offers an efficient and straightforward solution to enhance the quality of your audio and video recordings without the hassle of dealing with background noise manually.
The Bottom Line
Getting rid of background noise in GarageBand is a key to enhancing your audio projects. By following the simple steps outlined in this guide, you can ensure your recordings sound crisp and professional. Remember to use the Noise Gate effect to reduce unwanted noise between your audio clips, and consider utilizing the Equalization tool to fine-tune your sound.
Meanwhile, if you want to manually remove background noise from a recording or audio, HitPaw Univd's AI Noise Remover is designed to cater to a wide range of users, from content creators looking to polish their videos to professionals aiming for pristine audio recordings. Its user-friendly interface and advanced AI technology make the process of removing background noise a breeze.




 HitPaw Edimakor
 HitPaw VikPea (Video Enhancer)


Share this article:
Select the product rating:
Joshua Hill
Editor-in-Chief
I have been working as a freelancer for more than five years. It always impresses me when I find new things and the latest knowledge. I think life is boundless but I know no bounds.
View all ArticlesLeave a Comment
Create your review for HitPaw articles