Full Guide on Adobe Media Encoder Video Compression
Adobe Media Encoder serves as a pivotal tool in the realm of video compression, enabling users to optimize file sizes while preserving quality. As an integral component of Adobe's Creative Suite, it offers a comprehensive suite of features tailored for efficient encoding tasks.
This blog post aims to provide an insightful exploration of Adobe Media Encoder, elucidating its functionalities, supported formats, and compression techniques. Whether you're a seasoned professional or a novice in the field, this post aims to equip you with the knowledge and tools necessary for effective video compression.
Part 1. Understanding Adobe Media Encoder
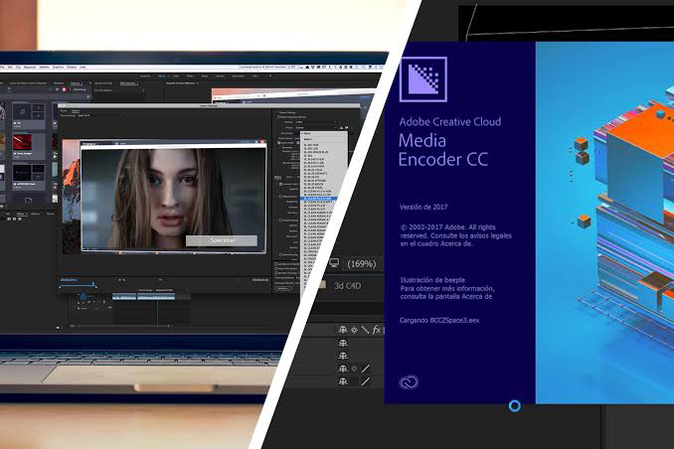
Adobe Media Encoder offers a robust set of features and functionalities tailored to streamline the video compression process. Adobe Media Encoder provides a variety of encoding presets optimized for different platforms and devices. Users can easily select the appropriate preset based on their output requirements, whether it's for web streaming, mobile devices, or professional broadcasting.
In terms of supported video formats and codecs, Adobe Media Encoder boasts comprehensive compatibility to accommodate a wide range of needs:
Video Formats: It supports popular video formats such as MP4, MOV, AVI, WMV, and more. This ensures flexibility when working with different types of media files.
Codecs: Adobe Media Encoder supports a multitude of codecs for both video and audio compression. Some of the commonly used codecs include H.264, H.265 (HEVC), ProRes, AAC, and MP3, among others. This broad codec support enables users to choose the most suitable option based on their specific requirements.
Part 2. Step-by-Step Guide to Compress Videos in Adobe Media Encoder
Steps to Compress Video with Adobe Media Encoder
1. Launch Adobe Media Encoder:Begin by opening Adobe Media Encoder on your computer.
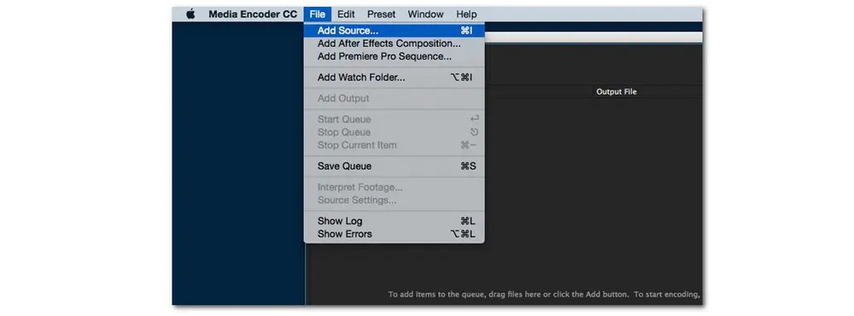
2. Import Video Files:Click on the "+ Add" button to import the video files you wish to compress into the queue.

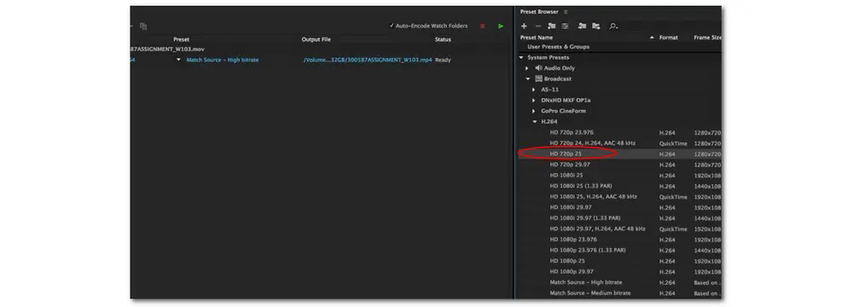
3. Select Output Preset:Choose an appropriate output preset from the preset dropdown menu. You can select presets optimized for various platforms or customize settings according to your requirements.

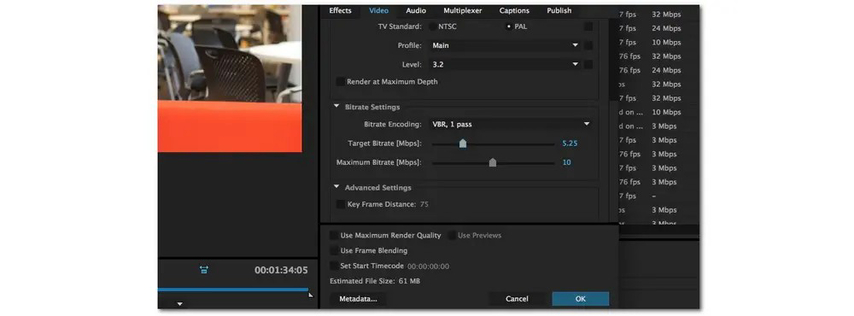
4. Adjust Settings:Fine-tune compression settings such as bitrate, resolution, codec, and others to achieve the desired balance between file size and video quality.

5. Queue the Compression:Once settings are configured, click on the "Start Queue" button to initiate the compression process. Adobe Media Encoder will start encoding the videos based on your settings.

6. Monitor Progress:Monitor the progress of compression tasks in the queue window. You can also pause or cancel tasks as needed.
7. Export Compressed Videos:Once compression is complete, locate the compressed videos in the specified output folder.
Pros and Cons of Adobe Media Encoder
Pros
- Versatility: Adobe Media Encoder supports a wide range of video formats and codecs, making it suitable for various compression needs.
- Integration: Seamlessly integrates with other Adobe Creative Suite applications, facilitating a smooth workflow for professionals.
- Batch Processing: Efficiently handles batch processing, allowing users to compress multiple videos simultaneously.
Cons
- Resource Intensive: Adobe Media Encoder can be resource-intensive, especially when processing large video files or multiple tasks simultaneously.
- Learning Curve: It may have a steep learning curve for beginners, requiring time to familiarize oneself with its features and functionalities.
- Cost: Requires a subscription to Adobe Creative Cloud, which may be a barrier for some users.
In summary, Adobe Media Encoder offers robust capabilities for video compression, with extensive customization options and seamless integration within the Adobe ecosystem. However, it may require some time investment to master its features, and the subscription cost could be prohibitive for some users.
Part 3. Best Alternative Solution to Compress Videos
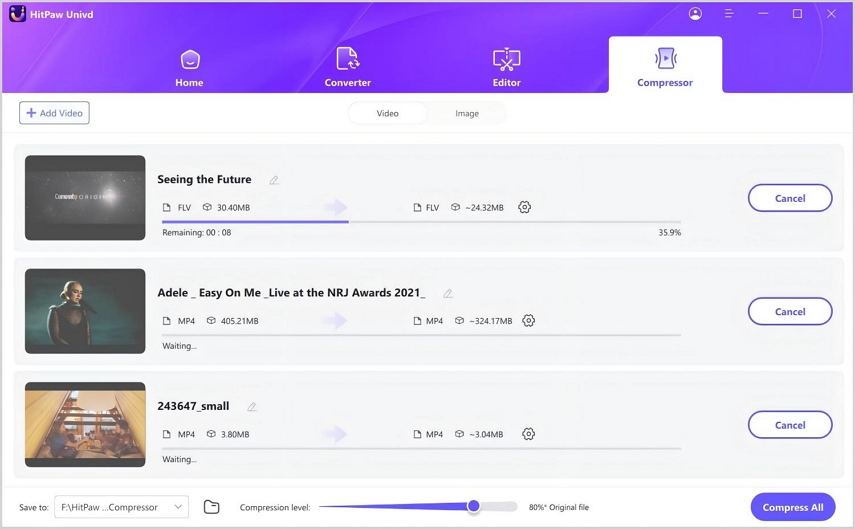
HitPaw Univd (HitPaw Video Converter) emerges as a dependable alternative to Adobe Media Encoder, offering a plethora of features tailored to video compression needs. Here's an in-depth exploration of its main features and a comprehensive guide on how to compress videos using HitPaw Univd.
Main Features of HitPaw Univd
- Supports a vast array of video formats, ensuring compatibility with various devices and platforms.
- Maintaining video quality while reducing file size.
- Compress multiple videos simultaneously, saving you time and effort.
- Delivers speedy results without compromising quality.
- Compatible with both Windows and Mac operating systems.
How to Compress Video Using a HitPaw Univd?
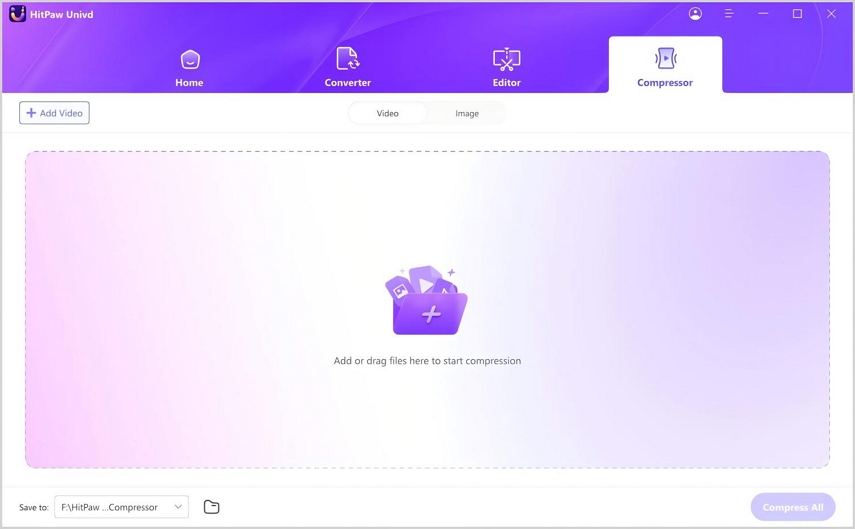
1. Download and Install HitPaw Univd:Begin by downloading HitPaw Univd from the official website and follow the installation instructions.

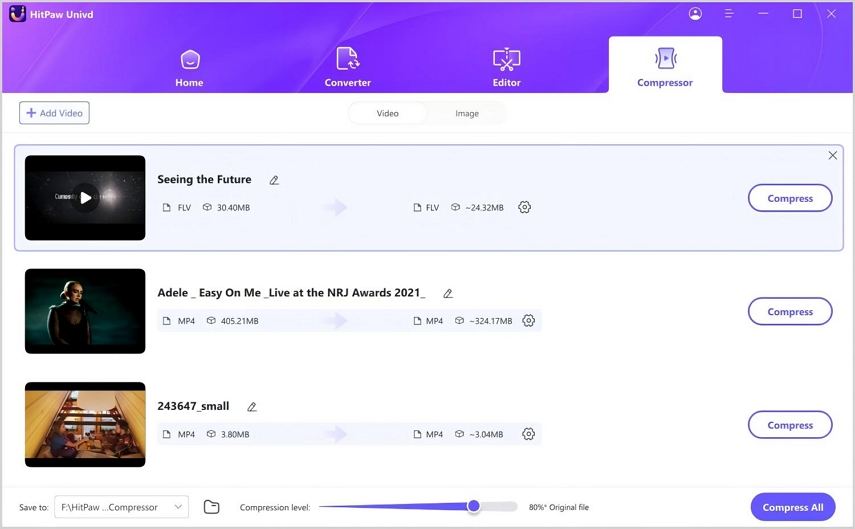
2. Add Videos:Click on the "Add Files" button to import the videos you want to compress into HitPaw Univd. Alternatively, you can drag and drop the files directly into the interface.

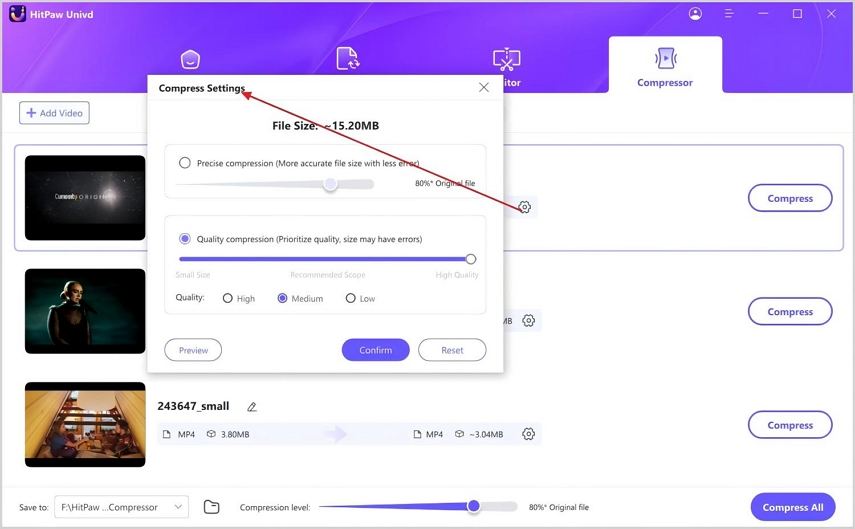
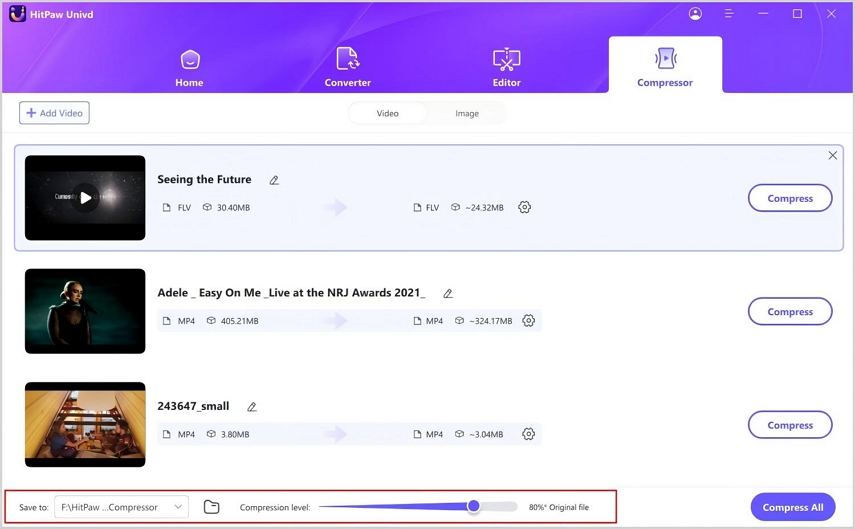
3. Select Compression Settings:Customize compression settings according to your preferences. Adjust bitrate, resolution, and other parameters to achieve the desired balance between file size and quality.

4. Choose Output Format:Select the desired output format for the compressed videos. HitPaw Univd supports a wide range of formats, ensuring compatibility with various devices and platforms.

5. Start Compression:Once you've configured the settings, click on the "Convert" button to initiate the compression process. HitPaw Univd will start compressing your videos, delivering high-quality results in a fraction of the time.

Watch the following video to learn more details:
HitPaw Univd simplifies the video compression process, offering a user-friendly interface and robust features tailored to meet the diverse needs of users. Whether you're a novice or a seasoned professional, HitPaw provides the tools you need to compress videos efficiently and effectively.
Part 4. FAQs about Adobe Media Encoder Compressing Videos
Q1. How do I ensure optimal compression settings in Adobe Media Encoder?
A1. Adjust bitrate, resolution, and codec settings according to your target platform and desired quality.
Q2. Can Adobe Media Encoder handle batch processing efficiently?
A2. Yes, Adobe Media Encoder excels at batch processing, allowing users to queue multiple tasks for streamlined compression.
Conclusion
In conclusion, Adobe Media Encoder serves as a versatile solution for video compression, offering a plethora of features and flexibility. However, for those seeking a user-friendly alternative, HitPaw Univd emerges as a compelling option. Whether you're a seasoned professional or a novice user, HitPaw Univd provides a seamless experience for all your compression needs. Embrace efficiency and ease with HitPaw, and elevate your video compression journey today.




 HitPaw Edimakor
 HitPaw VikPea (Video Enhancer)


Share this article:
Select the product rating:
Joshua Hill
Editor-in-Chief
I have been working as a freelancer for more than five years. It always impresses me when I find new things and the latest knowledge. I think life is boundless but I know no bounds.
View all ArticlesLeave a Comment
Create your review for HitPaw articles