How To Upscale Video to 1080 easily in 2025
Do you have old low-resolution videos that look blurry on modern screens? Whether it's a nostalgic home video or an important project, enhancing it from 480p to 1080p can significantly improve the viewing experience. In this guide, we'll introduce the best methods to upscale videos to 1080p.
Part 1. Benefits of Converting 480p to 1080p
Upscaling your video from 480p to 1080p can greatly improve its quality, making it look sharper and more polished. Here are some key reasons why you should consider using a 480p to 1080p converter:
- Enhanced Visual Quality: Upscaling increases the resolution, making the video appear more defined and detailed.
- Improved Display on Larger Screens: Low-resolution videos often look pixelated on large TVs, but upscaling removes that fuzziness.
- Better for Social Media: High-definition videos are more engaging and shareable on platforms like YouTube and Instagram.
- Professional Use: Upscaling makes your content suitable for professional environments, such as presentations or marketing materials.
- Future-Proofing: By upscaling to 1080p, you're ensuring that your video will still look great as screen resolutions continue to improve.
Part 2. Best Way to Upscale Video to 1080p in Windows & Mac
Best For: Users looking for a simple and efficient way to upscale video to 1080p and 4K, as well as other AI tools and multimedia tools are integrated.
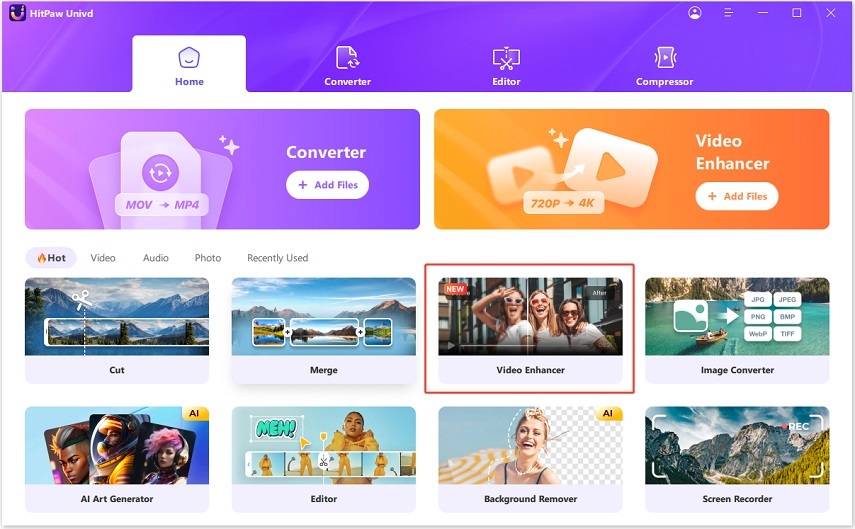
When it comes to video upscaling, HitPaw Univd stands out as the best AI-powered solution. Its Video Enhancer feature utilizes the most cutting-edge AI technology to automatically enhances your video's quality up to 1080p and even 4K. It works with various formats, and the intuitive interface makes it easy for anyone to use.
Features of HitPaw Univd

HitPaw Univd - All-in-one Video Solutions for Win & Mac
Secure Verified. 254,145 people have downloaded it.
- Upscale 480p to 1080 and 4K resolution
- Improve clarity and sharpness in faces.
- Remove noise and video compression artifact for cleaner visuals
- Support multiple video formats including MP4, MOV, AVI, TS, etc.
- Trim, cut, merge, crop, add filters, add watermarks to videos
- Auto detect and blur faces in videos
- Available on both Windows and Mac systems
Secure Verified. 254,145 people have downloaded it.
Step By Step Guide to Upscale 480p to 1080p
This guide will show you how to convert 480p video to 1080p with HitPaw Univd's Video Enhancer.
Step 1:Download and install HitPaw Univd on your computer. You can access the Video Enhancer in the "Home" tab.

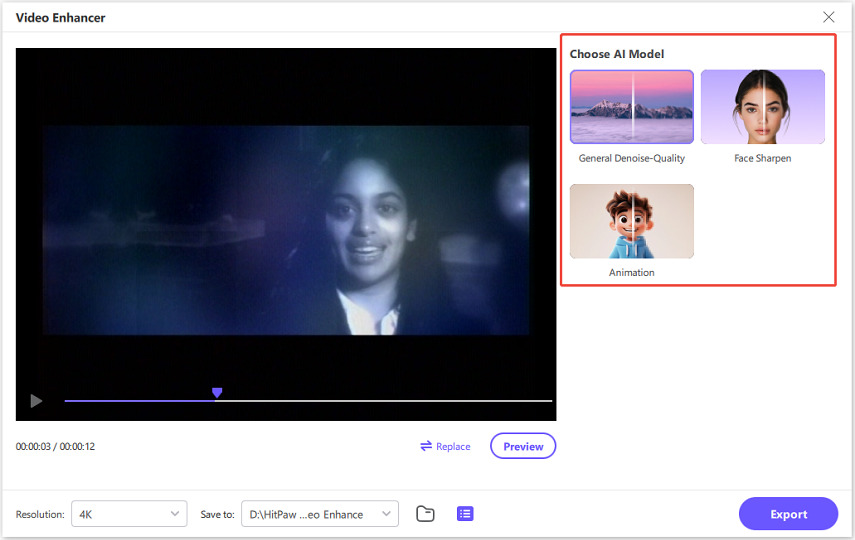
Step 2:Click the "Add Files" button to import the video you want to enhance using AI technology. HitPaw Univd supports various video formats, including MP4, AVI, MOV, MKV, M4V, and MOD.

Step 3:Once you've uploaded your video, select the most appropriate AI model based on your needs. For example, the General Denoise Model is designed to restore the visual integrity of content compromised by environmental factors or compression artefacts; while the Face Sharpen Model is perfect for improving the clarity of portrait videos.

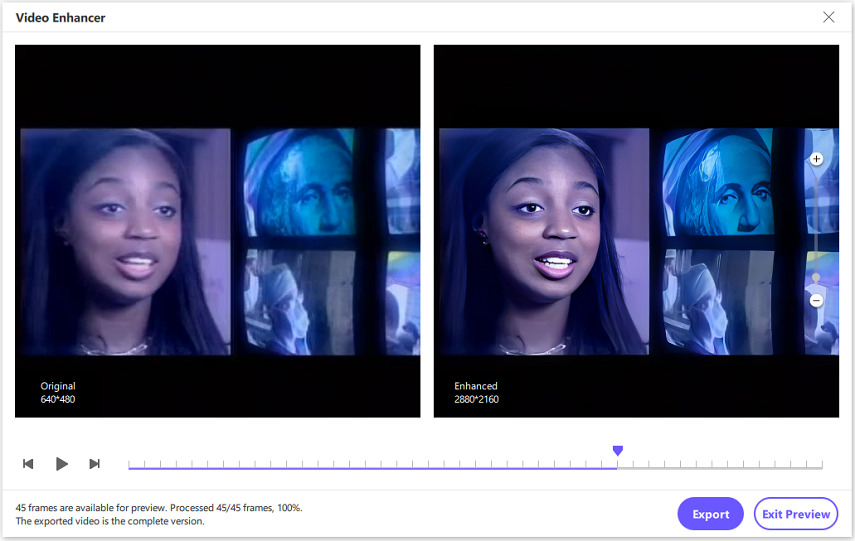
Step 4:After selecting your AI model, click the Preview button to preview the enhanced effect. This program provides free preview of the first 45 frames.

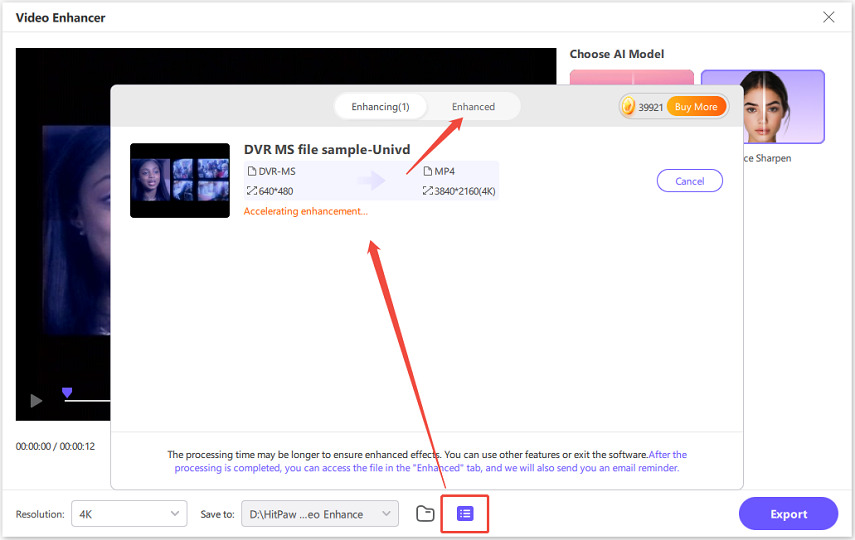
Step 5:If you are satisfied with the improvements, click the Export button to start enhancing the entire video to 1080p.

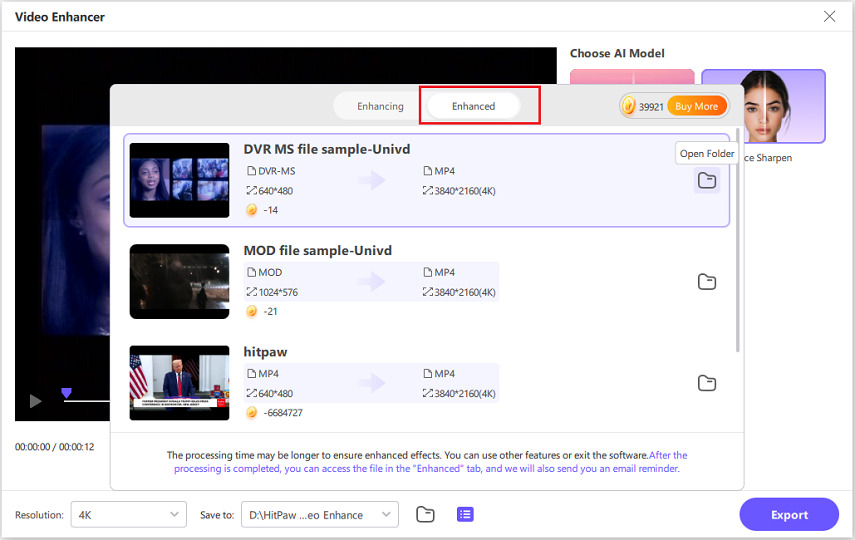
Step 6:You can find the upscaled video under the Enhanced tab once the enhancement process is completed,. Click the folder icon to access and view the high-quality video that's now ready for use.

Pros & Cons of Using HitPaw Univd
Pros
- User-friendly interface for all skill levels
- Upscale video up to 4K resolution, offering professional-grade video enhancement
- High-quality results with no distortion or blurring
- More AI features, including noise removal, vocal remover, video blur, videostabilization, and more
Cons
- Limited features available in the free version
Part 3. Alternative Methods to Convert 480p Video to 1080p
1. Adobe Premiere Pro
Best For: Professional editors who need comprehensive editing tools and high-quality upscaling.
Adobe Premiere Pro is a leading professional video editing tool that excels in upscaling 480p to 1080p. Though it lacks AI features, it allows precise manual control over video resolution, making it ideal for advanced users.
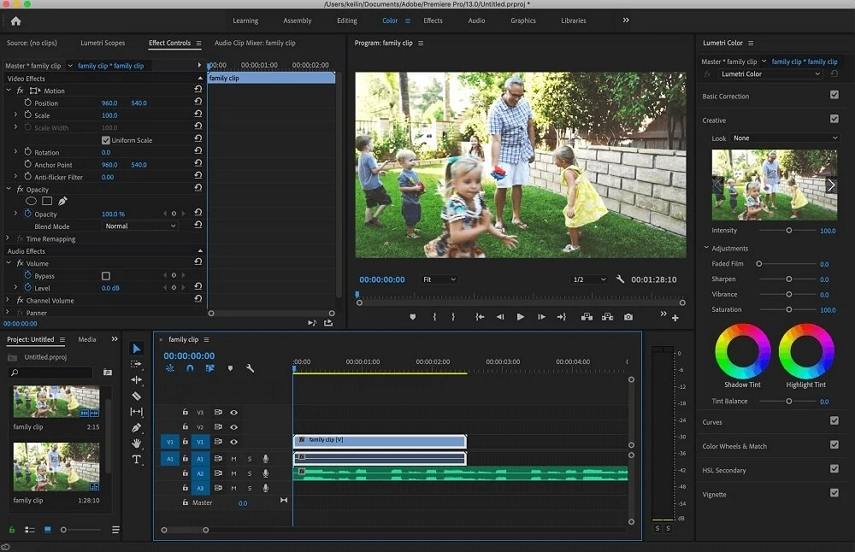
Premiere Pro offers an extensive suite of editing tools, including colour grading and audio adjustments, alongside the ability to scale up videos to meet modern HD standards. Whether you're editing or just upscaling Adobe Premiere Pro gives you control over every detail of your video project.
How to Upscale 480p to 1080p with Adobe Premiere Pro
Step 1:Begin by creating a new project in Adobe Premiere Pro, then import the 480P video you want to enhance.
Step 2:Right-click within the project window and choose "New Item" > "Sequence" to create a new sequence for your video.
Step 3:In the "New Sequence" window, navigate to the "Settings" tab, select "Custom" under Editing Mode, and input 1080P as the resolution.

Step 4:Add your video to the timeline, right-click on the thumbnail, and select "Set to Frame Size".
Step 5:Go to the Export section, select "Match Source" to align the sequence with the desired resolution, and click to start exporting the video.
Pros & Cons of Using Adobe Premiere Pro
Pros
- Advanced video editing features for fine control
- Highly customizable settings for professional output
- Supports all video formats for flexibility
- Excellent for detailed editing and color correction
- Ideal for high-end video production and upscaling
Cons
- Steep learning curve for beginners to master
- Expensive monthly subscription for full access
2. AVCLabs Video Enhancer AI
Best For: Users looking for a comprehensive AI-based solution for video upscaling and enhancement.
AVCLabs Video Enhancer AI provides a seamless solution for upscaling 480p to 1080p with its advanced AI technology. The software enhances video resolution while removing noise and improving overall quality. It also comes with additional features like video stabilization and color enhancement, making it a complete solution for video improvement.
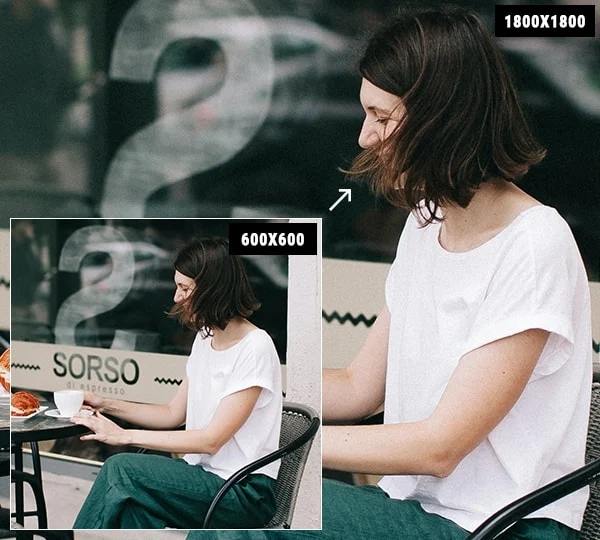
The user-friendly interface allows both beginners and experienced editors to enhance their videos effortlessly. Whether you're working with old footage or low-quality video, AVCLabs ensures professional results every time.
How to Upscale 480p to 1080p with AVCLabs Video Enhancer AI
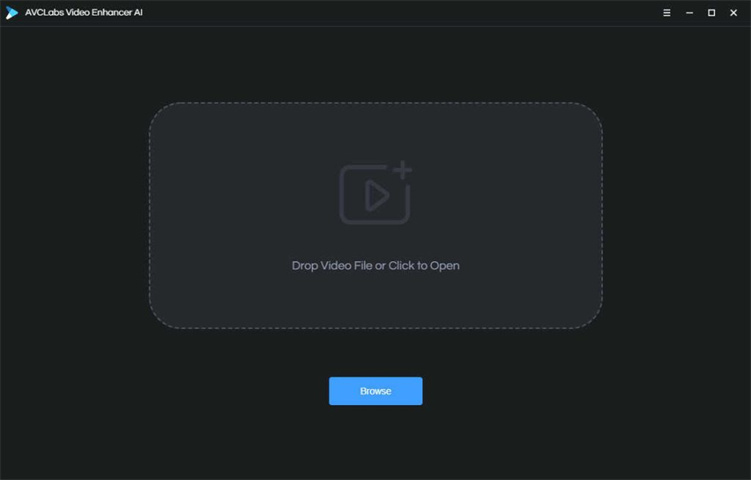
Step 1:Open AVCLabs Video Enhancer AI to begin.

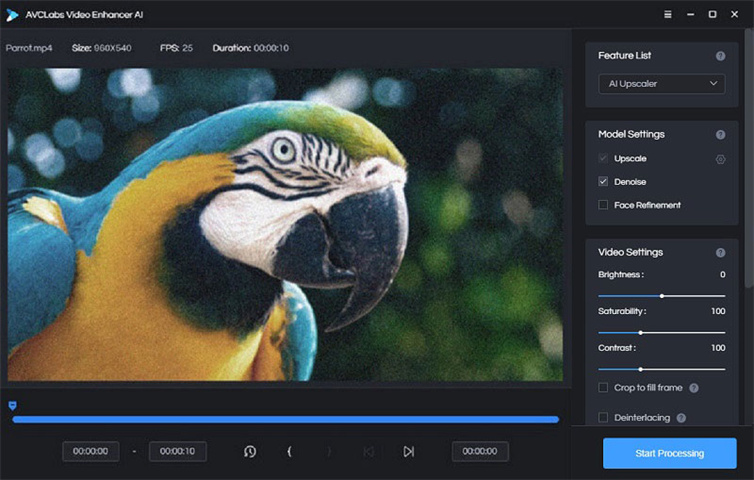
Step 2:Click "Browse" to select and import your 480P video, then choose the appropriate AI model and modify settings as necessary.

Step 3:Adjust the video settings, such as brightness, saturation, contrast, and set the resolution to 1080P.

Step 4:Click on "Start Processing" to kick off the upscaling and wait for the conversion to 1080P to finish.

Pros & Cons of Using AVCLabs Video Enhancer AI
Pros
- AI-driven technology for excellent results
- Multiple enhancement options, including noise reduction
- Easy-to-use interface for all skill levels
- Supports batch processing for faster work
- Ideal for both beginners and professionals alike
Cons
- Paid subscription required for full features
- Free version has limited capabilities and options
3. DaVinci Resolve 19
Best For: Advanced users who need professional editing features alongside upscaling.
DaVinci Resolve 19 is a powerful video editing tool renowned for its advanced color grading and video editing features. It allows users to upscale 480p to 1080p with precision, and its AI features ensure that the upscaled video retains high quality.
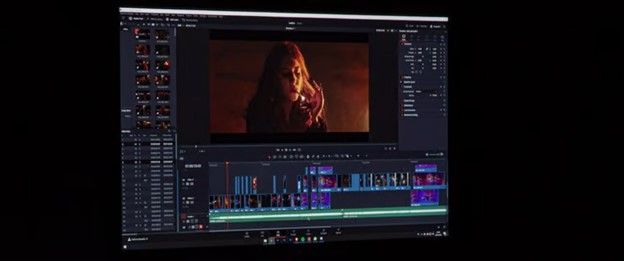
DaVinci Resolve is favored by professionals for its robust editing tools, which include multi-user collaboration and comprehensive post-production features. While it can be a bit challenging for beginners, its professional-grade tools are worth the effort for those who require top-tier video enhancement.
How to Convert 480p to 1080p with DaVinci Resolve 19
Step 1:Open DaVinci Resolve and import your 480P video into the media pool.

Step 2:Click the "Project Settings" icon located at the bottom right corner of the screen. Under the 'Master Settings' tab, change the timeline resolution to 1080P.

Step 3:Drag the video from the media pool onto the timeline.

Step 4:Open the "Inspector" window in the top right section, then adjust the zoom level in the 'Transform' settings to match the new resolution.

Step 5:Navigate to the "Deliver" tab, select your output format and desired resolution, and begin the rendering process.

Step 6:Once rendering is complete, export the video to finalize the upscaling.
Pros & Cons of DaVinci Resolve 19
Pros
- Comprehensive video editing tools for all projects
- High-quality color grading and visual effects
- AI-powered features for enhanced resolution and clarity
- Regular updates with new features for advanced users
- Best suited for professionals working on big projects
Cons
- Steep learning curve for beginners or casual users
- Requires a paid version for full features
Conclusion
While there are several ways to upscale videos, HitPaw Univd provides the most efficient and high-quality AI-powered enhancement. With its simple interface, powerful AI models, and ability to upscale videos up to 4K and 8K, it's the best choice for anyone looking to improve their video resolution quickly and effectively.





 HitPaw FotorPea
 HitPaw VikPea (Video Enhancer)
 HitPaw VoicePea


Share this article:
Select the product rating:
Joshua Hill
Editor-in-Chief
I have been working as a freelancer for more than five years. It always impresses me when I find new things and the latest knowledge. I think life is boundless but I know no bounds.
View all ArticlesLeave a Comment
Create your review for HitPaw articles