How To Fix Adobe Media Encoder Not Installed Error
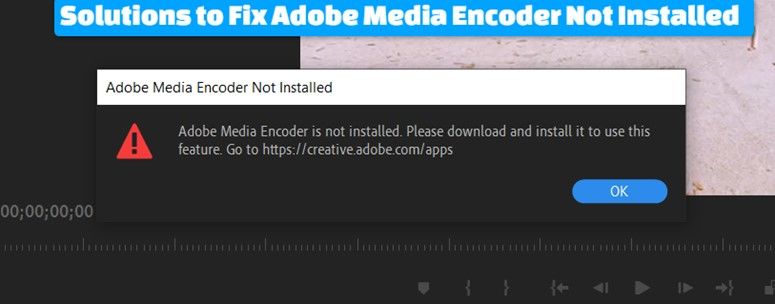
Before you can start encoding images on Adobe After Effects, Adobe Premiere Pro, Adobe Character Animator, and Adobe Audition, you need to download and install Adobe Media Encoder from the Creative Cloud website. If you successfully installed the Adobe Media Encoder but keep getting “Adobe Media Encoder Not Installed” on your screen, we've got the solutions to help you fix the problem.
To fix the Adobe Media Encoder not installed error, first, check whether you installed the Adobe Media Encoder correctly and if not fully installed, download and ensure complete installation. Secondly, the encoder might have gotten corrupted during the download and installation process. To fix the error due to a corrupt file, uninstall and reinstall Adobe Media Encoder. Keep reading for more solutions.
Part 1: What is Adobe Media Encoder Used For?
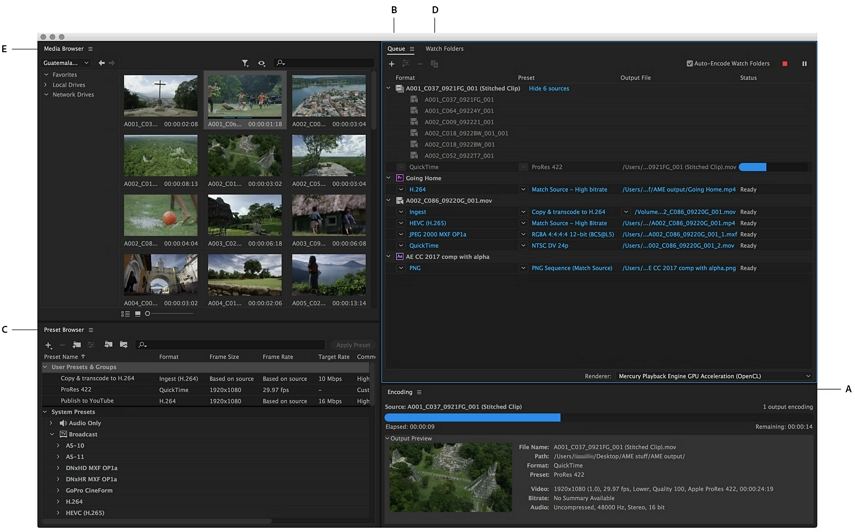
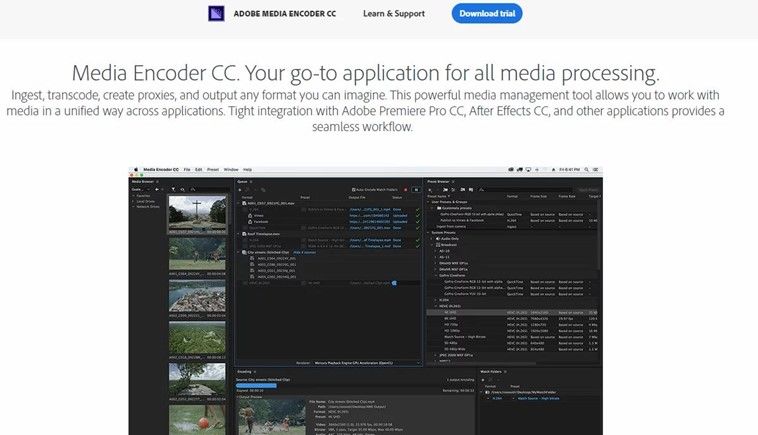
The Adobe Media Encoder has five panels: Encoding panel, Preset Browser, Queue panel, Media Browser, and the Watch Folder. All these panels are designed to streamline the file encoding and transcoding process.
Adobe Media Encoder is used to format and convert single, or multiple audio or video files into any file format of your choice. Also, using the tool you can stitch clips together to create a video.
Part 2: Causes of Adobe Media Encoder is Not Installed Error
Like any other software, users occasionally encounter different issues when using Adobe Media Encoder. And being a broad-based encoder with multiple customizable panels, the program is susceptible to malfunctioning. The possible causes of the "Adobe Media Encoder is not installed" error are here.
Media Encoder not completely Installed
It's possible you installed the program but it didn't successfully install as is required. Or, you presumed that it was installed, and yet it wasn't installed on your computer. In such a case, you'll have to install it before using this Adobe software feature.
Corrupt installation
It's difficult to know whether the installation is corrupted but it has proven to be a major cause of the Adobe Media Encoder is not installed error. Installations can get corrupt particularly if they are moved from one drive to drive.
Adobe Media Encoder not at its default location
For the Adobe Media Encoder to function to its expectations in all Adobe products, it has to be well installed in the right default location. Now that you received that error message, it's possible Adobe Media is not at its right default location.
Older version
Are you using the latest Adobe Media Encoder version? If you're using an old version of the Adobe Media Encoder, this is among the error messages to expect. Ensure you've installed the latest version on your computer.
Part 3: How To Fix Adobe Media Encoder Not Installed Error
With the causes of the Adobe Media Encoder not installed error in mind, it's now simple to fix it. Based on the causes, the following solutions will fix the error: Adobe Media Encoder is not installed issue.
Solution 1: Install New Adobe Media Encoder
If you doubt Adobe Media Encoder was installed on your computer, the best you can do to fix this is to download and install a new Adobe Media Encoder. Adobe Media is easily downloaded from the Creative Cloud website. Here's how to download and install Adobe Media Encoder:
- Go to Adobe Creative Cloud and download the application.
- Right-click the downloaded file and choose "Run as administrator".

- Restart your computer after installing then check if the error is resolved.
Solution 2: Update Adobe Media Encoder
You can updatetheinstalled Adobe apps including Media Encoder automatically or manually. The current Adobe Media Encoder v 22.1.1 has multiple bug fixes. You can either set the application to update automatically or update it manually.
To update Adobe Media Encoder automatically:
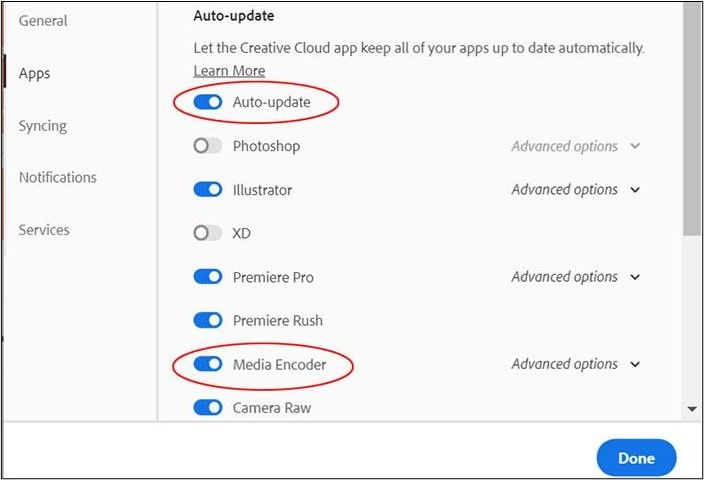
- Open the Creative Cloud desktop app, select the Account icon, and then select "Preferences".
- Select the "Apps" tab then turn on the "Auto-update" for all apps of Adobe software. Alternatively, choose the "Media Encoder" and turn on the "Auto-update".
- Click the "Done" button and the Adobe Media Encoder will update automatically.
To update Adobe Media Encoder manually:
- Open the Creative Cloud desktop app and select "Updates" in the left panel of the "Apps" tab.
- Select the ... more icon, and click on "Check for updates".
- Navigate to "Media Encoder" and click the "Update" button to update it to the latest version.

After upgrading Adobe Media Encoder to the latest version, it would also be worthy to upgrade Adobe Premiere Pro to its newest version for both to pair seamlessly and encode files without problems.
Solution 3: ChangeMedia Encoder Install Location
Adobe Media Encoder will work properly if not installed in its rightful install location. Manually copy-pasting Media Encoder when installing is likely to save the application in the wrong location. As a result, registry files and preferences will not register with the system correctly.
The solution to this to ensure the Media Encoder install location is correct. Here is how to install the application in its default location.
- Move the application back to its default install location - C:\Program Files\Adobe.
- Alternatively, open Adobe Creative Cloud, uninstall Media Encoder, and then install it again from the Creative Cloud website. Change the install location preference before proceeding.
- Press the gear icon at the top-right side of the application and choose "Preferences". While on the preferences, check the "Install" location and select the default directory back again.
- Now restart the computer after reinstalling and check if the error is resolved.
Is the Adobe Media Encoder not installed error solved? If it persists, try another transcoding and encoding program and save your time.
Part 4: Still Get Adobe Media Encoder Not Installed? Use Adobe Media Encoder Alternative
Adobe Media Encoder is a robust encoding program that can handle both audio, videos, and images, you need an equally powerful alternative. HitPaw Univd (HitPaw Video Converter) is the best Adobe Media Encoder alternative. Using this program, you can convert your videos and audio to any format of your choice.
HitPaw Univd - All-in-one Video Solutions for Win & Mac
Secure Verified. 254,145 people have downloaded it.
- Converts videos and audio to/from over 1000 formats including MOV, MP3, MO4, AVI, and WMV.
- Deal with download, convert and edit of video, audio, image and DVD files.
- Integrated popular AI tools to enhance your media experience.
- Batch download, convert and edit files with fast speed.
- Works on both Windows and Mac.
Secure Verified. 254,145 people have downloaded it.
How to Converter Videos with Adobe Media Encoder Alternative
Here are the steps to follow when converting videos using HitPaw Univd.
Step 1. Import Videos
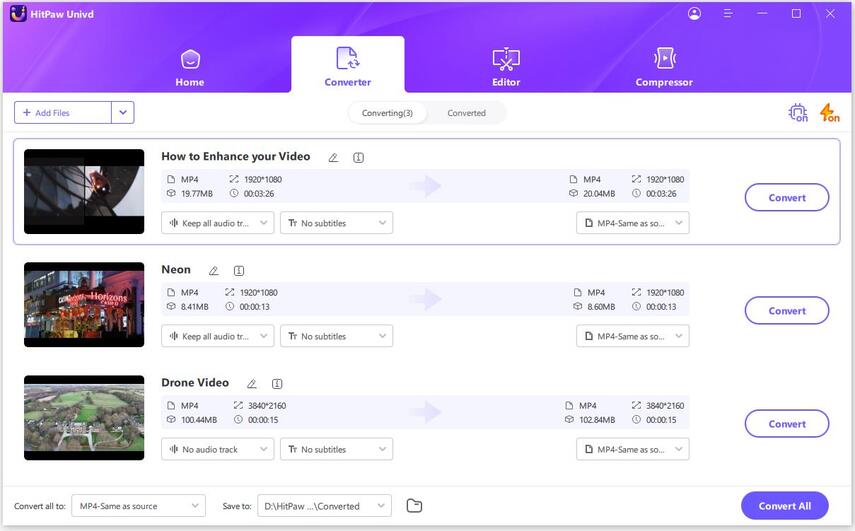
Free download and install the HitPaw Univd. Open the program Click the “Add Files” option to import video, audio or DVD files to this program.

Alternatively, you can drag and drop files into the program.
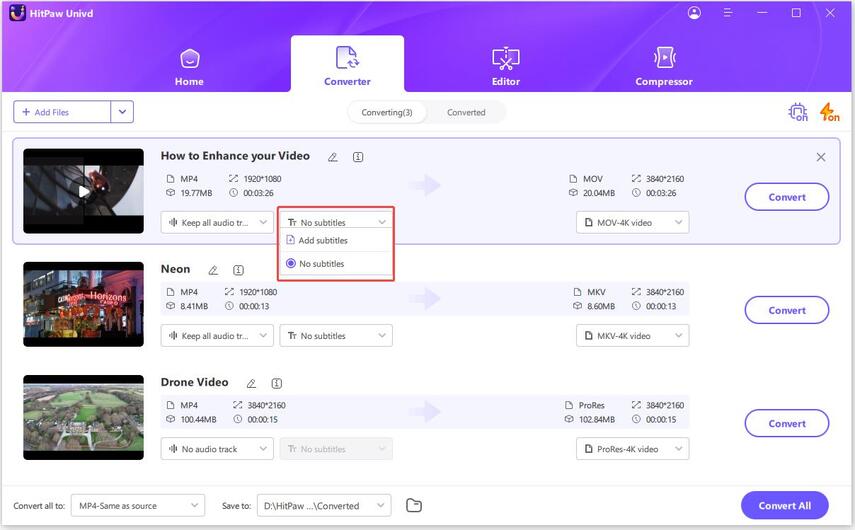
Step 2. Edit Video Meta Info and Add Subtitles (Optional)
Click the pen icon or info icon to edit the video tag information. And you can add external subtitles to the video.
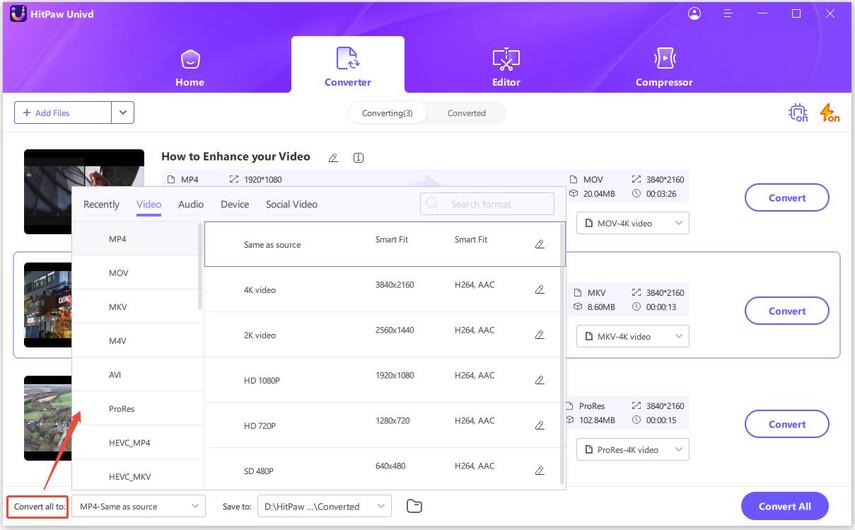
Step 3. Select an Output Format
To select an output format for a single file, click the inverted triangle icon on the lower right side of the file. To select the output format for multiple files, click "Convert all to" in the lower left corner.
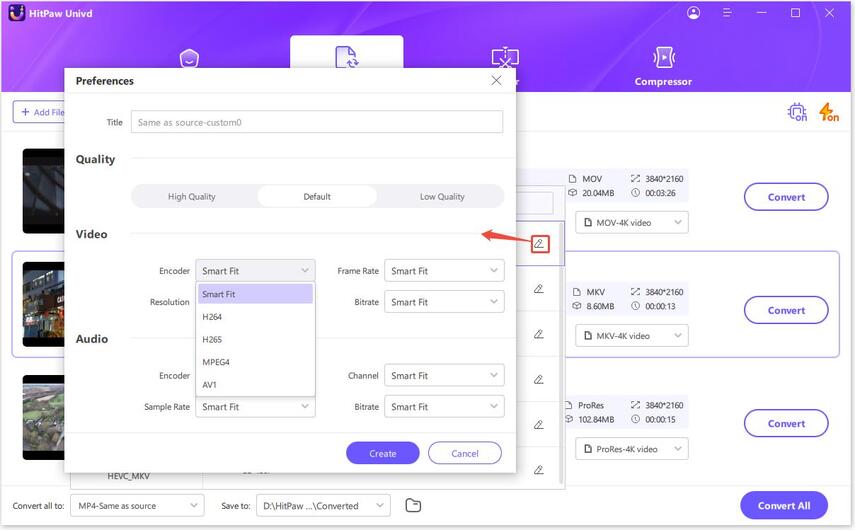
After selecting the output format, customize the parameters for the output format. Click the edit icon to open the format preferences window where you can choose the output quality, audio, and video codec for this format.
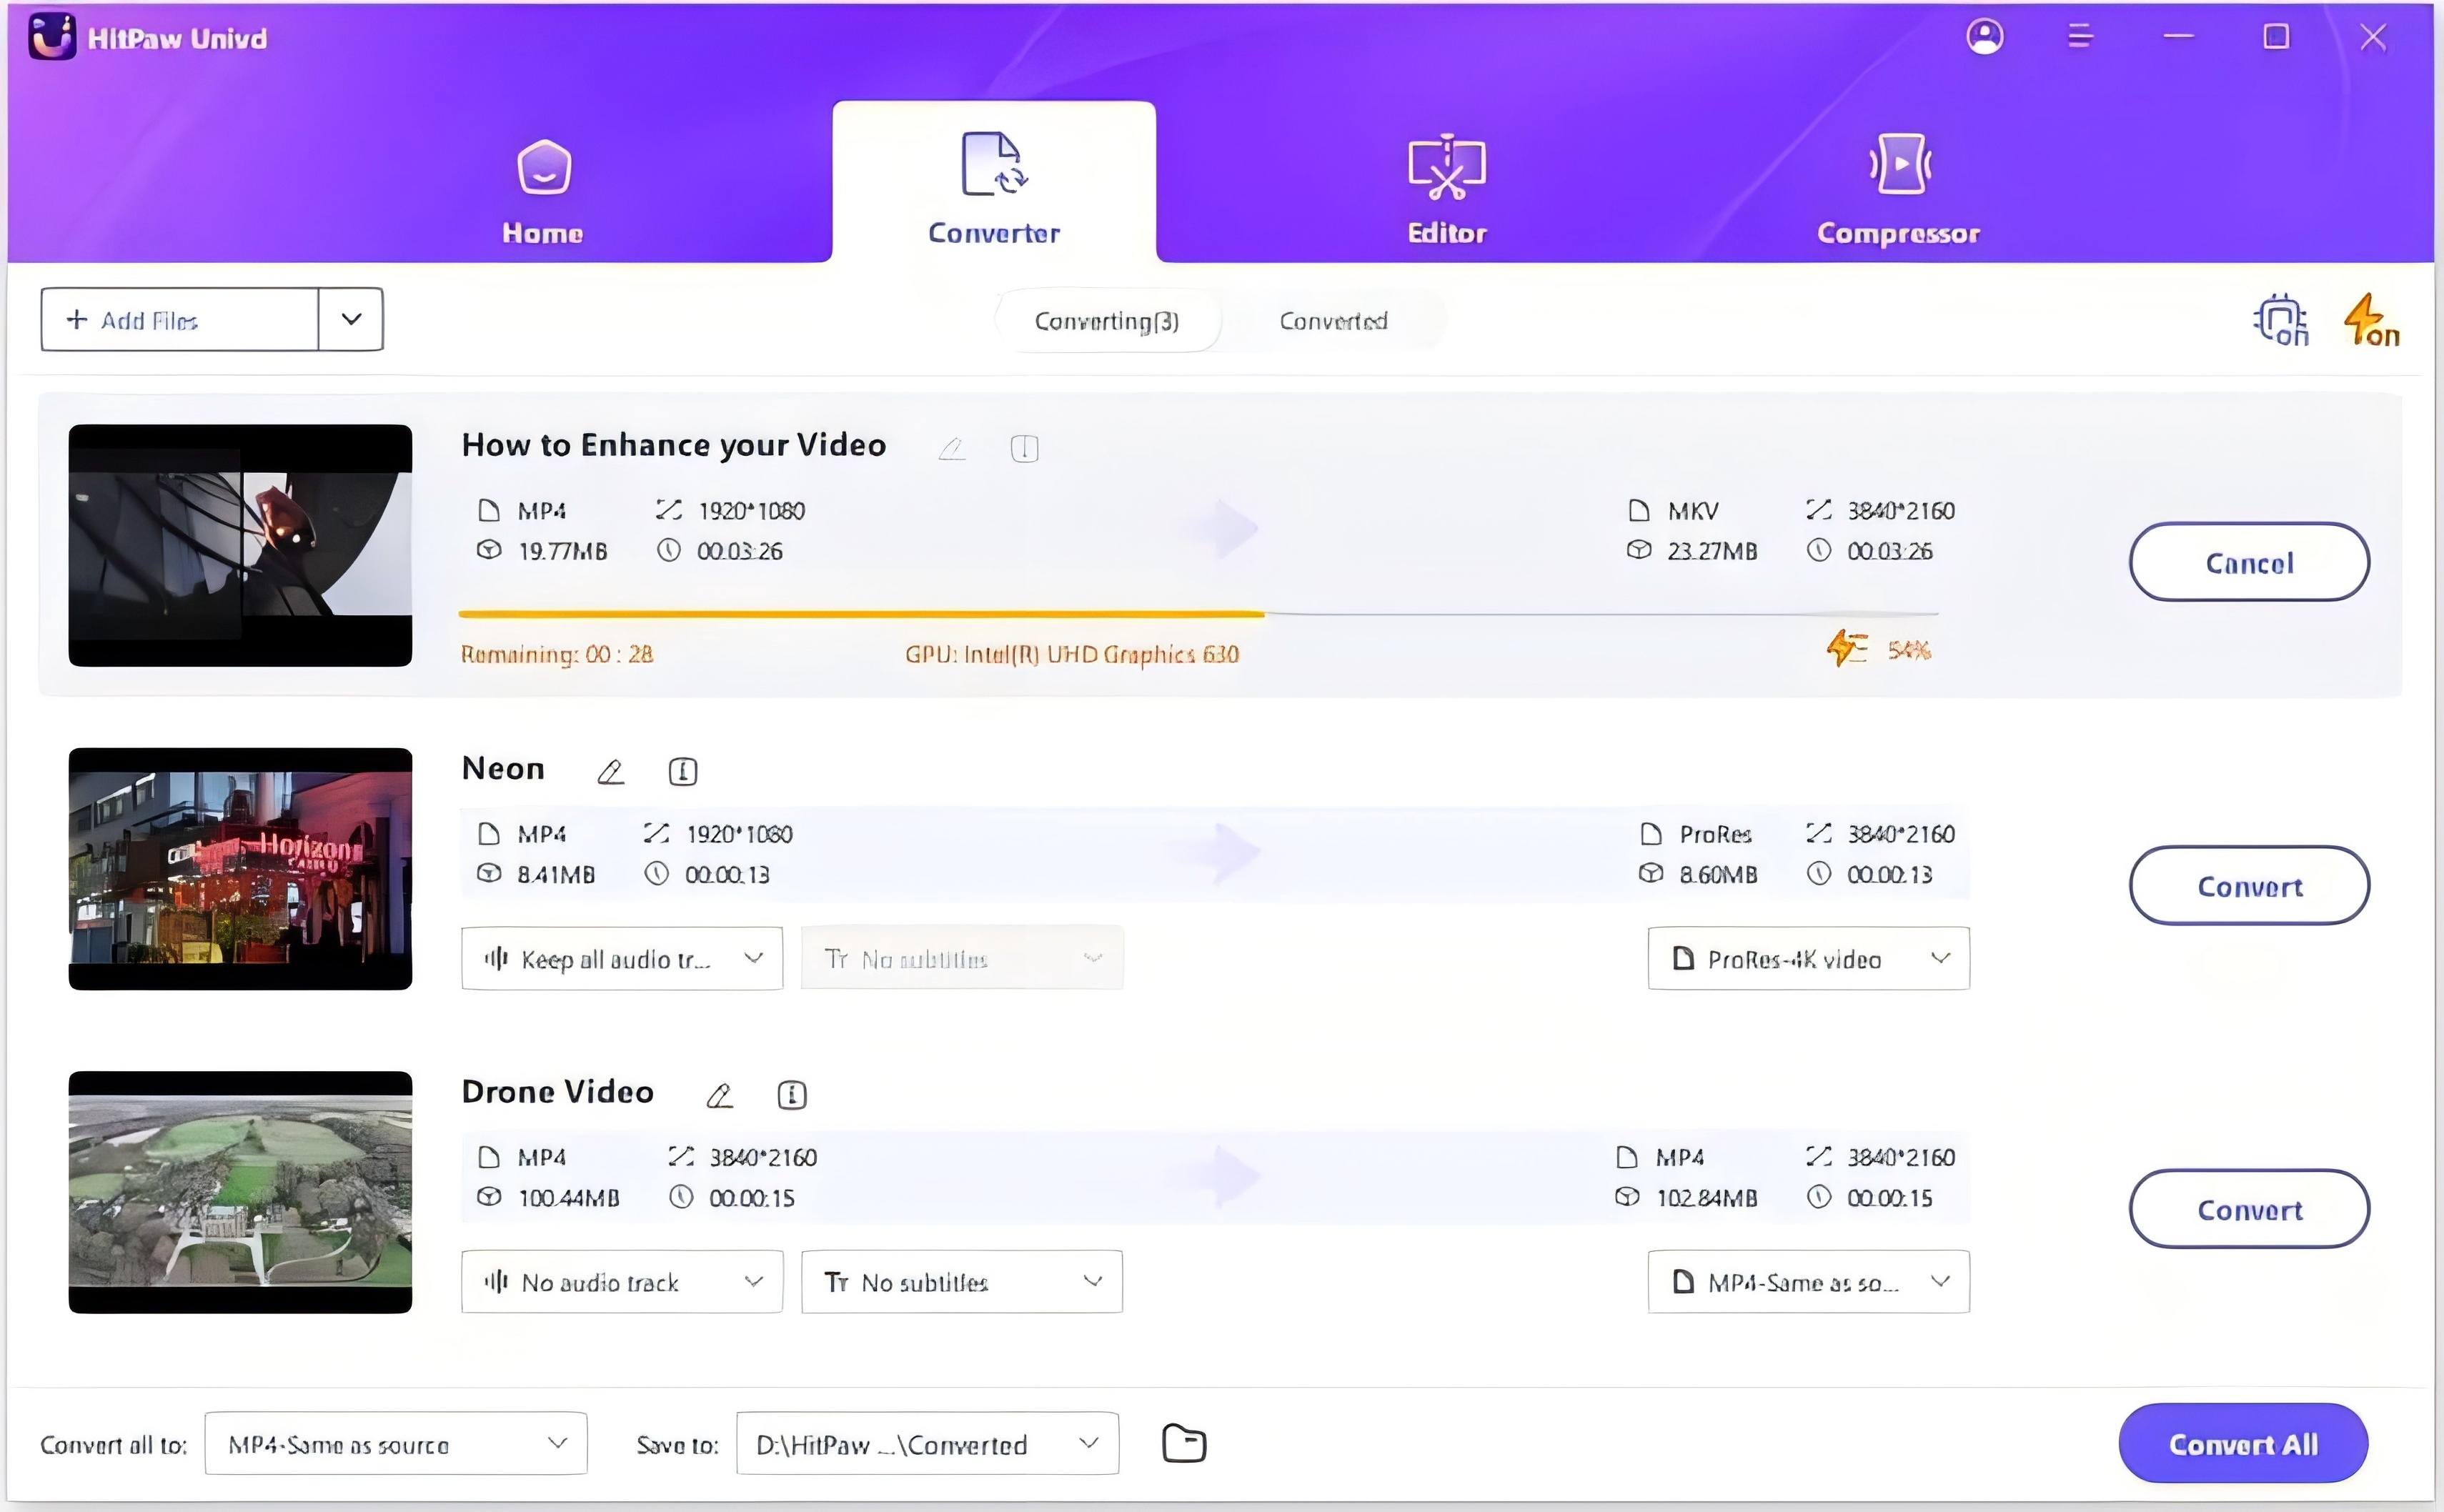
Step 4. Start Converting Files
Click the “Convert”, or “Convert All” to start converting files in bulk. This program converts files up to 120x faster by using full GPU acceleration.
Step 5. Access the Converted Files
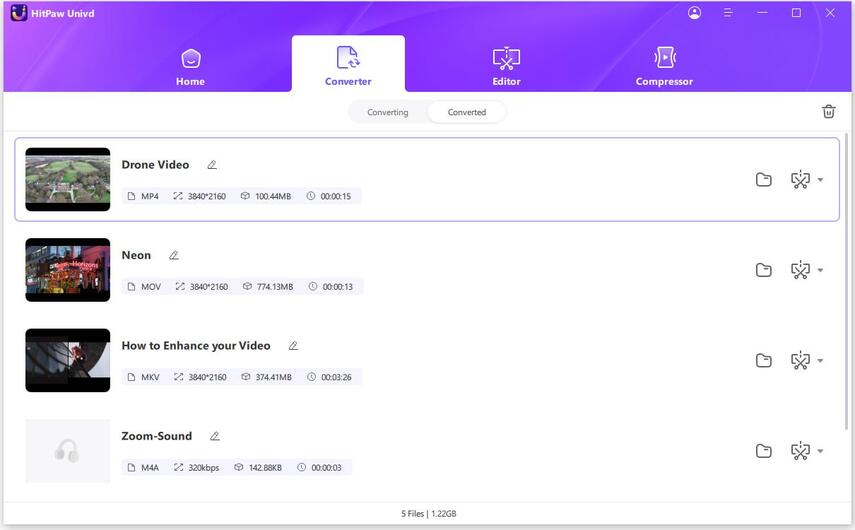
When the conversion completes, you can access to the converted files from the Converted tab. Here you can play the video using the built-in HitPaw player, or import the video to the Edit menu for further editing.
Conclusion
The Adobe Media Encoder is a powerful encoding program that's used together with other Adobe products. Adobe Media Encoder download and installation process sometimes doesn't register with other systems thus resulting in Adobe Media Encoder not installed error. Use the solutions above to fix the error.
If the problem persists, we recommend using the best Adobe Media Encoder alternative - HitPaw Univd to convert your videos, audio, and even images.



 HitPaw Univd

Share this article:
Select the product rating:
Joshua Hill
Editor-in-Chief
I have been working as a freelancer for more than five years. It always impresses me when I find new things and the latest knowledge. I think life is boundless but I know no bounds.
View all ArticlesLeave a Comment
Create your review for HitPaw articles