[2025 Full Guide] How to Split Video Intro Parts
Video intros serve as the gateway to your content, setting the stage for what's to come while capturing your audience's attention. Crafting a captivating intro involves various elements, and splitting it into distinct parts can significantly enhance its effectiveness. The first part of your video intro should include a strong hook.
This is where you grab the viewer's attention right from the start. A compelling hook might be a surprising fact, a provocative question, a bold statement, or an intriguing visual. The goal is to make your audience want to keep watching to see what's next.
Part 1. [Best] Cutting Video into Parts with HitPaw Univd (HitPaw Video Converter)
HitPaw Univd stands out as an excellent option for those seeking a seamless video editing experience. Its intuitive interface makes it accessible to both beginners and experienced users alike, streamlining the process of cutting videos with precision. One of its standout features is its ability to retain the original quality of the video, ensuring that your edits look professional and polished.
Moreover, HitPaw Univd supports a wide array of video formats, from popular ones like MP4 and AVI to more specialized formats, ensuring compatibility with various devices and platforms. This versatility is particularly valuable for individuals working on projects with specific requirements or targeting diverse audiences.
Features
- Converts high-quality videos with just a few clicks.
- Compatible with both Mac and Windows.
- It allows you to transcode numerous videos concurrently.
- Explore the commendable video editing operations.
- It does not include the watermark.
- Affordable premium package.
Cutting video into parts through HitPaw Univd
Step 1: On the Edit section's main interface, select the Cut option and add the source video.
After successfully adding the source video, you can preview it in the timeline. Drag the playhead to the desired time point, then click the scissor icon to split the video. You can repeat the process to cut additional clips.

Step 2: After successfully cutting the video, choose the "Merge into one file" option to combine the cut clips. Click the Confirm button to begin exporting the clips.
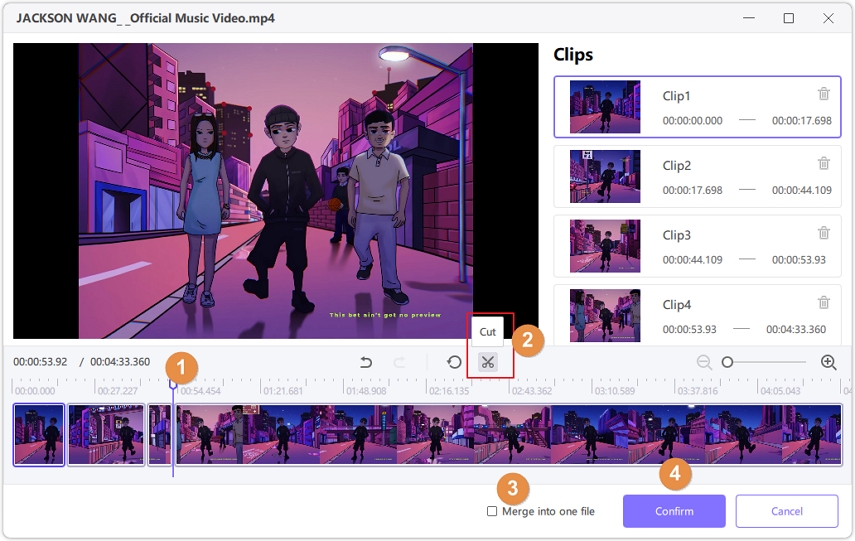
Step 3: The main interface allows you to preview the chopped video and select an output format. To export a single file, click the Export button; to export all files, select Export All.

Part 2. How to Split a Video into Parts with Canva
Split video in Canva may be quite beneficial for Social Media Marketing professionals, as well as creative directors and designers. To divide videos, create or extract two or more videos from a single video. It can be used to shorten the duration of any video.
How to break a video into parts via Canva?
Step 1: To open the Canva app, simply click the app icon in your device's menu. It works on any device, including laptops, phones, and PCs, and takes up little space.

Step 2: In the editor, click the addition ("+") icon. The icon is located in the bottom left of your screen.
Step 3: Click on 'Uploads': After clicking on the "+" symbol in Step 2, you will see a list of options in the bottom bar, including elements, templates, galleries, and more. From there, select "Uploads".

Step 4: Tap on "Upload Media": This option will be shown at the top of the screen in purple. You simply need to click on it.
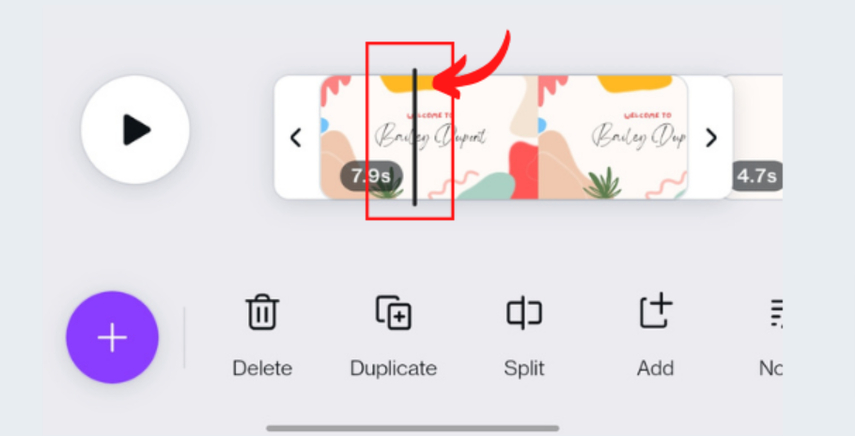
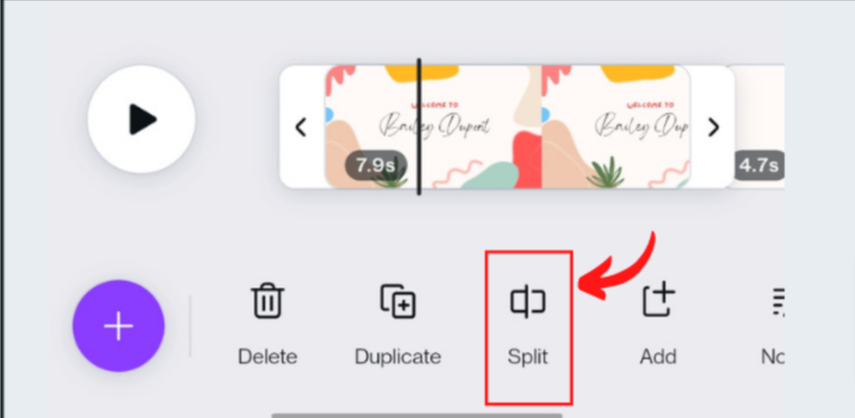
Step 5: Choose the video file from your gallery. After hitting "Upload Media," you will get a list of all the photographs and videos on your device, and you can then select the video you wish to split. Select a place at a certain place in a video scene. After choosing a video, you can quickly upload it. You can now click anywhere in the video to see a list of options. Select 'Split' from the menu options. Choosing this option simply divides or splits the video into two pieces. You can even divide the video into as many portions as you wish and edit them individually.
Part 3. How to Break a Video into Parts with Adobe
Adobe Premiere Pro includes the creative tools needed to transform any material into appealing videos and films. This powerful software offers an extensive range of features, allowing both novice and professional editors to bring their visions to life with precision and creativity. You can apply numerous effects and transitions to achieve a polished look, enhancing the visual and auditory experience of your projects.
The software also supports advanced color grading, audio editing, and multi-camera editing, providing a comprehensive toolkit for any video production needs. Nonetheless, dividing your video is a must-do while editing it. Segmenting your footage allows for more detailed and organized editing, enabling you to manage your workflow efficiently and ensure that each part of your video is crafted to perfection.
This process is essential for maintaining narrative coherence and pacing, ultimately contributing to the overall quality and impact of your final product.
How to split a video into two parts
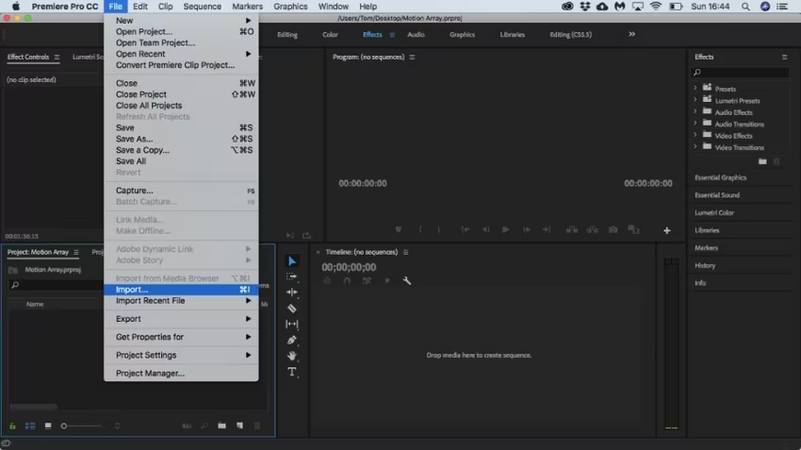
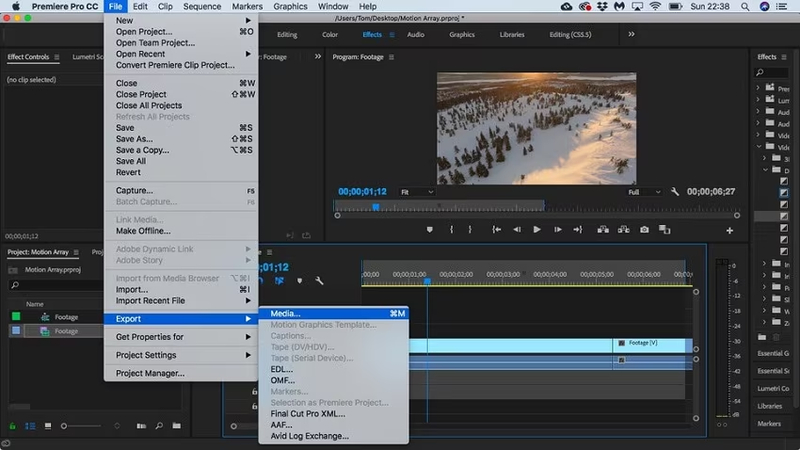
Step 1: Transfer your video from your computer to the app. Navigate to the 'File' > 'Import' choices. You may also drag and drop your video into the timeline if you already have a sequence created.
Next, position the Timeline's current-time indicator where you want to split your clip. Then, under the Current Time Indicator, select 'Sequence' > 'Razor'.
Step 2: Highlight the video you want to separate. Simply go to 'Toolbox' and select the 'Razor' tool. Mouse over the point at which you wish to split your video clip and then le
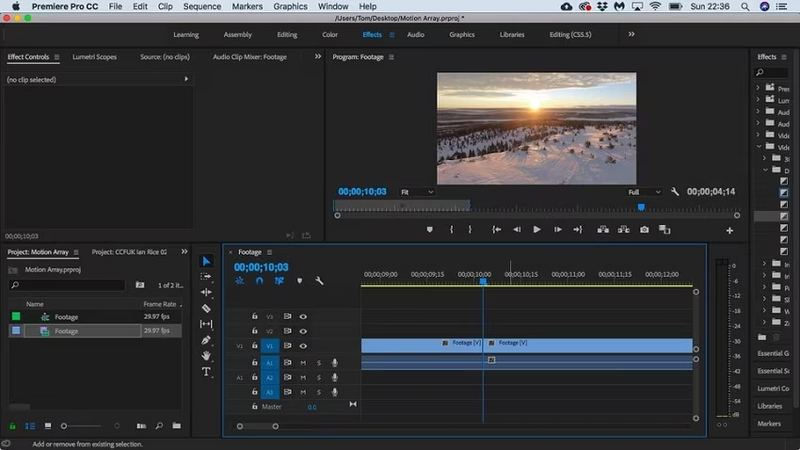
Step 3: Divide your video into different portions. Hold the 'Shift' key down and use the 'Razor' tool to click on the set section. You can also secure any clip that you do not intend to separate. To do so, select the square to the right of the 'eyeball' in your video.
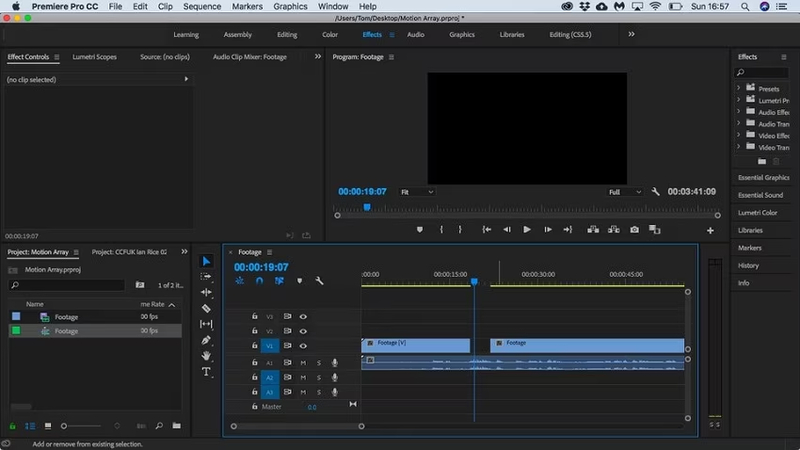
Step 4: Your split clips are now considered separate entities. You can add effects, adjust the tempo independently, or include titles. Once you've made your selections, you can export your clips and save them as one video file.
Conclusion
We've introduced a couple of amazing methods to help you efficiently split videos into different parts, all while providing a simple and intuitive user interface. Among the various tools available, HitPaw Univd emerges as the top recommendation. This tool is particularly noteworthy for its ability to cut videos without compromising on quality.
HitPaw Univd not only offers a user-friendly interface but also supports both Mac and Windows platforms, ensuring broad compatibility. Additionally, it is equipped with batch processing capabilities, allowing you to handle multiple videos simultaneously with ease.


 HitPaw Edimakor
 HitPaw VikPea (Video Enhancer)


Share this article:
Select the product rating:
Joshua Hill
Editor-in-Chief
I have been working as a freelancer for more than five years. It always impresses me when I find new things and the latest knowledge. I think life is boundless but I know no bounds.
View all ArticlesLeave a Comment
Create your review for HitPaw articles