[Solved!] How to Use Shortcut Resize Video
Resizing videos is often a crucial step in video editing, whether you're preparing content for different devices, optimizing for social media platforms, or simply managing file sizes for easier storage and sharing. Shortcut, a versatile and user-friendly video editing tool, offers an efficient solution for resizing your videos without compromising on quality.
In this comprehensive guide, we will delve into the step-by-step process of using Shortcut resize video. From adjusting dimensions to maintaining the right aspect ratio, we'll cover everything you need to know to ensure your videos meet your specific requirements, whether for personal projects or professional presentations.
Part 1. How to Use Shortcut Resize Video
Resizing videos is a common task for video editors, especially when preparing content for various platforms and devices. Whether you need to adjust the video size to fit a particular screen, reduce the file size for easier sharing, or change the aspect ratio for social media, Shotcut offers a powerful yet user-friendly solution.
This versatile tool provides a range of features that cater to both beginners and advanced users, ensuring that the resizing process is smooth and efficient. In this part, we will take you through the detailed steps to Shotcut crop and resize video using Shotcut, covering everything from importing your video to exporting the final product.
By following these steps, you can ensure that your videos are perfectly tailored to your specific needs, whether for personal use, professional presentations, or social media sharing.
Steps to use Shotcut resize video
Step 1: If you haven't already, download Shotcut from the official website and install it on your computer. Linux, macOS, and Windows can all use Shotcut.
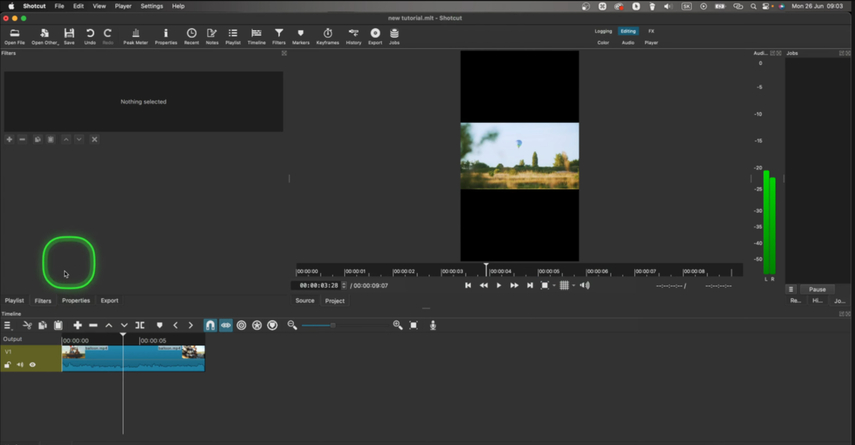
Step 2: Launch Shortcut and open a new project. To import a video file, click on Open File in the toolbar or drag and drop it into the Shortcut window.
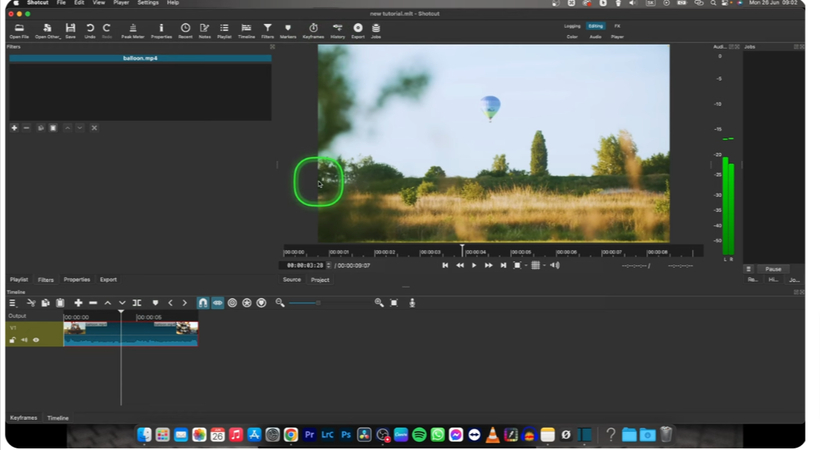
Step 3: You can edit your video by dragging it from the preview window or the playlist to the timeline at the bottom of the screen.
Click on the Filters tab located in the toolbar. If the Filters panel is not visible, you can enable it by going to View > Filters. In the Filters panel, click the + button to add a new filter. Scroll down the list or use the search bar to find the Size and Position filter. To add it to your video, click on it.
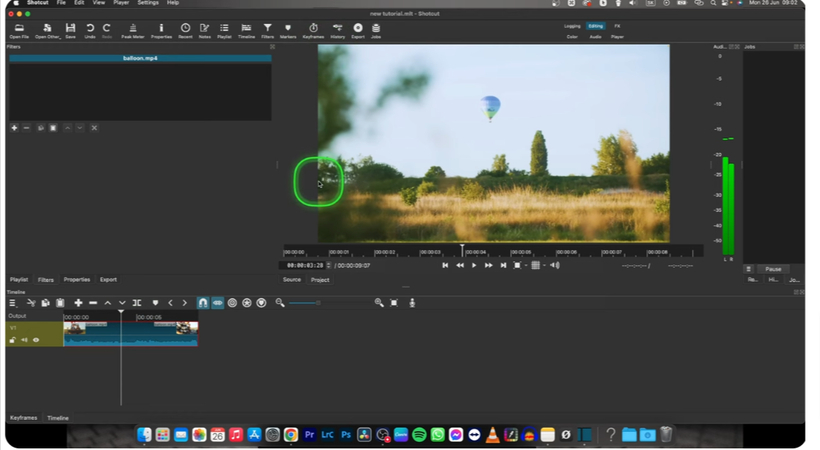
Step 4: After applying the Size and Position filter, you will see handles appear around your video in the preview window. Drag these handles to resize your video to the desired dimensions. You can also manually enter the width and height values in the properties panel of the filter.
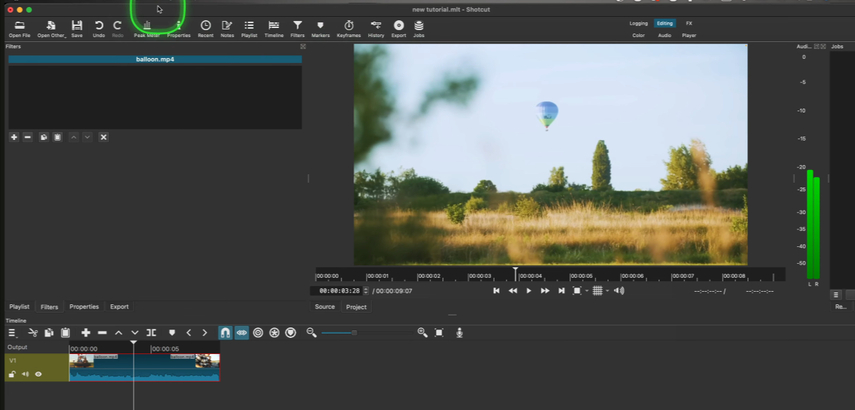
Step 5: To maintain your video's aspect ratio, make sure the Aspect Ratio lock icon is enabled in the properties panel. This ensures that the video's width and height scale proportionally.
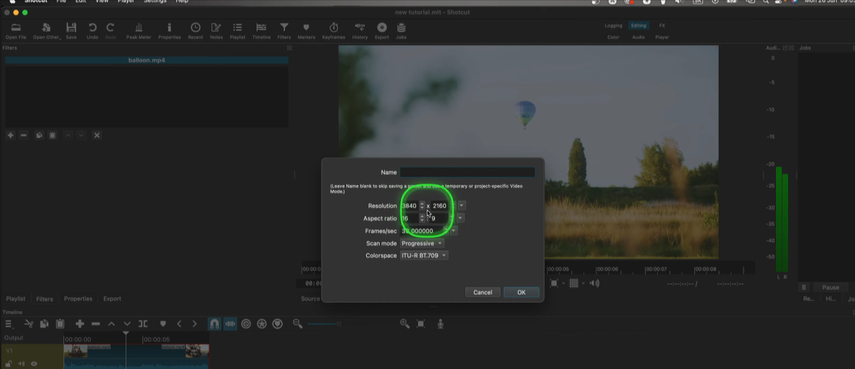
Step 6: If you need to change the aspect ratio, you can do so by unlocking the Aspect Ratio lock and manually entering the desired width and height values. Be mindful that this may crop or stretch your video.
Once you're satisfied with the resizing, it's time to export your video. Click on the Export button in the toolbar. Choose your desired export preset or customize the export settings as needed. Click on Export File, choose the destination and file name, and then click Save to start the export process.
Part 2. The Best Alternative to Resize Videos with HitPaw Univd (HitPaw Video Converter)
While Shotcut is a fantastic tool for resizing videos, you might be looking for an alternative that offers even more simplicity and additional features. HitPaw Univd stands out as a top choice, providing an intuitive interface and a range of functionalities that make video resizing effortless. Unlike some tools that require a steep learning curve, HitPaw Univd is designed with user-friendliness in mind, allowing even beginners to quickly master video editing tasks.
This powerful tool excels in resizing videos and offers comprehensive editing capabilities, such as cropping, rotating, and converting videos to various formats. Additionally, HitPaw Univd ensures that your video quality remains high, regardless of the adjustments you make. Whether you are preparing content for different devices or optimizing videos for social media platforms, HitPaw Univd streamlines the process, saving you time and effort.
Features
- Even inexperienced users can explore and use the application efficiently because to its easy design.
- Video dimensions are easily adjustable to accommodate different platforms and screen sizes.
- When downsizing, don't compromise the quality of your videos.
- offers choices for rotating, cropping, and transcoding videos to other formats.
- Resizes videos effectively and without waiting a long period.
- Lets you save time and work by resizing many videos at once.
- Provides support for a large variety of video formats, guaranteeing interoperability across many systems and devices.
- With the preset options it offers for a number of networks, like Facebook, Instagram, and YouTube, selecting the ideal settings is simple and meets your demands.
- Allows for simple audio manipulation, such as changing the audio track and level.
- Lets you add and edit captions for your movies.
How to resize videos through HitPaw Univd
Step 1: Install HitPaw Univd on your PC after downloading it from the official website. You can drag and drop your video file into the HitPaw Univd application window or use the Add Video option when the program is open. Once your video is imported, click on the Edit icon (usually represented by a pencil or scissors) next to the video thumbnail. This will open the editing interface where you can access various tools.
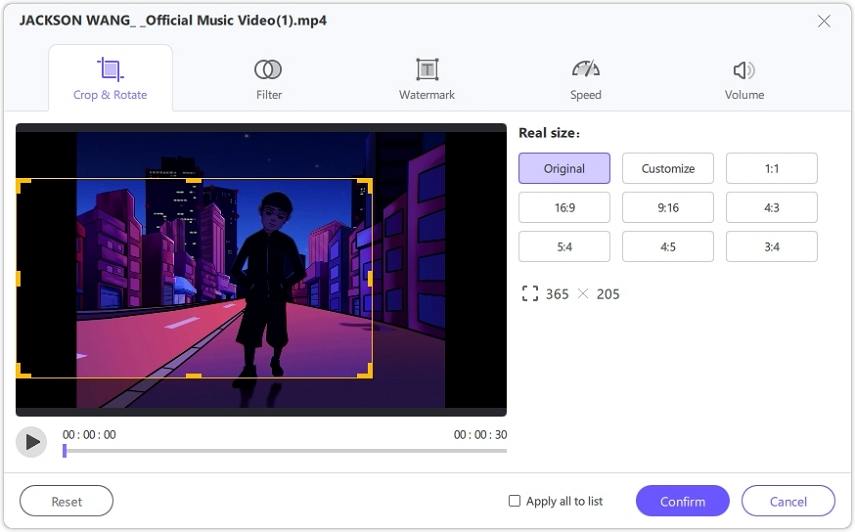
Step 2: In the editing interface, navigate to the Crop and Resize tab. You will see options to manually adjust the width and height of your video. Use the handles to drag and resize your video frame as needed. Alternatively, you can enter specific dimensions for precise resizing. After making the necessary adjustments, click on the OK or Apply button to save your changes and return to the main interface.
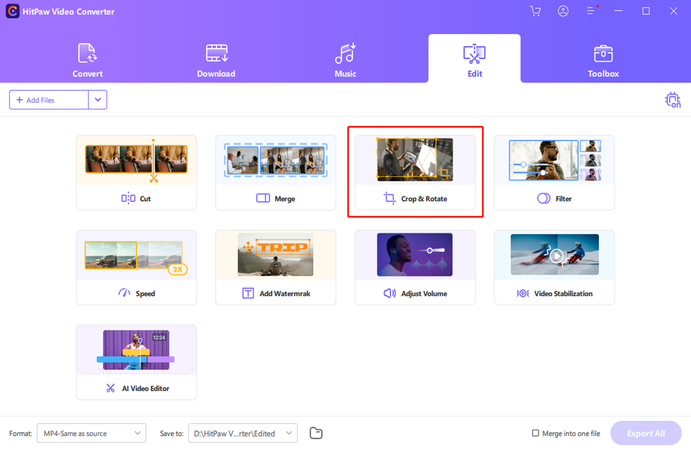
Step 3: Finally, click on the Confirm button. Choose the desired output format and quality settings, then click Export again to save your resized video to your computer.
Wrap-up
This article explored how to resize videos using Shotcut, a robust and versatile video editing tool. We walked through the step-by-step process of downloading, installing, and utilizing Shotcut's features to use Shotcut resize video.
While Shotcut is a great option, we also introduced HitPaw Univd as an excellent alternative for those seeking even more simplicity and additional features. HitPaw Univd's user-friendly interface, high-quality output, and comprehensive editing tools make it a top choice for video resizing and other editing tasks. With HitPaw, you can easily resize, crop, rotate, and convert videos quickly and efficiently.


 HitPaw Edimakor
 HitPaw VikPea (Video Enhancer)


Share this article:
Select the product rating:
Joshua Hill
Editor-in-Chief
I have been working as a freelancer for more than five years. It always impresses me when I find new things and the latest knowledge. I think life is boundless but I know no bounds.
View all ArticlesLeave a Comment
Create your review for HitPaw articles