6 Effective Methods to Pixelate a Video on Computer/Mobile
Pixelating a video can be essential for various reasons, such as protecting privacy, censoring sensitive information, or adding a creative effect. Whether you're a professional editor or a casual user, knowing how to pixelate videos on different platforms can be highly beneficial. In this comprehensive guide, we'll explore the ultimate methods to pixelate videos on Windows and Mac using powerful tools. We'll also cover online editors and mobile apps for iPhone and Android, providing step-by-step instructions to make the process easy and efficient. Let's dive into video pixelation and discover the best tools for the job.
Part 1: Pixelate a Video with Adobe Premiere Pro on Windows and Mac
Adobe Premiere Pro is a top-tier video editing software widely used by professionals in the film and media industry. Known for its robust features and high-quality output, Premiere Pro offers advanced tools for pixelating videos and much more.
Step 1. Open Adobe Premiere ProImport your video by going to File > Import and selecting the video file.
Step 2. Add Video to TimelineDrag the imported video to the timeline.
Step 3. Apply Mosaic EffectGo to Effects > Video Effects > Stylize > Mosaic. Drag the Mosaic effect onto your video clip in the timeline.
Step 4. Adjust PixelationIn the Effect Controls panel, adjust the horizontal and vertical block settings to achieve the desired level of pixelation.
Step 5. Export VideoOnce you're satisfied with the pixelation, go to File > Export > Media to export the edited video.
Part 2: How to Pixelate a Video Online
Pixelating videos online can be a convenient solution for those who do not want to download and install software. Online editors are accessible from any device with an internet connection, offering quick and straightforward video editing capabilities. However, they come with certain limitations such as file size restrictions, slower processing speeds, and potentially lower security standards. Here, we will explore two popular online video editors that allow you to pixelate videos: Kapwing and Clideo.
1. Using Kapwing
Kapwing is a versatile online video editor known for its user-friendly interface and wide range of editing tools. It supports various video formats and provides an easy way to apply pixelation effects.
Step 1. Open Kapwing WebsiteNavigate to Kapwing using your web browser.
Step 2. Upload VideoClick on "Upload" to import the video file you want to pixelate. You can upload files from your computer or paste a URL if your video is online.
Step 3. Apply Pixelate EffectAfter uploading, select the video layer and navigate to the "Effects" tab. Choose "Pixelate" from the available options. Adjust the pixelation intensity and the specific area you want to pixelate using the on-screen tools.
Step 4. Export VideoOnce you're satisfied with the pixelation effect, click on "Export" to process your video. After processing, you can download the pixelated video to your device.
2. Using Clideo
Clideo is another excellent online video editing tool that offers a simple yet powerful interface for various editing tasks, including pixelation.
Step 1. Open Clideo WebsiteVisit Clideo using any web browser.
Step 2. Upload VideoClick on "Choose file" to upload your video. Clideo allows you to upload videos from your device, Google Drive, Dropbox, or via a URL.
Step 3. Apply PixelationOnce your video is uploaded, select the "Pixelate" option from the available tools. Adjust the pixelation area and intensity as required.
Step 4. Export VideoAfter applying the pixelation effect, click on "Export" to process the video. You can then download the pixelated video to your device.
Part 3: How to Pixelate a Video on iPhone/Android
Mobile apps provide the convenience of editing videos directly on your smartphone. Here, we will discuss how to pixelate videos on iPhone using iMovie and on Android using CapCut.
1. Pixelating on iPhone using iMovie
iMovie is a powerful and free video editing software provided by Apple for its macOS and iOS devices. It is well-known for its simplicity and professional-quality results.
Step 1. Open iMovieLaunch the iMovie app on your iPhone. If you don't have it installed, download it from the App Store.
Step 2. Import VideoCreate a new project and import the video you wish to pixelate by tapping on the “+” button and selecting your video from the gallery.
Step 3. Apply PixelationWhile iMovie doesn't have a direct pixelation tool, you can overlay a blurred or pixelated image over the video. To do this, add a new image layer, adjust its size to cover the area you want to pixelate, and apply a blur or mosaic filter to that layer.
Step 4. Export VideoOnce you've achieved the desired pixelation effect, tap on “Done” and export the video by tapping on the “Share” button and selecting “Save Video”.
2. Pixelating on Android using CapCut
CapCut is a popular video editing app for Android devices, offering a range of powerful editing tools, including pixelation.
Step 1. Open CapCutDownload and open CapCut from the Google Play Store.
Step 2. Import VideoTap on "New Project" and select the video you wish to edit from your gallery.
Step 3. Apply PixelationIn the editing interface, navigate to the effects section. Use the “Pixelate” tool to apply the effect to the desired areas of your video. Adjust the strength and coverage as needed.
Step 4. Export VideoAfter completing the pixelation, tap on the “Export” button to save the edited video to your device.
Bonus: The Ultimate Way to Pixelate a Video on Windows and Mac
HitPaw Univd (HitPaw Video Converter) is a versatile tool designed to simplify video editing and conversion tasks. This software supports a wide range of formats and provides an intuitive interface, making it accessible for users of all levels. HitPaw Univd not only converts videos but also offers powerful editing features, including the ability to pixelate specific parts of a video. Whether you are on Windows or Mac, HitPaw Univd ensures a seamless and efficient editing experience.
Key Features of HitPaw Univd
HitPaw Univd - All-in-one Video Solutions for Win & Mac
Secure Verified. 254,145 people have downloaded it.
- Easily recognize the faces in a video and blur or add stickers to unwanted faces in a few clicks.
- Converts and edits videos in numerous formats, including MP4, AVI, MOV, and more.
- Simple and intuitive design makes it easy to navigate and use.
- Allows downloading and converting multiple files simultaneously.
- Ensures that the original quality of videos is maintained after conversion and editing.
Secure Verified. 254,145 people have downloaded it.
How to Blur Video with HitPaw Univd
Step 1.Download and Install HitPaw Univd.
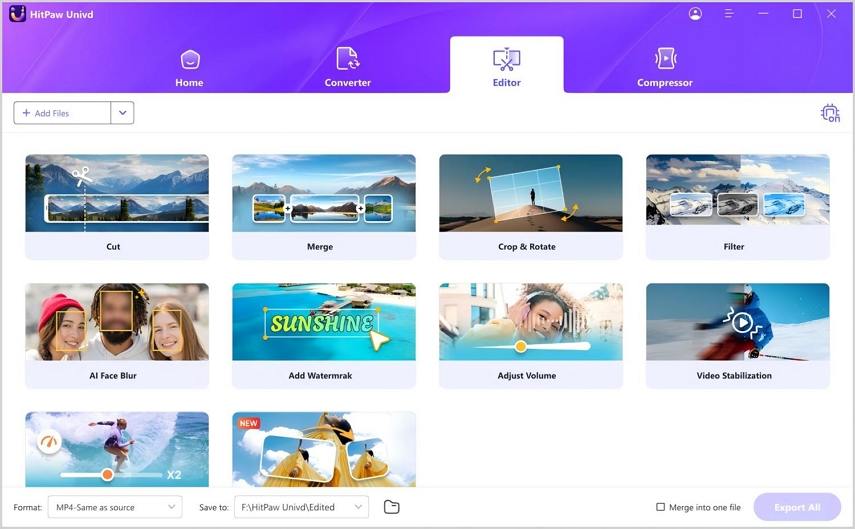
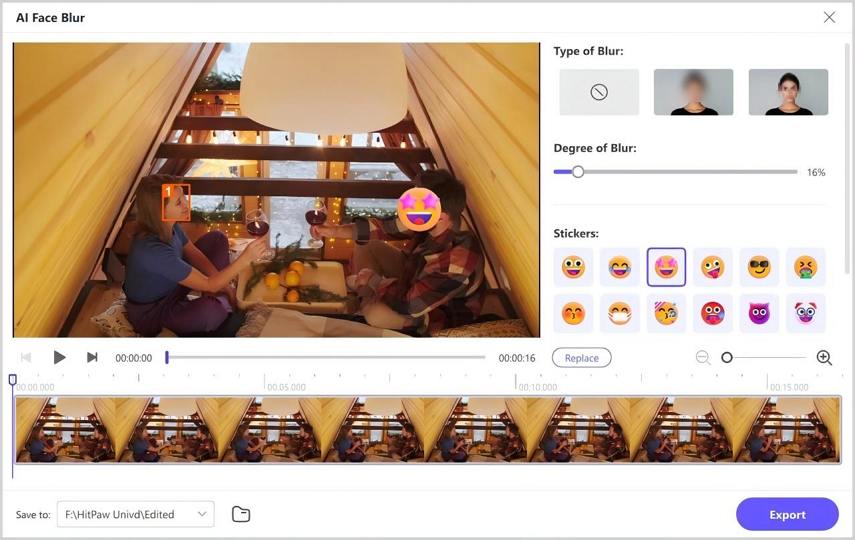
Step 2.Open the AI Face Blur feature from the Edit section.

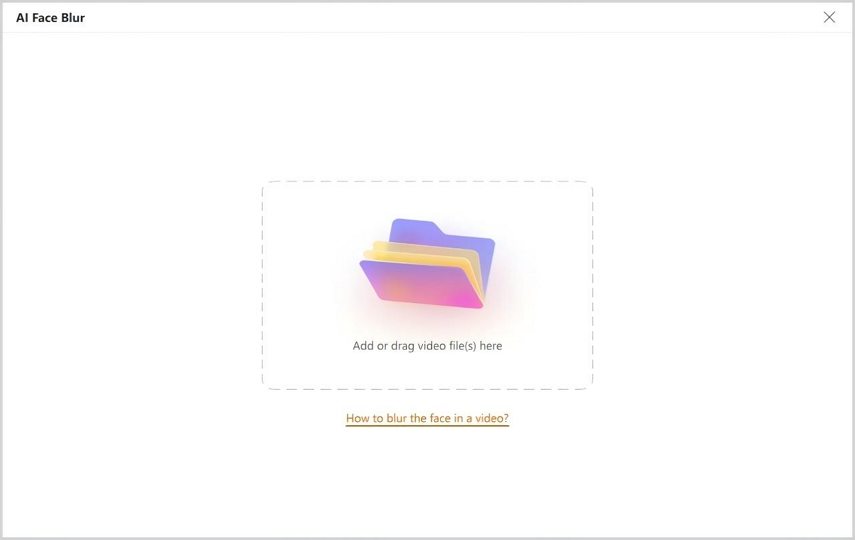
Step 3.Add the video file you want to pixelate in the HitPaw Univd.

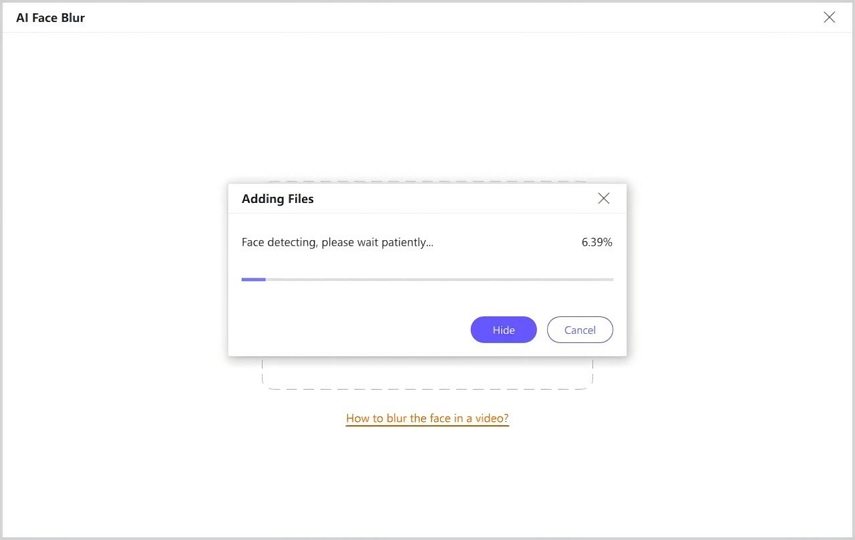
Step 4.Once you import the video, HitPaw Univd will automatically analyze and detect face.

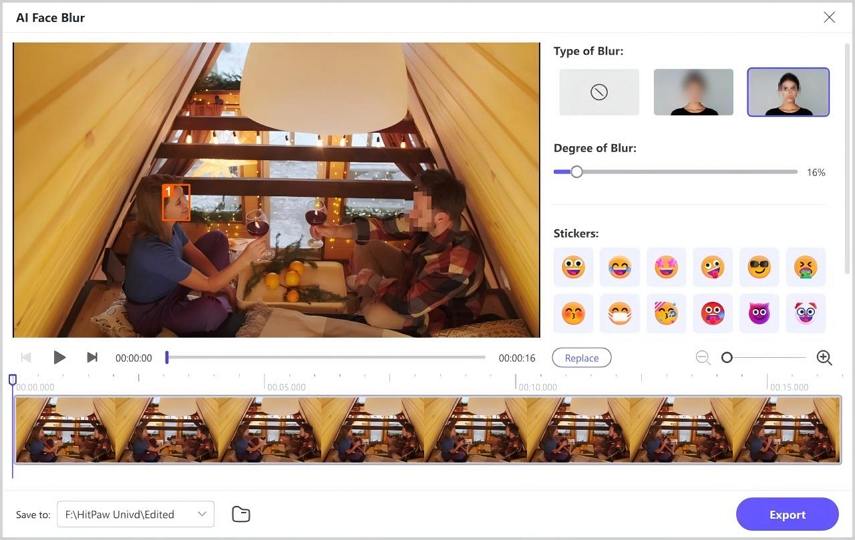
Step 5.You can choose the degree of blur. Allows you to switch from 0% to 100% and preview the effect on the video. Similarly, you can click the sticker to apply on the face chosen. And you can click the sticker on the video to remove it.


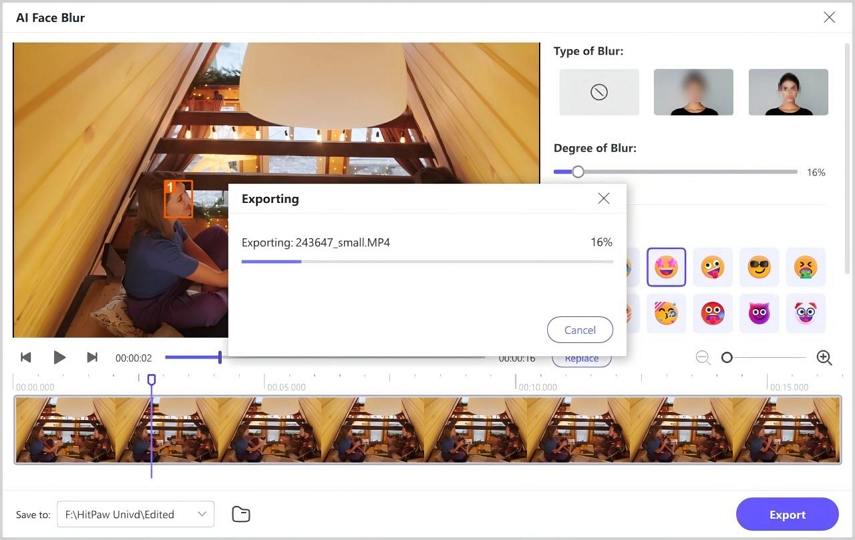
Step 6.Once you finish the blur setting, then click the Convert button to save the video with a blurred face or with stickers.

FAQs about Pixelate Video
Q1. How to fix pixelated videos?
A1. Fixing pixelated videos largely depends on the cause of pixelation. If the video is pixelated due to low resolution, consider using video enhancement tools to upscale the resolution. For compression-related pixelation, re-encoding the video with a higher bitrate can improve quality. However, fixing pixelation can be challenging if the original source quality is poor.
Q2. Does Windows 10 pixelate videos?
A2. Windows 10 itself does not inherently pixelate videos. However, pixelation can occur if the video is viewed at a resolution lower than its original quality or if video editing software with pixelation effects is used.
Q3. How to make a video pixelated on CapCut?
A3. To pixelate a video on CapCut, import the video, go to the effects menu, select the “Pixelate” effect, and apply it to the desired areas. Adjust the intensity and coverage of the pixelation effect as needed to achieve the desired result.
Conclusion for Pixelate Videos
Pixelating videos is a valuable technique for both privacy protection and creative effects. Whether you prefer desktop software, online tools, or mobile apps, there are multiple ways to pixelate your videos effectively. For comprehensive editing capabilities and high-quality output, HitPaw Univd stands out as a top choice. Its user-friendly interface and versatile features make it an excellent tool for all your video editing needs. Try HitPaw Univd today to experience seamless video pixelation and other advanced editing features.




 HitPaw Univd


Share this article:
Select the product rating:
Joshua Hill
Editor-in-Chief
I have been working as a freelancer for more than five years. It always impresses me when I find new things and the latest knowledge. I think life is boundless but I know no bounds.
View all ArticlesLeave a Comment
Create your review for HitPaw articles