How to Export Videos to Instagram Reels Using Adobe Premiere Pro
Instagram has transitioned from a platform focused on photos to one dominated by videos, particularly Instagram Reels. With this shift, content creators now need to optimize their videos for Instagram's vertical, fast-paced format. Adobe Premiere Pro, a powerful video editing tool, is perfect for creating high-quality Reels, but understanding the best export settings is essential for ensuring that your videos look polished and professional. This article will guide you through the best Premiere Pro export settings for Instagram Reels, how to export videos to Reels Adobe Premiere.
Part 1: Best Premiere Pro Export Settings for Instagram?
Instagram, initially centered around sharing photos, has evolved into a video-heavy platform, much like TikTok. Among the most popular forms of video content on the app are Instagram Reels and stories. To make sure your videos stand out, it's crucial to export them with the optimal settings for Instagram.
If you're planning to upload a Reel, the video should be as short as 3 seconds and up to 90 seconds if recorded directly from the app, though you can upload longer videos from a file. Here are the best export settings for Instagram Reels in Premiere Pro:
Format: H.264 mp4
Frame Size: 1080 x 1920 vertical resolution (9:16 aspect ratio)
Frame Rate: Match source video or 30FPS
Render at Maximum Depth
Maximum Render Quality
Target Bitrate: 2 Mbps, maximum 3 Mbps
Bitrate Encoding: VBR, 2-Pass
Audio Format: AAC, 48kHz sample rate, stereo, 320kbps bitrate
These settings ensure that your video will be in the correct format and optimized for smooth playback and high quality on Instagram.
Part 2: How to Export Videos to Reels in Adobe Premiere Pro
How export vertical video for Instagram Premiere Pro? Exporting a video to Instagram Reels using Adobe Premiere Pro is simple when you follow the correct steps.The following steps will guide you through the process of exporting your video from Adobe Premiere Pro for Instagram Reels.
Step 1: Create a New Project and Sequence Preset
Start by launching Adobe Premiere Pro. Here's how you can set up a project for Instagram Reels:
1.Create a New Project: Go to File > New > Project and define your project settings.
2.Create a New Sequence Preset: Now, go to File > New > Sequence. In the New Sequence window:
- Click on the Sequence Presets tab.
- Expand Digital SLR > 1080p in the left pane.
- Select a preferred frame rate (e.g., DSLR 1080p30).
- Under the Settings tab, adjust the Frame Size values to 640x640.
- In the Audio section, set the Sample Rate to 44100 Hz.
- Save this preset if you're planning to post to Instagram regularly by clicking Save Preset, entering a name, and clicking OK.

3.Apply the Preset: Select the sequence preset you just created (for example, named "Instagram") and click OK.

Note: Saving the sequence preset is optional. It's handy if you frequently post videos on Instagram and want to streamline the process.
Step 2: Import the Clip and Add It to the Timeline
Once your project is set, you can import the video file and prepare it for editing:
1.Import the Clip: Double-click inside the Project window in the bottom-left section of Premiere Pro to import your video clip.

2.Add to Timeline: Drag the imported video to the Timeline on the right side of the screen.
3.Clip Mismatch Warning: If you see a Clip Mismatch Warning pop-up, select Keep Existing Settings to preserve your current project settings.

Step 3: Add Marker and Set Timeline Work Area
Instagram Reels have a time limit, so you'll need to ensure that your video fits within that range:
1.Add Marker: In the Timeline pane, type 14:29 to set the marker to just under 15 seconds (since Instagram's maximum video length is 15 seconds).
2.Set Work Area: Drag the work area handle from the right toward the left until it snaps to the marker, ensuring that your video is the correct length.
3.Trim the Clip: Drag the clip handles toward the marker to trim excess footage and adjust the total duration to fit the marker.

Step 4: Configure Export Settings and Export
Now that your video is edited and ready for Instagram, you'll need to configure the export settings:
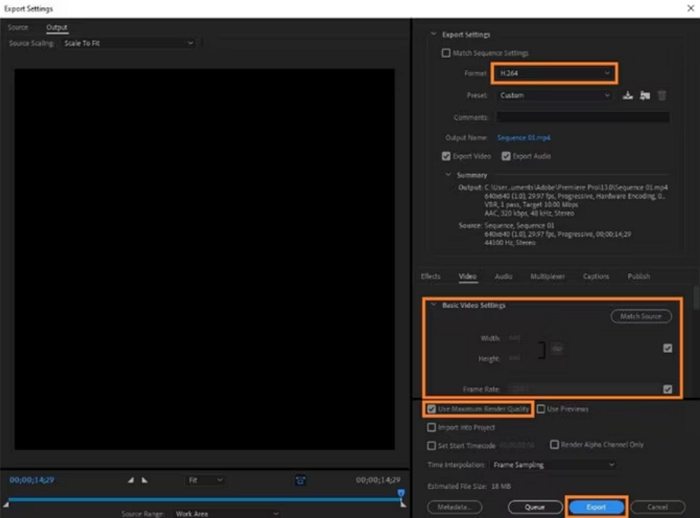
1.Open the Export Window: Go to File > Export > Media to bring up the Export Settings window.
2.Choose Export Format: From the Format drop-down list, select H.264, which is optimal for Instagram videos.
3.Set Dimensions: In the Basic Video Settings tab, ensure that the Width and Height values are both set to 640x640 for square videos (for vertical videos, it should be 1080x1920).
4.Render Settings: Check the Use Maximum Render Quality box to ensure the best quality for your video.
5.Export the Video: Click Export to finalize the rendering process and save the video, ready for uploading to Instagram Reels.

Following these steps to export premiere pro for instagram, you'll have a high-quality, Instagram-ready video that adheres to the platform's requirements and fits perfectly in the Reels format.
Part 3: Video Format Is Unrecognizable? Convert Videos to Instagram Format Easily
If Adobe Premiere Pro seems too complex or resource-intensive, HitPaw Univd (HitPaw Video Converter) provides an easier and faster way to convert your videos for Instagram Reels. This tool supports a wide range of formats and offers simple editing features for Instagram compatibility.
HitPaw Univd - All-in-one Video Solutions for Win & Mac
Secure Verified. 254,145 people have downloaded it.
- Convert 1,000+ videos to Instagram-compatible formats at high speeds
- Compress and resize videos for Instagram without quality loss
- Edit videos with cropping, trimming, watermarks, and effects
- Download videos from over 10,000 websites for easy sharing
- Supports batch processing for converting multiple files simultaneously
Secure Verified. 254,145 people have downloaded it.
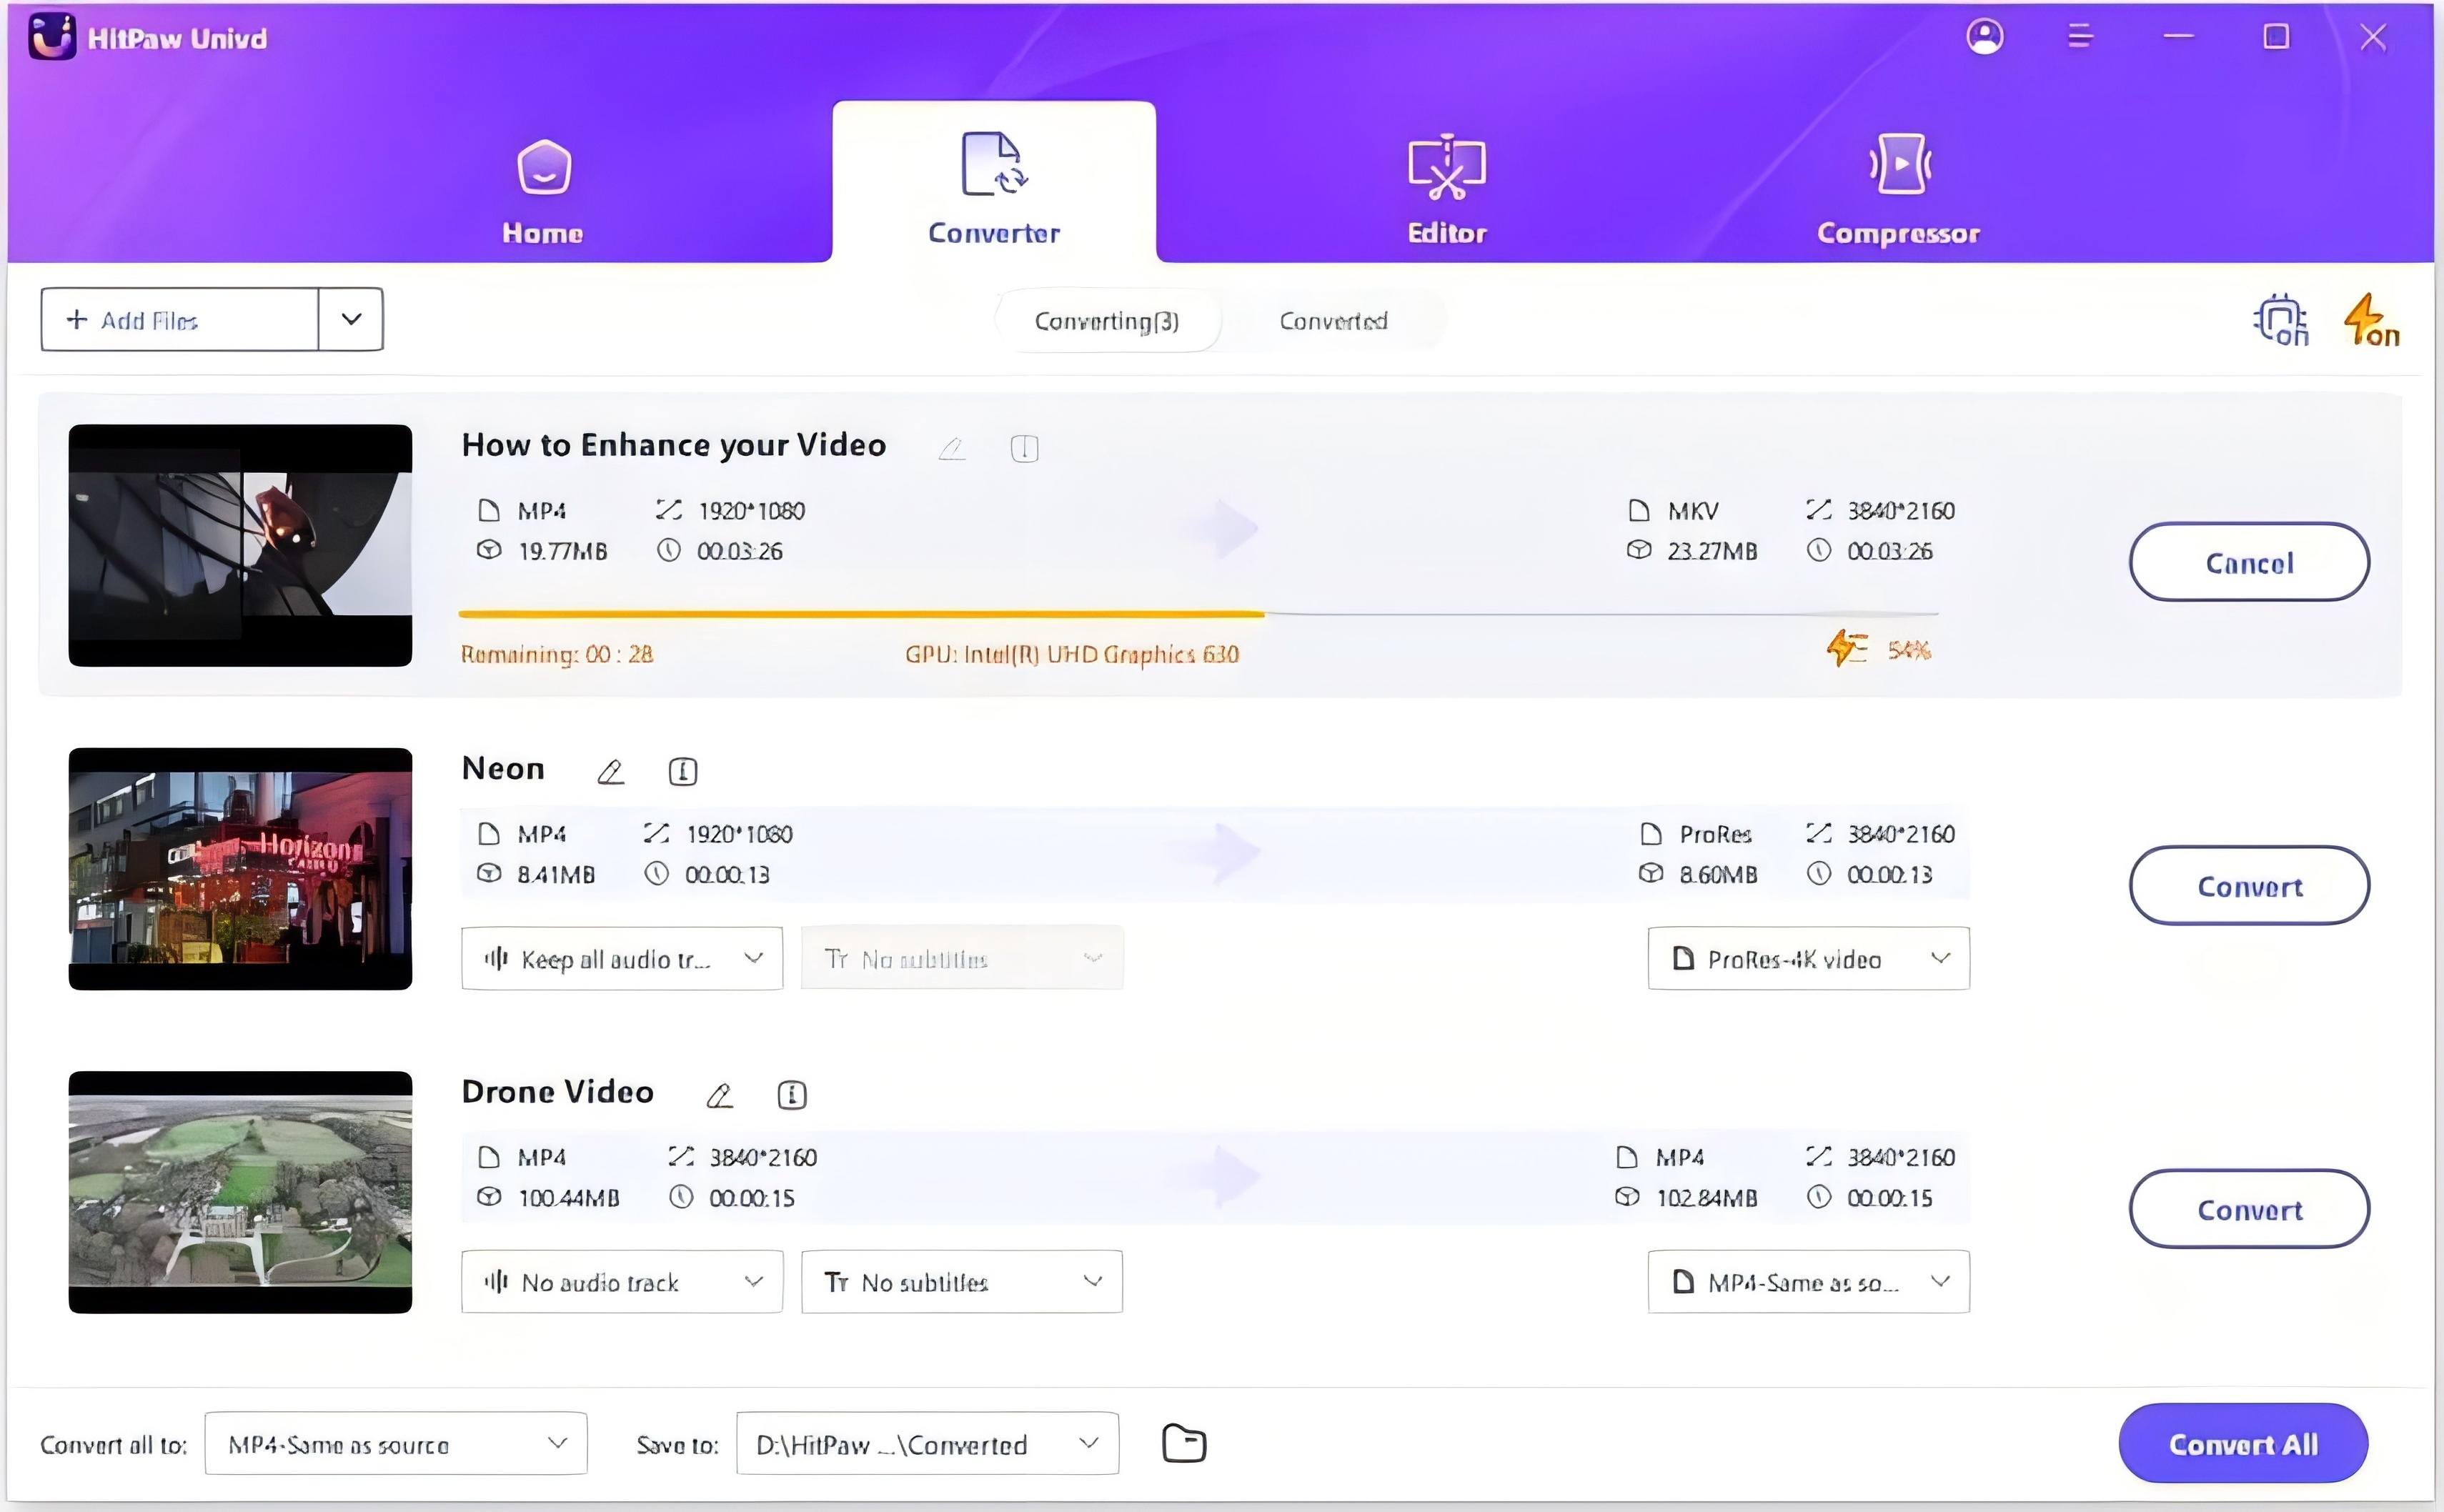
Step 1.Download and install HitPaw Univd. Run the software, Click Add Video to import files or drag and drop the video into the program.

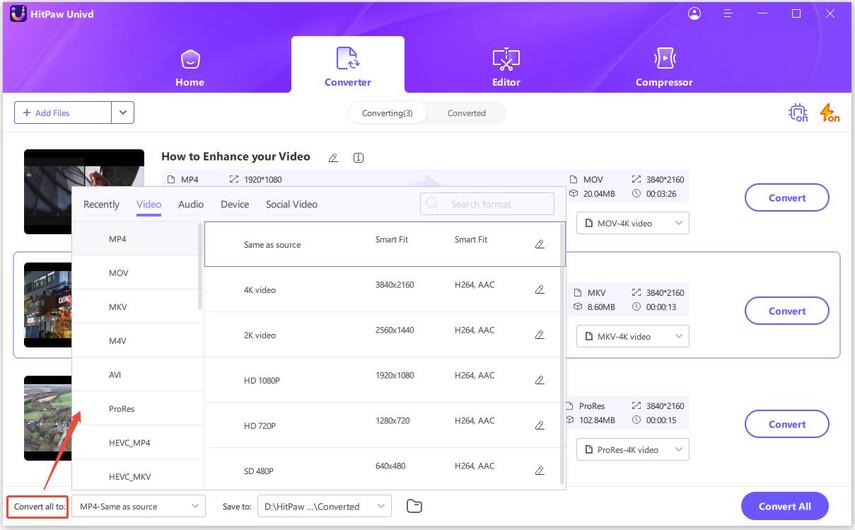
Step 2.Select Output Format: Choose an output format for each file or click Convert all to for batch conversion.

Step 3.Choose Destination Folder: Select the folder where you want to save the converted files, and click Convert All to starting converting.

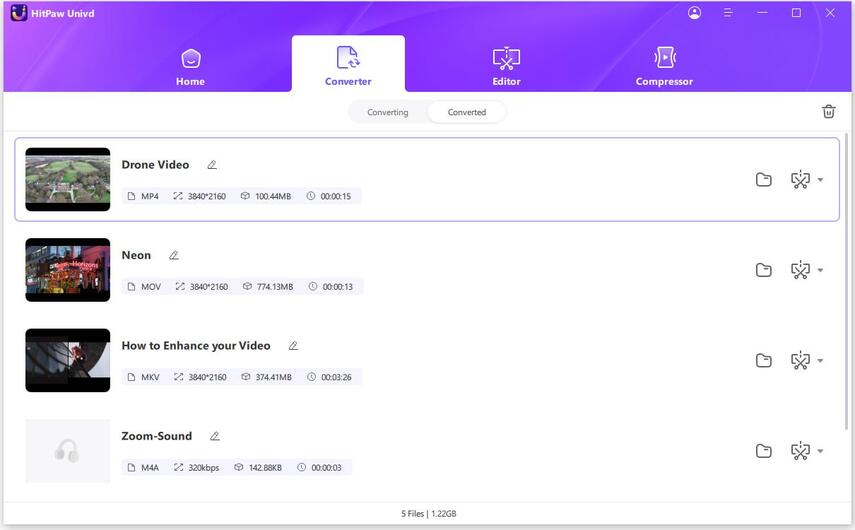
Step 4.After conversion, find your converted files in the Converted tab and upload them directly to Instagram.

FAQs on Videos to Reels in Adobe Premiere
Q1. Is Premiere Pro good for Reels?
A1. Yes, Premiere Pro provides professional editing tools and export settings tailored for high-quality Instagram Reels.
Q2. How do I change a video to a Reel in Premiere Pro?
A2. Follow the export steps outlined above, using the correct aspect ratio and resolution for Instagram Reels.
Q3. What format should Instagram Reels be in Premiere Pro?
A3. The preferred format is H.264, with a 1080x1920 resolution and 9:16 aspect ratio for vertical videos.
Conclusion
Creating eye-catching Reels for Instagram using Adobe Premiere Pro is a straightforward process when you know the right settings. For users who prefer a simpler solution, HitPaw Univd provides an excellent alternative for converting videos into Instagram-compatible formats quickly. Whether you're using professional software like Premiere Pro or opting for an easier tool like HitPaw, you can now produce high-quality videos ready to share on Instagram Reels.





 HitPaw Univd


Share this article:
Select the product rating:
Joshua Hill
Editor-in-Chief
I have been working as a freelancer for more than five years. It always impresses me when I find new things and the latest knowledge. I think life is boundless but I know no bounds.
View all ArticlesLeave a Comment
Create your review for HitPaw articles