How to Pixelate or Blur an Animated GIF: Ultimate Guide
Animated GIFs are a popular way to share short video clips and humorous moments online. However, you may sometimes want to edit an animated GIF to protect privacy or censor inappropriate content before sharing. Pixelating or blurring parts of a GIF is an easy way to do this while still preserving the original animation.
In this ultimate guide, we'll walk through several methods for pixelating and blurring animated GIFs on both desktop and mobile. Whether you use online tools, web apps, or desktop software, we'll explain the steps, options, and tips you need to successfully edit your animated GIFs. You'll learn the strengths and limitations of each blur GIF method you select as well.
Part 1. Why Need to Blur a GIF or Part of a GIF?
Animated GIFs have become hugely popular for sharing short video clips, memes, reactions, and humor on social media, messaging apps, blogs, and websites. Their small file size and endlessly looping animation make them very shareable across platforms. However, there are a few reasons why you may want to edit an animated GIF by blurring or pixelating part of it:
- To protect privacy if the GIF contains identifiable people, license plates, addresses, etc. Blurring faces or text preserves the animation without revealing identities.
- To censor nudity, violence, or other inappropriate content in a GIF before sharing publicly. A strategic blur avoids spreading offensive material.
- For parody or jokes, blurring part of a GIF can make the content sillier or more lighthearted. For example, blurred lips on someone talking.
- As an artistic or stylistic choice, using blur effects contrasts against sharp animation. This makes part of the GIF the visual focus.
Part 2. How to Blur GIF in Photoshop on Window and Mac
Do you want to create blurred GIF images on your Windows or Mac computer? Then you can think about using Adobe Photoshop as a software to do it.
- Step 1: Import GIF into Photoshop
- Step 2: Convert for Smart Filters
- Step 3: Apply Gaussian Blur
- Step 4: Create Layer Mask
- Step 5: Paint Layer Mask Black
- Step 6: Reveal Blur on Logos/Faces
- Step 7: Flatten Frames (Optional)
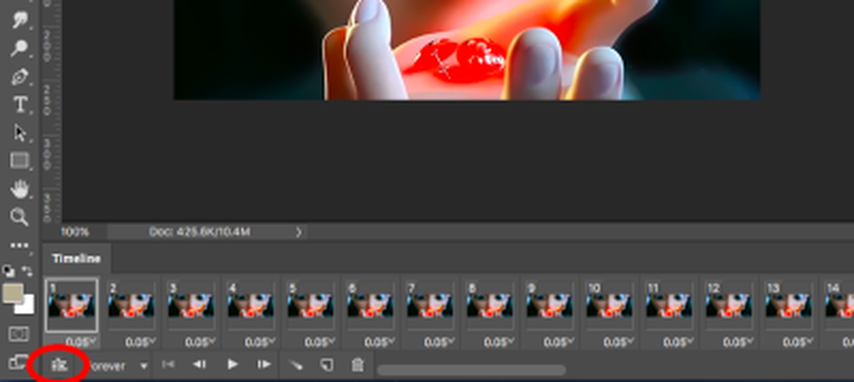
Open Photoshop and go to File > Import > Video Frames to Layers. Select your GIF file. This will open your GIF with each frame on its own layer.
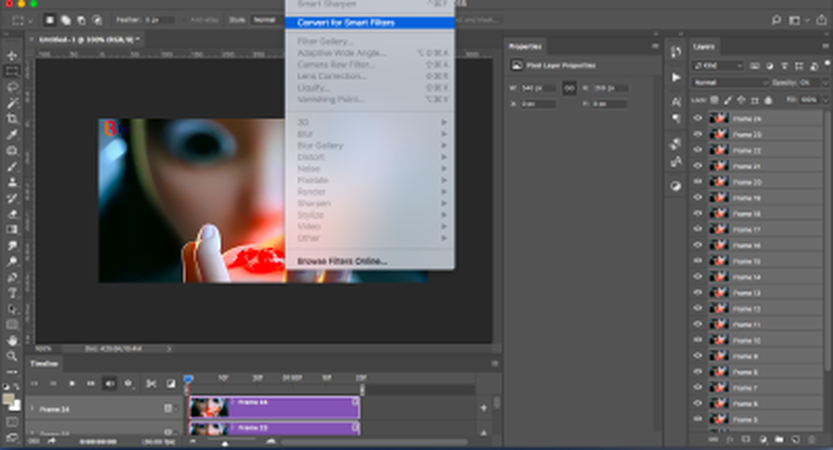
With all the GIF frames layers selected, go to Filter > Convert for Smart Filters. This allows you to apply filters to all frames at once.
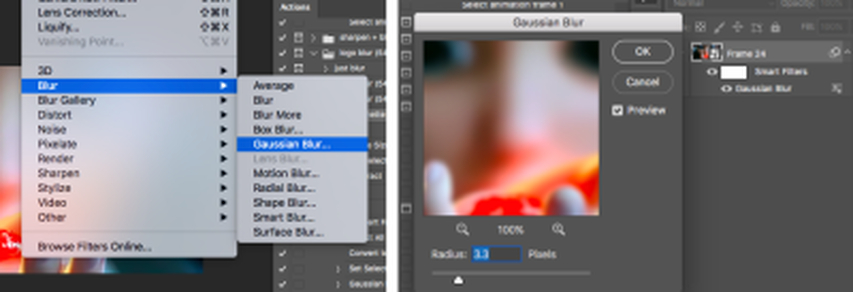
Go to Filter > Blur > Gaussian Blur. Adjust the radius slider to control how much blur is applied. Between 2-5 pixels is usually good. Click OK to apply the blur to all frames.
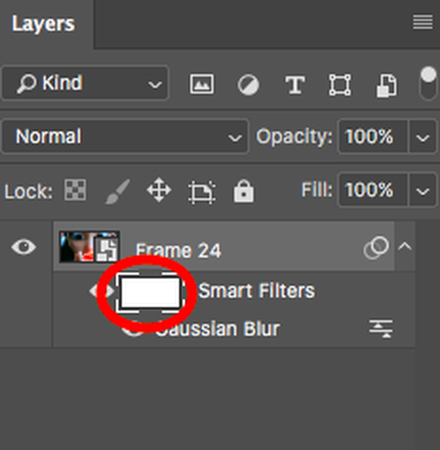
In the Layers panel, click the layer mask icon next to the "Smart Filters" layer to add a mask. The mask will be all white initially.
Set your foreground color to black. With a large soft brush at 0% hardness, paint over the entire layer mask. This hides the blur effect.
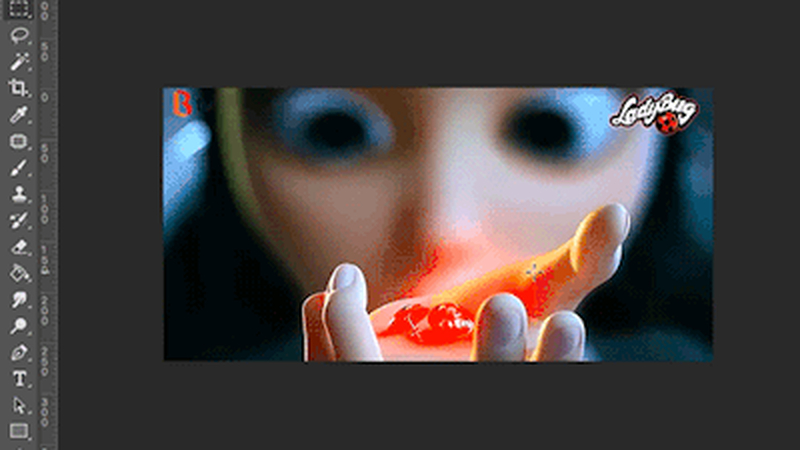
Set foreground color to white. With the same soft brush, paint over the parts of the GIF you want blurred such as logos, faces etc. on each frame. The blur will be revealed.
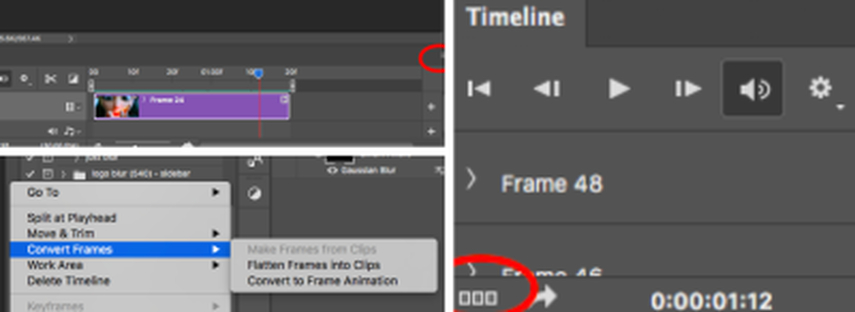
When done, flatten frames back into a clip by selecting Convert Frames option in timeline panel. Then convert back to Frame Animation. It can help you to make the blurred lines GIF perfect. Save final blurred GIF!
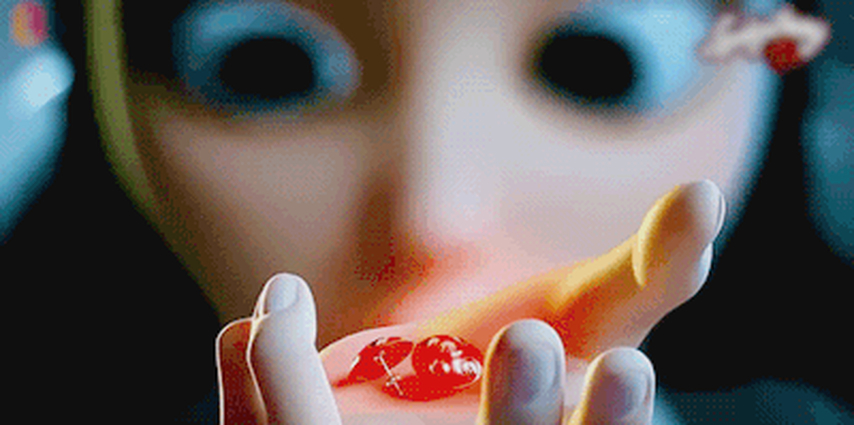
Part 3. How to Censor or Blur a GIF Online for Free
1 Make a Blurred GIF Using Kapwing
It is easy to use an online tool to blur a GIF file. If you are on the lookout for an online tool, Kapwing is a great option available to consider. Kapwing is a user-friendly, web-based tool that makes it simple to pixelate or blur specific parts of a GIF in just a few steps. Here's how you can do it with this blurred vision GIF tool.
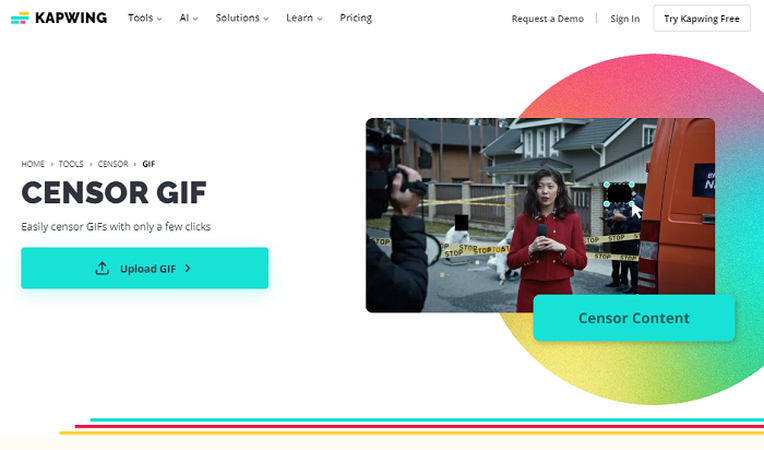
Step-by-Step Guide to Blurring a GIF with Kapwing
- 1. Upload Your GIF
Visit the Kapwing website and click on 'Start Editing'. You can upload your GIF directly from your device or paste a link if your GIF is hosted online. - 2. Apply the Blur or Pixelation Effect
Once your GIF is uploaded, use the editing toolbar to add a blur or pixelation effect. You can drag and position the effect over the parts of the GIF you want to censor. Adjust the intensity of the blur or pixelation to your preference using the slider tool. - 3. Export and Share
Once you're satisfied with the result, click on 'Export'. Kapwing will process your GIF, and you can download it or share it via social media or embed links.
Pros of Kapwing
- Free and available online
- User-friendly interface
- No frame by frame editing
- Customizable effects to blur a GIF
Cons of Kapwing
- Limited advanced editing
- Can take longer to process
2 Add Blurry Effect to a GIF Through Online GIF Tools
Another convenient way to add a blurry effect to your GIF is through Online GIF Tools, a free web-based platform that allows users to edit GIFs easily. Whether you need to blur sensitive content or highlight certain elements, Online GIF Tools provides an intuitive interface to apply a blur effect in a few simple steps, all without the need for a complicated software download. Let's walk through the process.
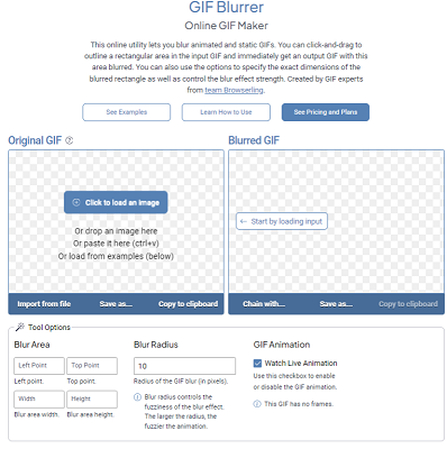
Step-by-Step Guide to Blurring a GIF with Online GIF Tools
- 1. Access the Online GIF Tools Blur Function
Go to Online GIF Tools - Blur GIF and click on 'Upload GIF' to start editing. Upload the GIF from your device or drag it and drop it into the editing box. - 2. Apply the Blurry Effect
Once the GIF is uploaded, you'll see options to adjust the blur strength using a slider. Drag the slider to increase or decrease the intensity of the blur. The blur effect will be applied across the entire GIF uniformly. - 3. Download the Blurred GIF
The tool will generate your blurred GIF, and you can download it directly to your device for immediate use.
Pros of Online GIF Tools
- Available completely for free
- No software installation needed
- Quick and simple
- You can blur GIF online as much as you want.
Cons of Online GIF Tools
- Customization options are limited
- Not possible to do partial blurring
Bonus: How to Blur Part of a Video on Windows and Mac Easily
If you're looking for an easy way to censor GIF on both Windows and Mac, HitPaw Univd (HitPaw Video Converter) offers a powerful and user-friendly solution. This tool allows you to blur faces or objects using AI technology, ensuring precision and efficiency. Whether you're editing a travel vlog, a security video, or a personal recording, HitPaw provides a streamlined approach to safeguarding privacy by obscuring sensitive details with minimal effort.
HitPaw Univd - All-in-one Video Solutions for Win & Mac
Secure Verified. 254,145 people have downloaded it.
- AI-powered face blur automatically detects, and tracks faces for accurate blurring.
- Customizable blur effects can adjust the degree, size, and shape of the blur to suit your needs.
- Efficient processing blurs faces in under 20 minutes, even in crowded videos.
- Privacy protection can blur specific areas of videos to safeguard personal information.
- No restrictions on the number of edits or exports, perfect for large projects.
Secure Verified. 254,145 people have downloaded it.
Steps on How to Blur Faces in Video with HitPaw
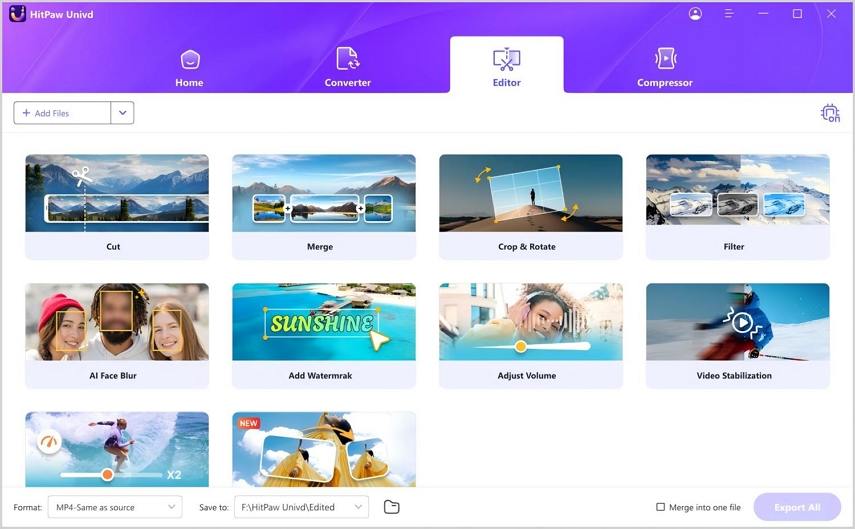
Step 1: Open AI Face Blur from Edit Tab
Launch HitPaw Univd, navigate to the Edit Tab, and select AI Face Blur to begin the process.
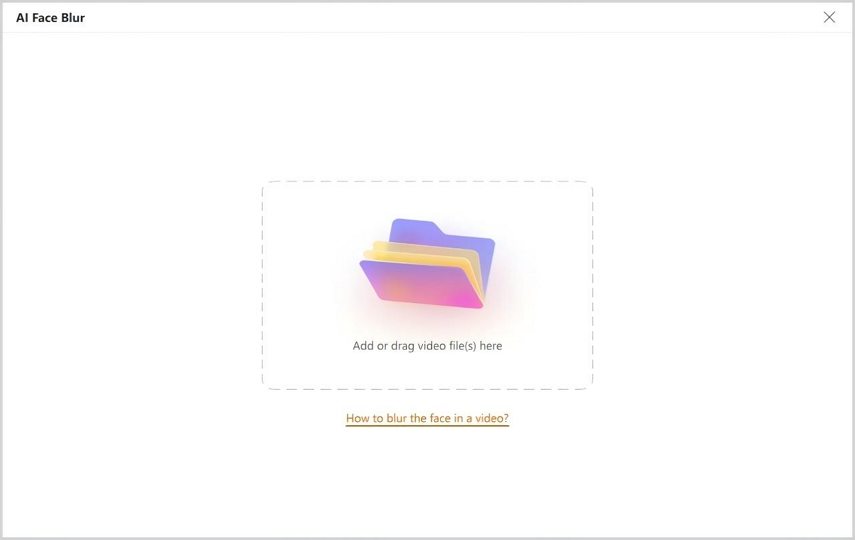
Step 2: Add Your Video Files Need to Apply Blur Effect
In the AI Face Blur interface, upload the video by either clicking 'Add File' or dragging the file directly into the workspace.
Step 3: Use AI Face Blur Feature
Once the video is imported, HitPaw will automatically analyze and detect faces. If there are multiple people in the video, the software will mark them with different numbers, allowing you to select which face to blur. Adjust the blur intensity from 0% to 100% and preview the changes in real-time.
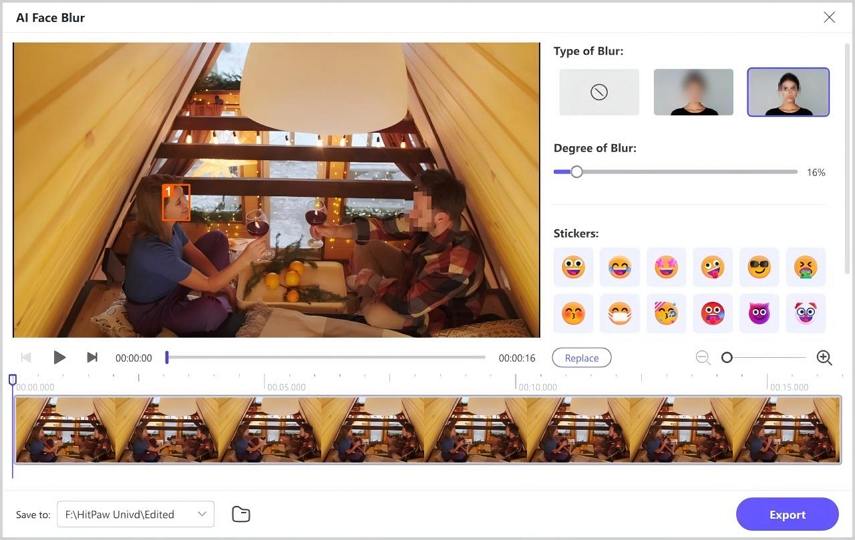
Step 4: Add a Sticker to Video
HitPaw also offers stickers to cover faces. Choose a sticker, and it will automatically appear over the selected face. If needed, you can remove the sticker by clicking it again.
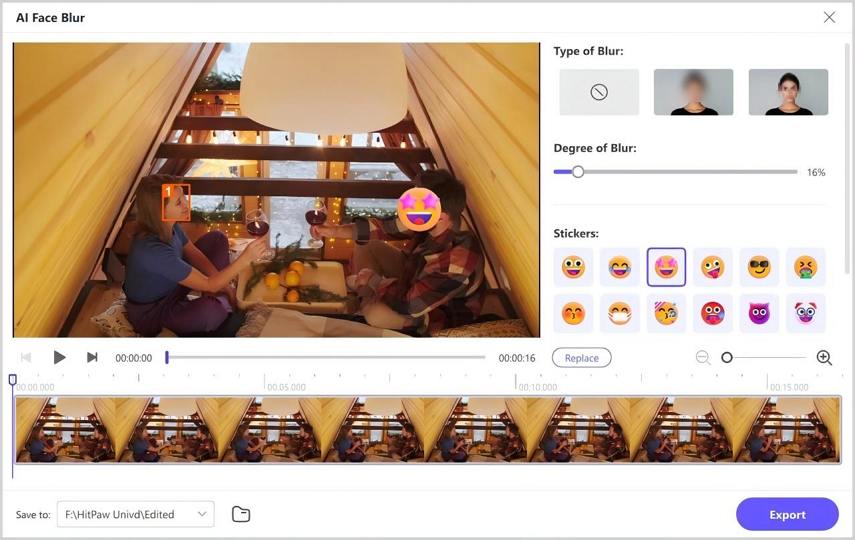
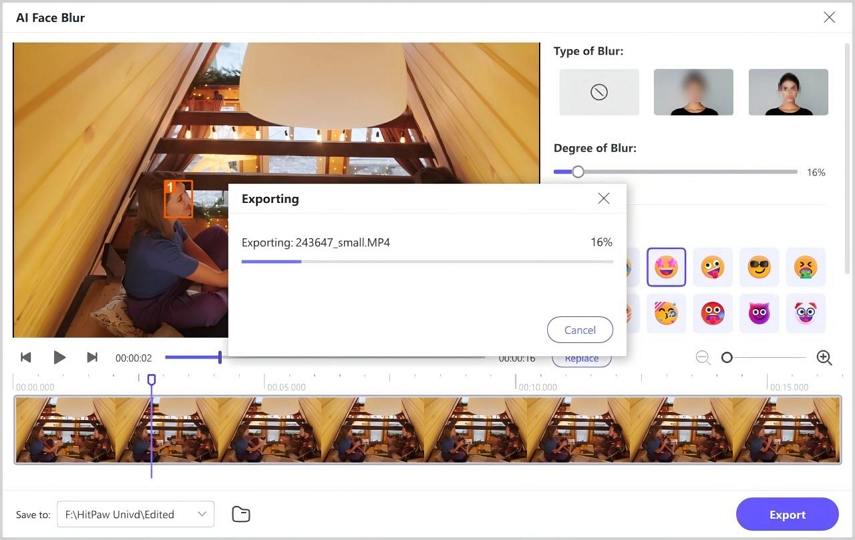
Step 5: Export Your Video with Blur Effect
Once you're happy with the blur effect or stickers, click Export to save the edited video with blurred faces.
Conclusion
Blurring faces or sensitive parts of a video has never been easier, thanks to HitPaw Univd. Its AI-powered face detection, customizable blur settings, and intuitive interface make it an excellent tool for protecting privacy or enhancing your videos. Whether you're editing travel vlogs, home videos, or professional recordings, HitPaw simplifies the process while delivering high-quality results. If you need a quick and efficient way to blur video content, try HitPaw Univd today and experience its powerful features firsthand!


 HitPaw Univd


Share this article:
Select the product rating:
Joshua Hill
Editor-in-Chief
I have been working as a freelancer for more than five years. It always impresses me when I find new things and the latest knowledge. I think life is boundless but I know no bounds.
View all ArticlesLeave a Comment
Create your review for HitPaw articles