Ultimate Guide to Making a DVD Photo Slideshow
A DVD photo slideshow is a great way to share and preserve your memories in a physical format. So, how to burn a photo slideshow DVD? This guide will introduce you to some powerful tools and provide detailed steps to help you create and burn a DVD photo slideshow effortlessly.
Part 1. How to Burn a DVD Photo Slideshow with 3 Powerful DVD Photo Slideshow Creators
1. How to Burn a Photo Slideshow DVD with PhotoStage Slideshow Producer
PhotoStage Slideshow Producer is a user-friendly tool designed for creating dynamic photo slideshows with music, effects, and transitions. It supports a variety of output formats, including DVD.
Applicable Platform: Windows/macOS
Burn a Photo Slideshow DVD with PhotoStage Slideshow Producer:
Step 1: Download and Install PhotoStage Slideshow ProducerVisit the official PhotoStage website and download the installer. Follow the on-screen instructions to install the software on your Windows.
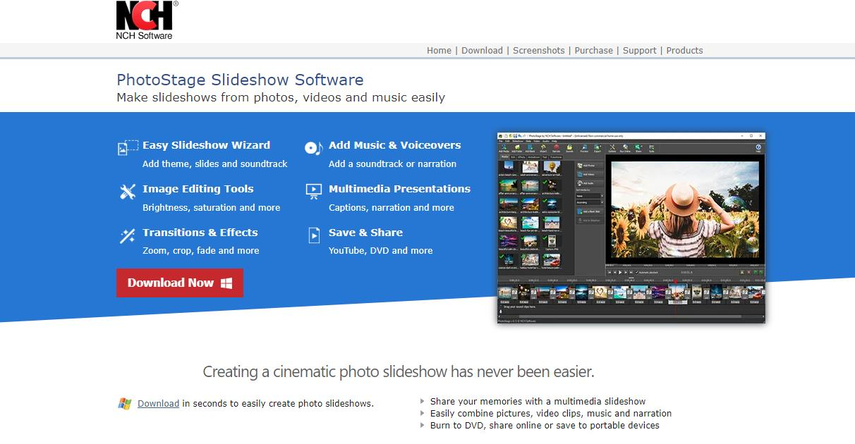
Step 2: Import Your Photos
Launch PhotoStage Slideshow Producer. Click the "Add Photos" button or directly drag your image file to import photos from your computer.
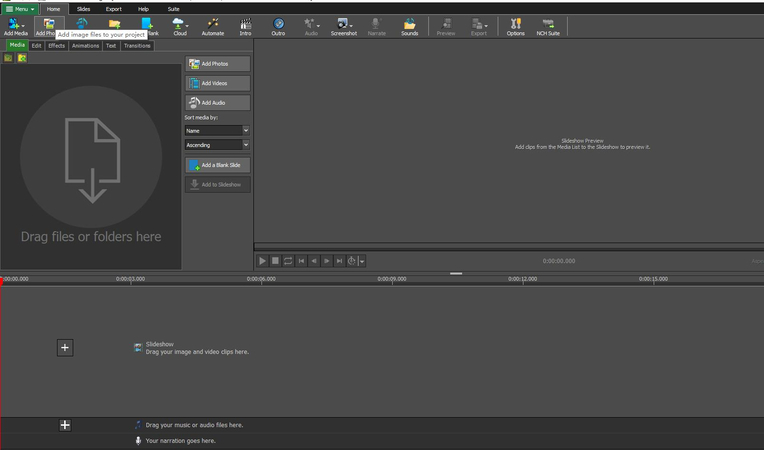
Step 3: Arrange Your Slideshow
Click "Add to Slideshow" to add your photos into the slideshow timeline. Rearrange the order of the photos as desired. Use the built-in editing tools to add transitions, effects, and background music.
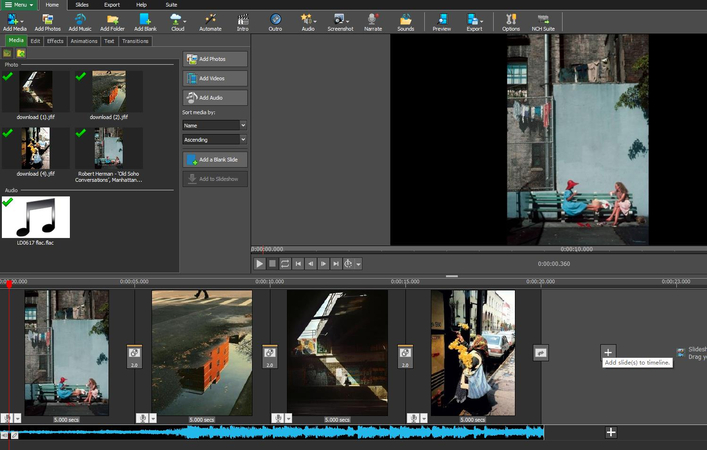
Step 4: Preview Your Slideshow
Click the "Preview" button to see how your slideshow looks and then make some necessary adjustments.
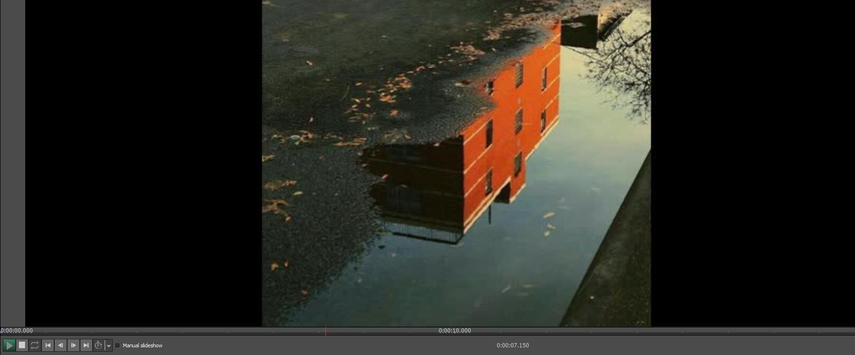
Step 5: Adjust the Settings
Once satisfied with your slideshow, click the "Export" button and select "DVD Movie Disc". Adjust settings such as disc name, aspect ratio, and video format on the "Video Outuotput Setup" page.
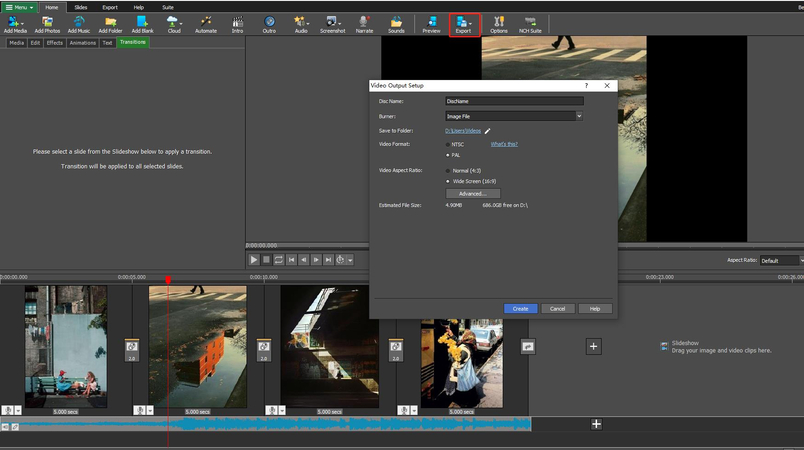
Step 6: Burn to DVD
After adjusting settings, click "Create" and choose the burner drive. Then click 'Create Image' to initiate the burning process. Once the process is complete, verify the created DVD file to ensure it has been output correctly and meets your quality standards.
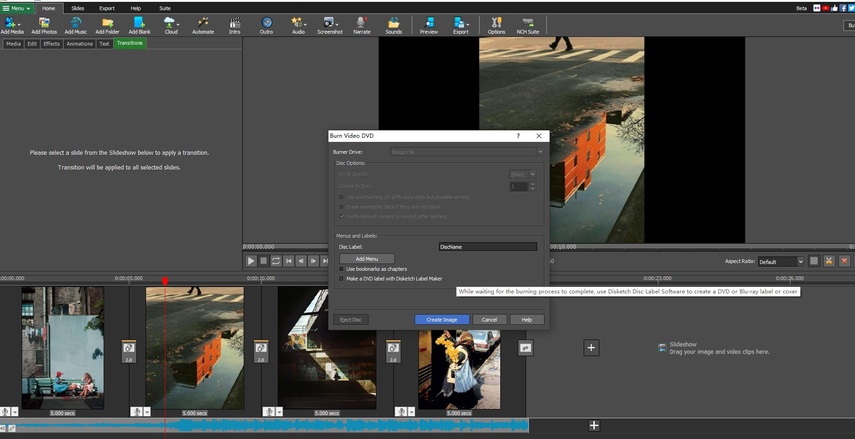
2. How to Burn a Photo Slideshow DVD with Freemake Video Converter
Freemake Video Converter is a versatile tool that supports various video formats and allows users to convert, edit, and burn videos to DVD. With its powerful features, Freemake Video Converter simplifies the process of creating professional-quality DVDs from your video files.
Applicable Platform: Windows
Burn a Photo Slideshow DVD with Freemake Video Converter:
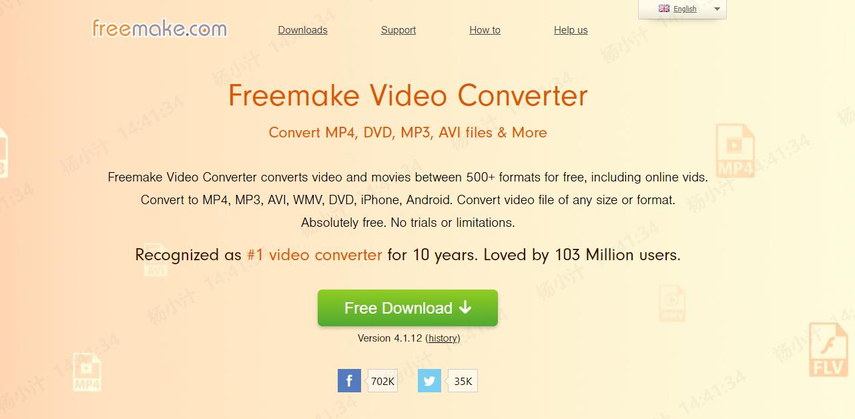
Step 1: Download and Install Freemake Video ConverterGo to the Freemake website and download the software. Install Freemake Video Converter by following the installation instructions.
Step 2: Add Your Photos
Open Freemake Video Converter. Click the "+Photo" button to add photos to your project.

Step 3: Add the Music
After adding the media files, click "No audio" button and choose "Add audio" to add the background music if it's needed.
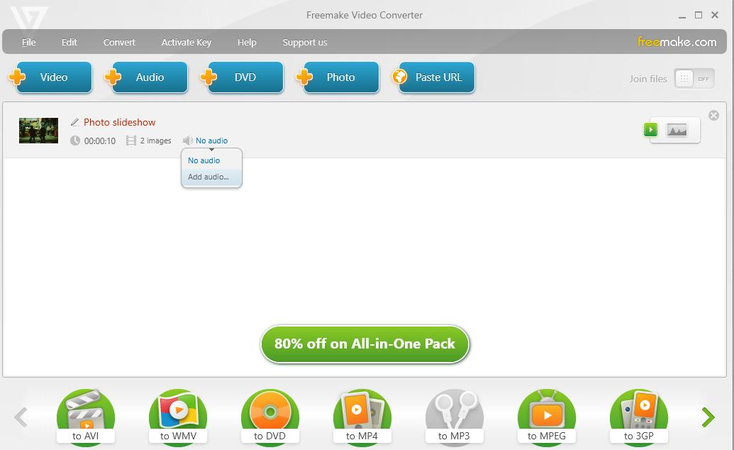
Step 4: Edit the Slideshow
Click the slideshow preview icon to preview the slideshow and fine-tune your slideshow to ensure it meets your expectations.
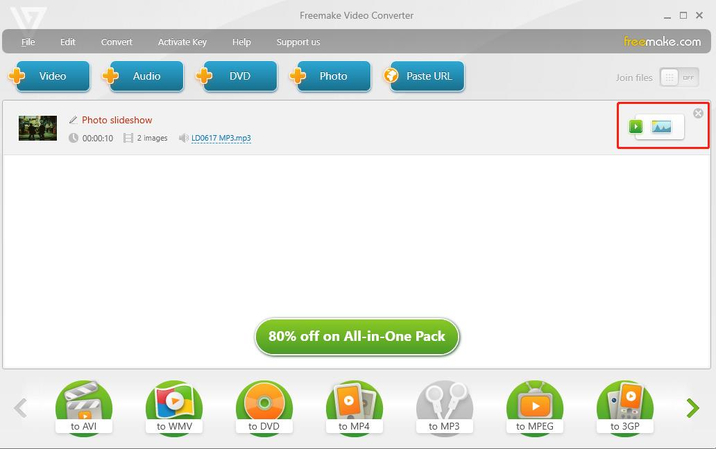
Step 5: Choose DVD Menu Type
Click the "to DVD" sign and select the DVD menu type you like.
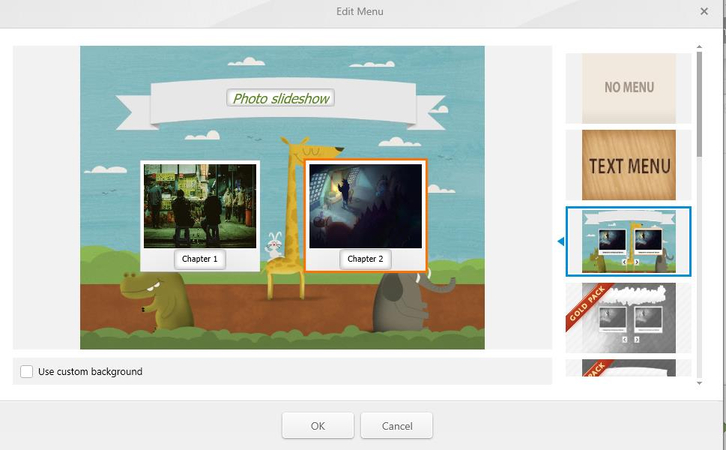
Step 6: Burn to DVD
Satrt burning your photo slideshow to DVD by clicking "Convert" and click "Open folder" to get the DVD file after the burning process is completed.
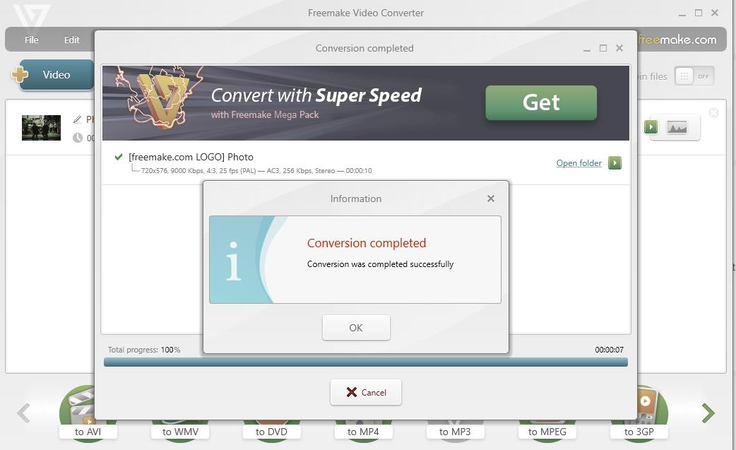
3. How to Burn a Photo Slideshow DVD with SmartSHOW 3D
SmartSHOW 3D is an advanced slideshow maker that allows you to create 3D photo slideshows with a variety of effects and transitions. It offers a range of output options, including DVD.
Applicable Platform: Windows
Burn a Photo Slideshow DVD with SmartSHOW 3D:
Step 1: Download and Install SmartSHOW 3DVisit the SmartSHOW 3D website and download the installer. Follow the installation instructions to set up the software on your computer.
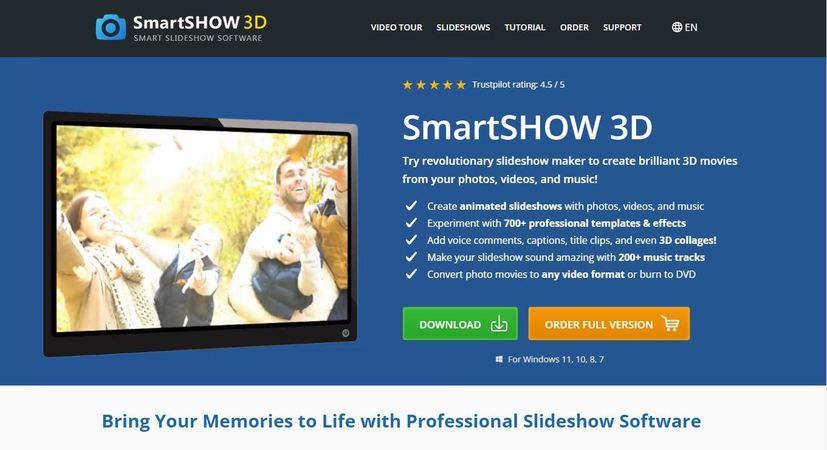
Step 2: Choose a Template
Launch SmartSHOW 3D. Click "SLIDESHOW IN 5 MINUTES" to choose your favorite slideshow template. import your photos. Add background music by clicking the "Add Music" button.
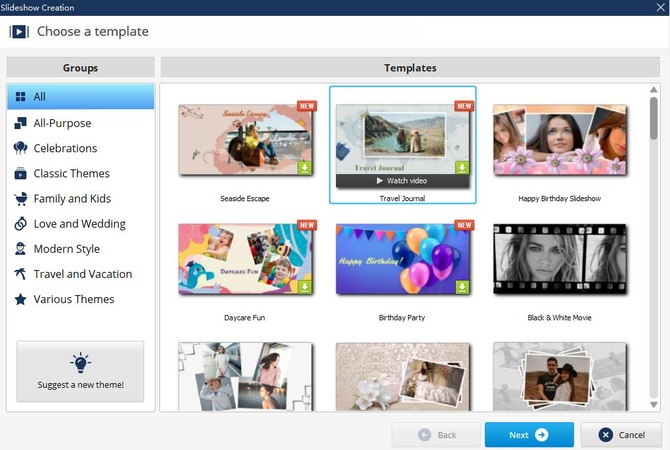
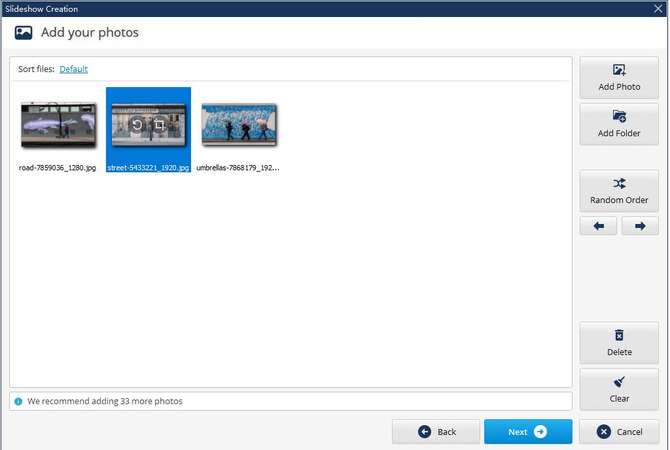
Step 3: Add Photos and Music
After choosing a template, click "Add Photo" and then "Add music from file" to import your photos to the slideshow and add thebackground music consecutively.
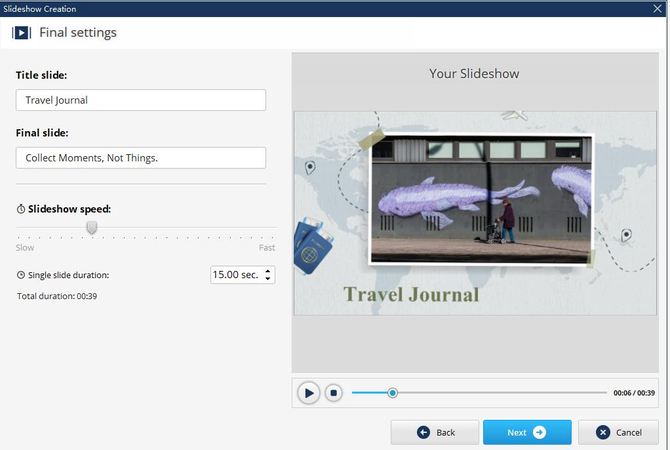
Step 4: Edit Your Slideshow
Enter the texts of title slide and final slide and adjust the slideshow speed.
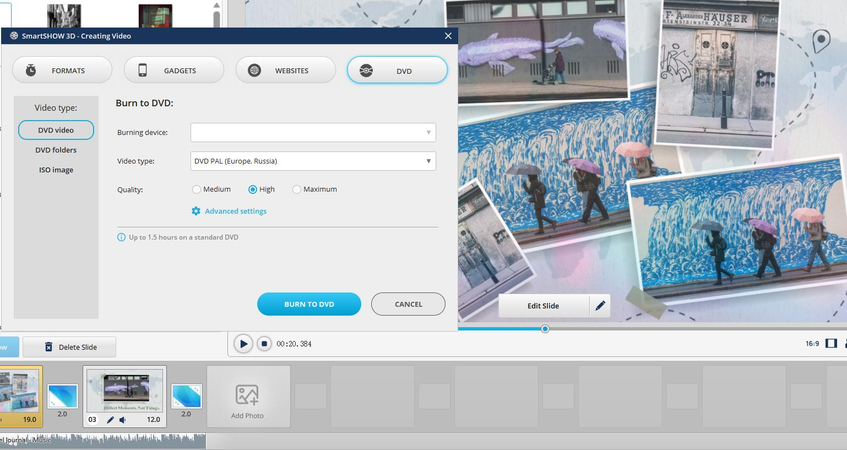
Step 5: Export and Burn to DVD
Preview your slideshow to ensure everything looks perfect. Click the "Create Video" button and select "Burn to DVD" to start the conversion.
Part 2. Best Tool to Burn Photo Slideshow Video to DVD with HitPaw Univd (HitPaw Video Converter)
Sometimes, you may already have a photo slideshow video, but you find that it takes a long time to burn it to a DVD. Well, HitPaw Univd can complete this activity very fast and in high quality. HitPaw Univd is a powerful and efficient tool designed to convert various media formats quickly and burn them to DVD with ease.
Applicable Platform: Windows/macOS
Features:
- Fast Conversion Speed: Utilizes advanced technology to ensure quick conversion.
- User-Friendly Interface: Easy to navigate, even for beginners.
- High-Quality Output: Ensures your slideshows retain their original quality.
Burn a Photo Slideshow to DVD with HitPaw Univd:
Step 1: Download and Install HitPaw Univd
Visit the HitPaw website and download the software. Follow the installation prompts to install it on your Windows.
Step 2: Find the DVD Burner Tool
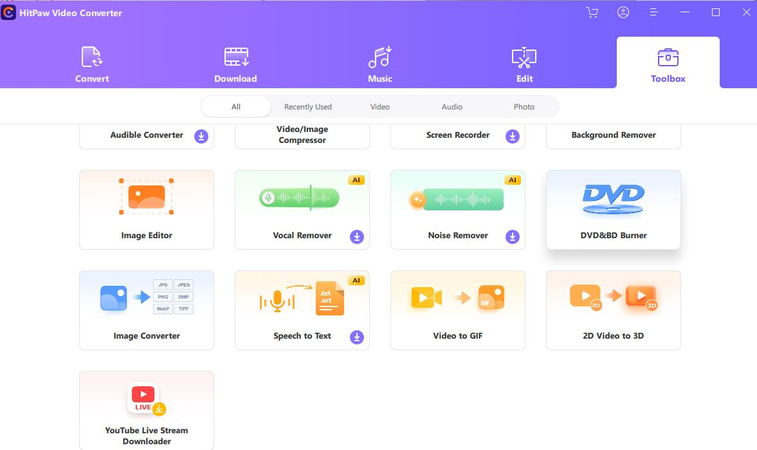
Launch the program and click "Toolbox" to find the "DVD&BD Burner".
Step 3: Add Your Photo Slideshow Video
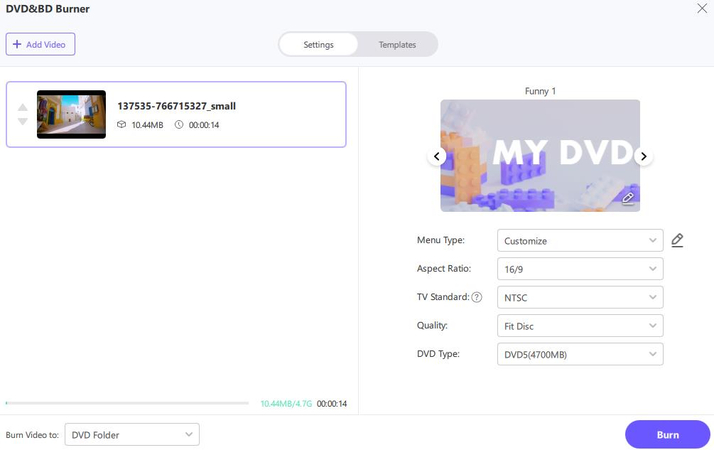
Click "DVD&BD Burner" and click on the “Add Video” button to import your photo slideshow video.
Step 4: Customize DVD Settings
Customize menu type, aspect ratio, tv standard, and other DVD settings.
Step 5: Start the Conversion
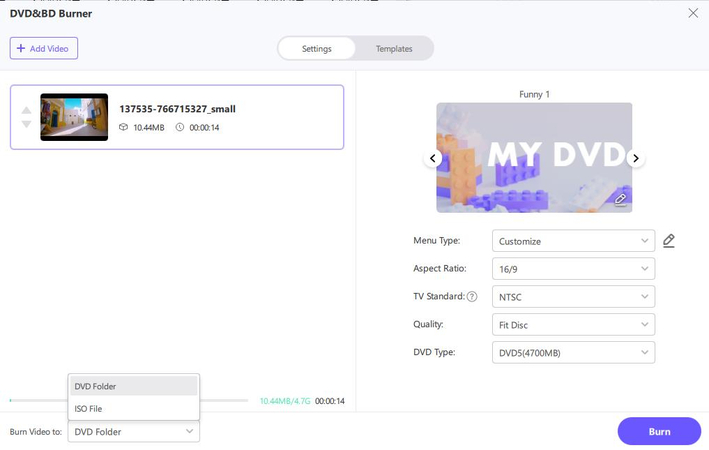
Click on the “Burn” button to start converting your photo slideshow video to DVD.
Step 6: Check the DVD File
Play the converted DVD on a computer with a DVD drive or a DVD player to ensure it functions after burning.
Part 3. FAQ of Photos Slideshow DVD
Q1. Can I put photos on DVD?
A1. Yes, you can create a photo slideshow and burn it to a DVD using various software tools like PhotoStage Slideshow Producer, Freemake Video Converter, and HitPaw Univd.
Q2. Why is my DVD not showing pictures?
A2. If your DVD is not showing pictures, it could be due to compatibility issues with the DVD player or improper burning. Ensure you used the correct format and settings during the burning process.
Conclusion
Creating a DVD photo slideshow on Windows is simple with the right tools. Follow the steps in this guide to preserve your memories on DVD effortlessly. If you already have a photo slideshows video, try HitPaw Univd to bring your memories to life.


 HitPaw Edimakor
 HitPaw VikPea (Video Enhancer)




Share this article:
Select the product rating:
Joshua Hill
Editor-in-Chief
I have been working as a freelancer for more than five years. It always impresses me when I find new things and the latest knowledge. I think life is boundless but I know no bounds.
View all ArticlesLeave a Comment
Create your review for HitPaw articles