How to Compress Audio in Adobe Audition with Detailed Steps
Audio compression is an essential skill for any audio editor, especially when working on projects that require clear, balanced sound without large file sizes. Adobe Audition, a professional audio editing software, is packed with powerful tools, including an audio compressor, to help you manage audio dynamics and reduce file sizes. In this guide, we'll show you how to use Adobe Audition to compress audio, discuss its pros and cons, and introduce an alternative solution for efficient and high-quality audio compression.
Part 1: Does Adobe Audition Have a Compressor?
Yes, Adobe Audition includes a robust compressor feature, which is integral for anyone looking to fine-tune audio levels, balance volume, and reduce file sizes. The Adobe Audition compressor offers multiple controls, such as threshold, ratio, release time, and attack time, enabling users to achieve the perfect sound quality for different types of audio. Moreover, Adobe Audition offers various compressor types, including the parallel compressor-a popular choice for softening audio, particularly for vocals, live sound, and percussion.
Part 2: How to Compress Audio in Adobe Audition?
If you're ready to learn how to compress audio in Adobe Audition, here is a step-by-step guide to get you started. Adobe Audition provides an array of compressor settings that allow you to customize your audio dynamics fully. Follow the steps below to compress your audio files effectively.
Step 1.Begin by downloading Adobe Audition from the official website if you haven't already. Install and launch the program, then proceed to the next steps.
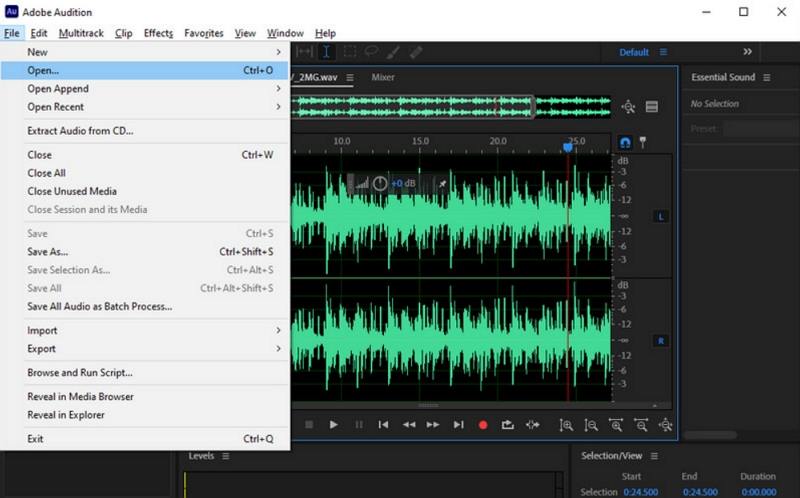
Step 2.Go to File > Open to import your audio track. Find the file you want to compress and add it to Adobe Audition. Once the file loads, you'll see the sound waves appear on the interface.

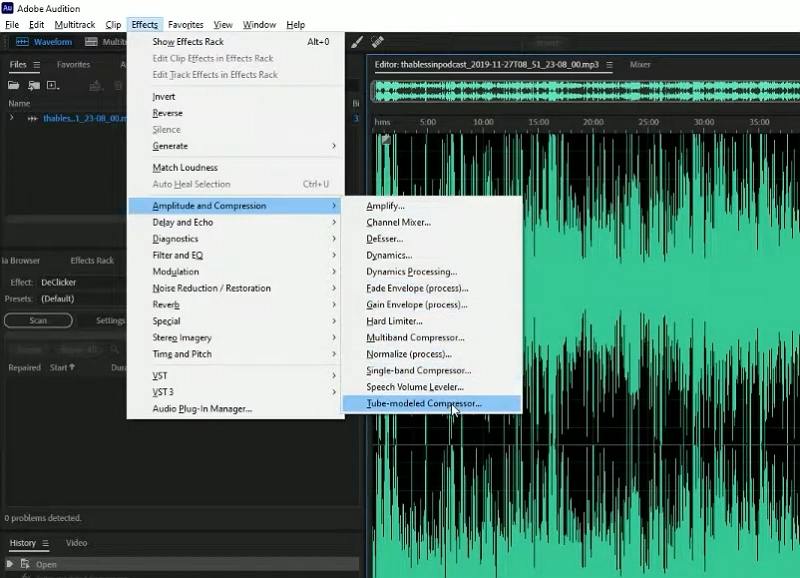
Step 3.To access the compression options, click Effects > Amplitude and Compression > Dynamics Processing. Here, you'll find various controls and types of compression you can apply to your audio.

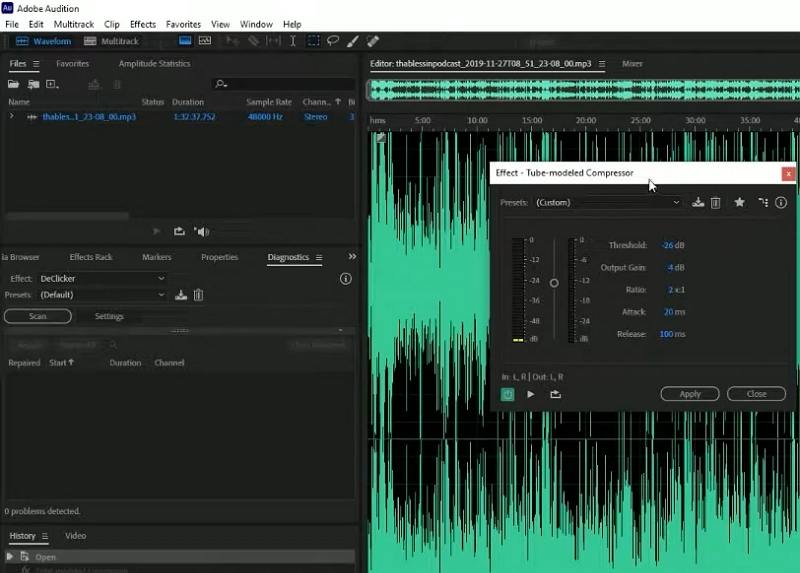
Step 4.Adjust the settings to control your compression:
- Threshold: The level at which compression begins.
- Ratio: Determines the intensity of compression.
- Attack Time: Controls how quickly the compressor responds to signals.
- Release Time: Sets the speed at which compression stops after the signal drops below the threshold.
Customize these options to fit your desired sound and dynamic range.

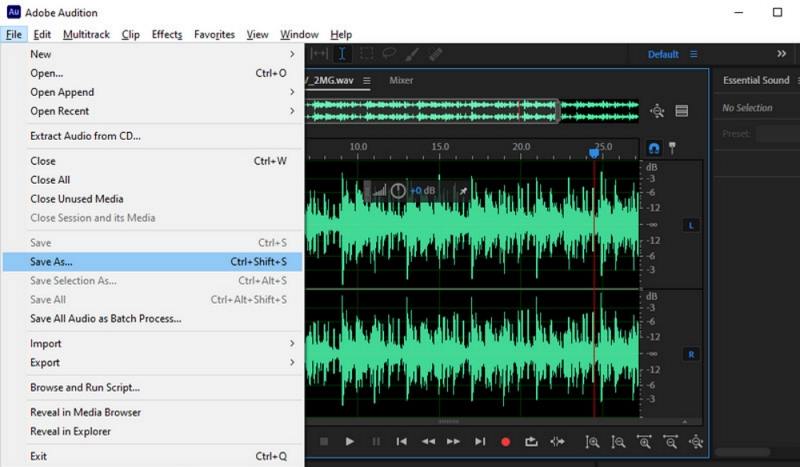
Step 5.Once you've configured your settings, apply them by clicking Apply. To save the compressed audio, go to File > Save As, choose a format, and adjust any additional settings as needed. Hit "Save" to export your compressed audio file.

Part 3: Pros and Cons of Adobe Audition Compressor
Using the Adobe Audition compressor has its strengths and weaknesses. Here's a breakdown of its pros and cons to help you decide if it's the right tool for your audio compression needs.
Pros
- High-quality compression: Delivers professional-grade sound with minimal loss.
- Customizable settings: Allows precise control over compression parameters.
- Multiple compressor types: Offers options like parallel compression for different audio needs.
- Batch processing: Adobe Audition supports batch processing, saving time on large projects.
Cons
- Complex interface: Adobe Audition's advanced options may be overwhelming for beginners.
- Subscription cost: Requires a subscription to Adobe Creative Cloud, making it pricier than standalone audio compressors.
- System requirements: Adobe Audition's features can be demanding on system resources.
Part 4: Best Alternative to Compress Audio with High Quality
For those who want a simpler alternative or need to compress various audio file types beyond Adobe Audition's capacity, HitPaw Univd (HitPaw Video Converter) is an excellent choice. It is a versatile, user-friendly software solution for audio and video compression. It supports a vast array of audio formats, allowing users to compress audio files, convert large audio files to MP3, and adjust parameters like bitrate and sample rate for optimal quality and file size. This tool provides easy-to-use settings for both beginners and professionals.
HitPaw Univd - All-in-one Video Solutions for Win & Mac
Secure Verified. 254,145 people have downloaded it.
- Compresses audio by adjusting bitrate, sample rate, and channels
- Converts large audio files to formats like MP3, WAV to reduce file sizes
- Batch processing for compressing multiple files simultaneously.
- Maintains high audio quality with efficient compression
- Compress audio file size with super fast speed and no quality loss
Secure Verified. 254,145 people have downloaded it.
How to Compress Audio Files with HitPaw Univd
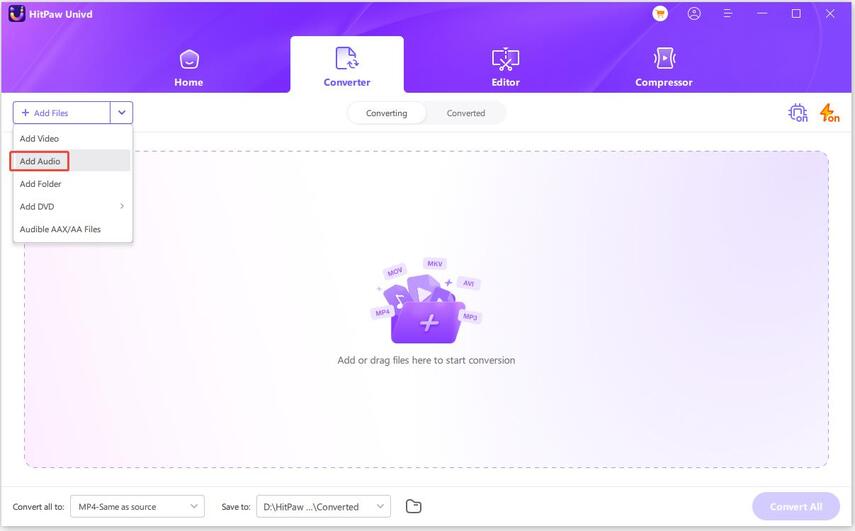
Step 1:Open HitPaw Univd, then click “Add Audio” in the main interface to import your audio files. You can also drag and drop files.

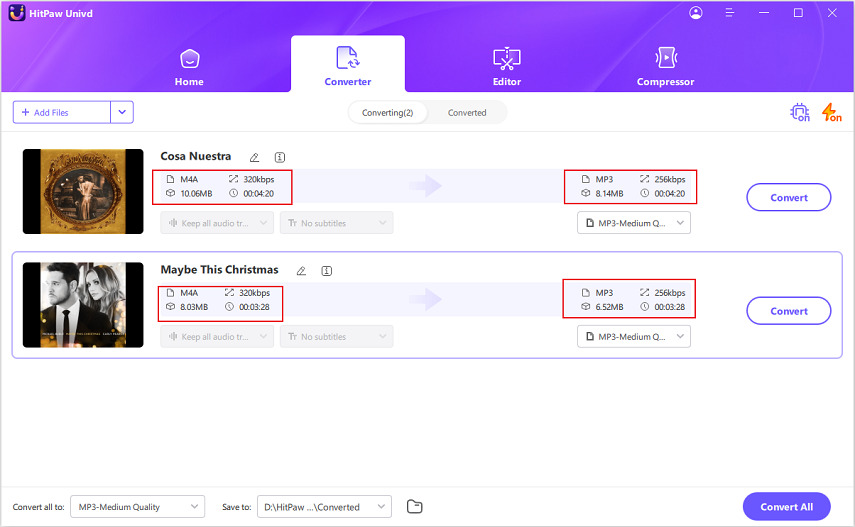
Step 2:Choose the output format by clicking on the inverted triangle beside each file or by selecting “Convert all to” in the lower-left corner.

Step 3:Click on the “edit” icon to open audio parameters. Adjust the bitrate here—lower values yield smaller file sizes.

Step 4:After configuring, click “Convert” or “Convert All” to start compressing the audio files.

Step 5:Go to the “Converted” tab and click “Open Folder” to locate your files.

Conclusion
Compressing audio with Adobe Audition allows for fine-tuned control over sound quality and file size, thanks to its professional-grade compressor and customizable settings. However, for users seeking a simpler and cost-effective alternative, HitPaw Univd offers an excellent solution that balances quality and efficiency. Whether you choose Adobe Audition or an alternative like HitPaw, these tools empower you to create high-quality audio that meets your project's needs.






 HitPaw Univd


Share this article:
Select the product rating:
Joshua Hill
Editor-in-Chief
I have been working as a freelancer for more than five years. It always impresses me when I find new things and the latest knowledge. I think life is boundless but I know no bounds.
View all ArticlesLeave a Comment
Create your review for HitPaw articles